1. Overview
1.概述
In this short tutorial, we’ll show how to test GraphQL endpoints using Postman.
在这个简短的教程中,我们将展示如何使用Postman测试GraphQL端点。
2. Schema Overview and Methods
2.模式概述和方法
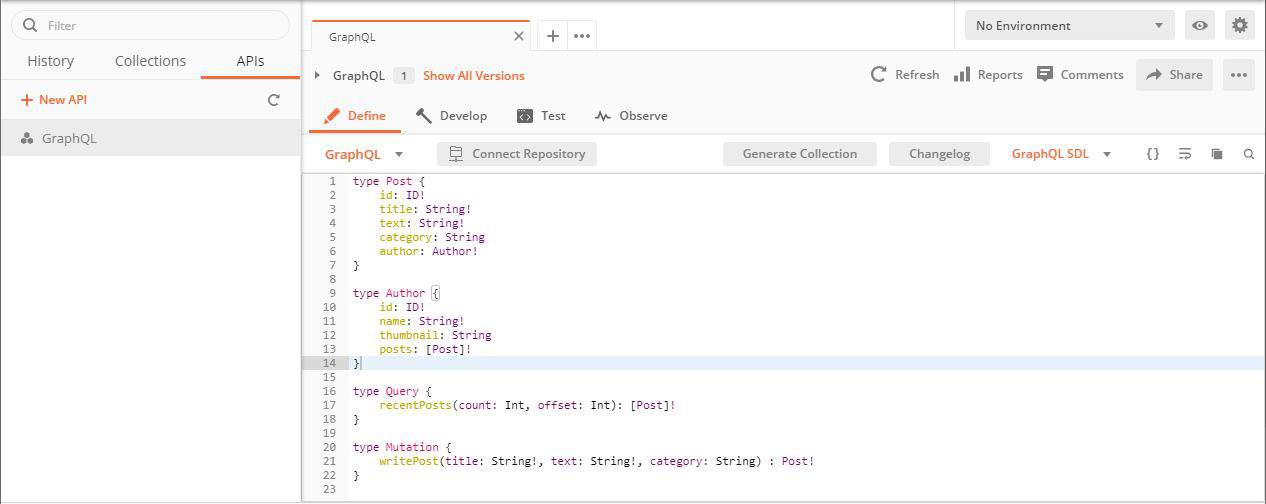
We’ll use the endpoints created in our GraphQL tutorial. As a reminder, the schema contains definitions describing posts and authors:
我们将使用在GraphQL教程中创建的端点。作为提醒,该模式包含描述帖子和作者的定义。
type Post {
    id: ID!
    title: String!
    text: String!
    category: String
    author: Author!
}

type Author {
    id: ID!
    name: String!
    thumbnail: String
    posts: [Post]!
}
Plus, we’ve got methods for displaying posts and writing new ones:
此外,我们还有显示帖子和写新帖子的方法。
type Query {
    recentPosts(count: Int, offset: Int): [Post]!
}

type Mutation {
    createPost(title: String!, text: String!, category: String) : Post!
}
When using a mutation to save data, the required fields are marked with an exclamation mark. Also note that in our Mutation, the returned type is Post, but in Query, we’ll get a list of Post objects.
当使用突变来保存数据时,必须的字段会用感叹号标记。还要注意的是,在我们的Mutation中,返回的类型是Post,但是在Query中,我们将得到一个Post对象的列表。
The above schema can be loaded in the Postman API section — just add New API with GraphQL type and press Generate Collection:
上述模式可以在Postman API部分加载–只需添加新API,带有GraphQL类型,并按生成集合。
Once we load our schema, we can easily write sample queries using Postman’s autocomplete support for GraphQL.
一旦我们加载了我们的模式,我们就可以使用Postman对GraphQL的自动完成支持,轻松地编写样本查询。
3. GraphQL Requests in Postman
3.Postman中的GraphQL请求
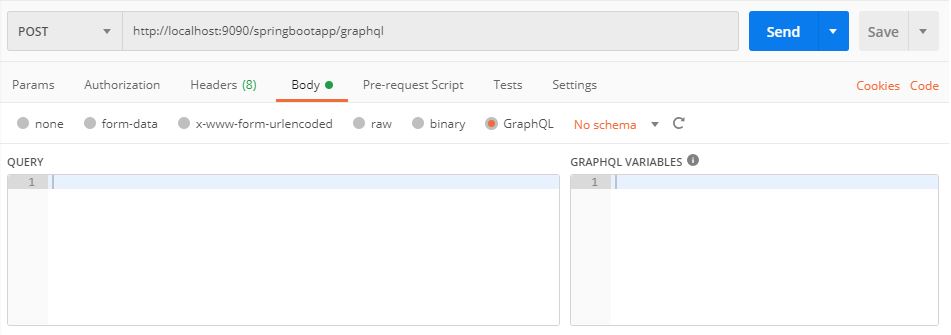
First of all, Postman allows us to send the body in GraphQL format — we just choose the GraphQL option below:
首先,Postman允许我们以GraphQL格式发送正文 – 我们只需选择下面的GraphQL选项。
Then, we can write a native GraphQL query, like one that gets us the title, category, and author name into the QUERY section:
然后,我们可以写一个原生的GraphQL查询,比如让我们把title、category和作者name放入QUERY部分。
query {
    recentPosts(count: 1, offset: 0) {
        title
        category
        author {
            name
        }
    }
}
And, as a result, we’ll get:
而且,结果是我们会得到。
{
    "data": {
        "recentPosts": [
            {
                "title": "Post",
                "category": "test",
                "author": {
                    "name": "Author 0"
                }
            }
        ]
    }
}
It’s also possible to send a request using the raw format, but we have to add Content-Type: application/graphql to the headers section. And, in this case, the body looks the same.
也可以使用原始格式发送请求,但我们必须在头文件部分添加Content-Type: application/graphql。而且,在这种情况下,正文看起来是一样的。
For example, we can update title, text, category, get an id and title as a response:
例如,我们可以更新title, text, category, 得到一个id和title作为响应。
mutation {
    createPost (
        title: "Post",
        text: "test",
        category: "test",
    ) {
        id
        title
    }
}
The type of operation – like query and mutation – can be omitted from the query body as long as we use a shorthand syntax. In this case, we can’t use the operation’s name and variables, but it’s recommended to use the operation name for easier logging and debugging.
操作的类型–像query和mutation–可以从查询主体中省略,只要我们使用速记的语法。在这种情况下,我们不能使用操作的名称和变量,但建议使用操作名称,以方便记录和调试。
4. Using Variables
4.使用变量
In the variables section, we can create a schema in JSON format that will assign values to the variables. This avoids typing arguments in a query string:
在变量部分,我们可以创建一个JSON格式的模式,为变量赋值。这就避免了在查询字符串中输入参数。
So, we can modify the recentPosts body in the QUERY section to dynamically assign values from variables:
因此,我们可以修改QUERY部分的recentPostsbody,以动态地从变量中赋值。
query recentPosts ($count: Int, $offset: Int) {
    recentPosts (count: $count, offset: $offset) {
        id
        title
        text
        category
    }
}
And we can edit the GRAPHQL VARIABLES section with what we’d like our variables to be set to:
我们可以在GRAPHQL VARIABLES部分编辑我们想设置的变量。
{
  "count": 1,
  "offset": 0
}
5. Summary
5.摘要
We can easily test GraphQL using Postman, which also allows us to import the schema and generate queries.
我们可以使用Postman轻松地测试GraphQL,它还允许我们导入模式并生成查询。
A collection of requests can be found on GitHub.
可以在GitHub上找到请求集合。


