1. Overview
1.概述
In this quick tutorial, we’ll build upon getting started with forms in Spring MVC and add one more button to the JSP form, mapping to the same URI.
在这个快速教程中,我们将在在Spring MVC中开始使用表单的基础上,在JSP表单中再添加一个按钮,映射到同一个URI。
2. A Short Recap
2.简要回顾
Earlier, we created a small web application to enter the details of an employee and save them in memory.
早些时候,我们创建了一个小的网络应用程序来输入雇员的详细信息并将其保存在内存中。
First, we wrote a model Employee to bind the entity, then an EmployeeController to handle the flow and mappings, and lastly, a view named employeeHome that describes the form for the user to key-in input values.
首先,我们写了一个模型Employee来绑定实体,然后是一个EmployeeController来处理流程和映射。最后是一个名为employeeHome的视图,描述用户输入值的表单。
This form had a single button Submit, that mapped to the controller’s RequestMapping called addEmployee to add the user entered details to the in-memory database using the model.
这个表单有一个单一的按钮Submit,它映射到控制器的RequestMapping,称为addEmployee,使用模型将用户输入的细节添加到内存数据库中。
In the next few sections, we’ll see how to add another button, Cancel, to the same form with the same RequestMapping path in the controller.
在接下来的几节中,我们将看到如何在同一个表单中添加另一个按钮,Cancel,,控制器中使用相同的RequestMapping路径。
3. The Form
3.表格
First, let’s add a new button to the form employeeHome.jsp:
首先,让我们在表单employeeHome.jsp中添加一个新按钮。
<%@ taglib prefix="form" uri="http://www.springframework.org/tags/form"%>
...
<body>
    <h3>Welcome, Enter The Employee Details</h3>
    <h4>${message}</h4>
    <form:form method="POST" action="${pageContext.request.contextPath}/addEmployee"
      modelAttribute="employee">
        <table>
            ...
            <tr>
                <td><input type="submit" name="submit" value="Submit" /></td>
                <td><input type="submit" name="cancel" value="Cancel" /></td>
            </tr>
...
As we can see, we added an attribute name to the existing Submit button and added another Cancel button with the name set to cancel.
正如我们所看到的,我们给现有的Submit按钮添加了一个属性name,并添加了另一个Cancel按钮,其name设置为cancel。
We also added a model attribute message towards the top of the page, which will be displayed if and when Cancel is clicked.
我们还在页面顶部添加了一个模型属性message,如果点击Cancel,它将被显示出来。
4. The Controller
4.控制器
Next, let’s modify the controller to add a new attribute param to the RequestMapping to distinguish between the two button clicks:
接下来,让我们修改controller,在RequestMapping中添加一个新的属性param,以区分两个按钮的点击。
@RequestMapping(value = "/addEmployee", method = RequestMethod.POST, params = "submit")
public String submit(@Valid @ModelAttribute("employee") final Employee employee,
  final BindingResult result, final ModelMap model) {
        // same code as before
}
@RequestMapping(value = "/addEmployee", method = RequestMethod.POST, params = "cancel")
public String cancel(@Valid @ModelAttribute("employee") final Employee employee,
  final BindingResult result, final ModelMap model) {
    model.addAttribute("message", "You clicked cancel, please re-enter employee details:");
    return "employeeHome";
}
Here, we added a new parameter params to the existing method submit. Notably, its value is the same as the name specified in the form.
在这里,我们为现有的submit方法添加了一个新的参数params。值得注意的是,它的值与表单中指定的name相同。
Then we added another method cancel with a similar signature, the only difference being the parameter params specified as cancel. As before, this is the exact same value as the name of the button Cancel in the JSP form.
然后我们添加了另一个具有类似签名的方法cancel,唯一不同的是将参数params指定为cancel。和以前一样,这和JSP表单中的按钮Cancel的name值完全一样。
5. Testing
5.测试
To test, we’ll deploy the project on a web container such as Tomcat.
为了测试,我们将在Tomcat这样的网络容器上部署该项目。
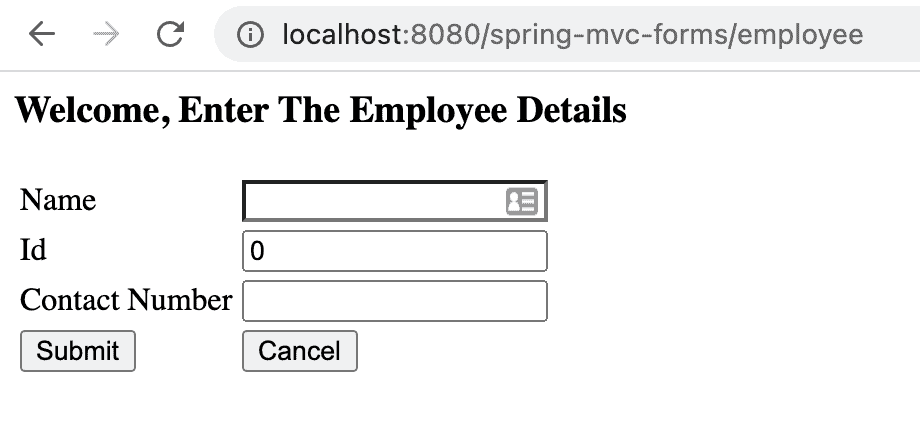
On hitting the URL http://localhost:8080/spring-mvc-forms/employee, we’ll be presented with:
在点击URL时http://localhost:8080/spring-mvc-forms/employee,我们会看到。
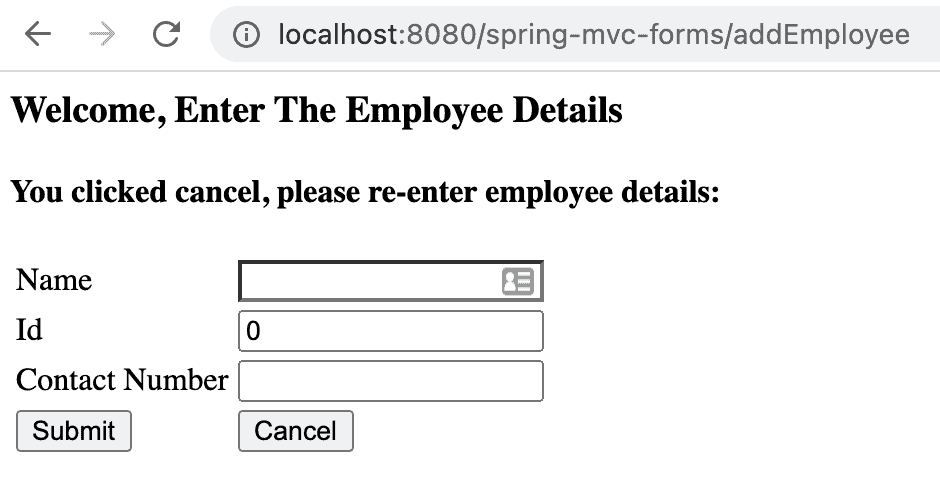
After hitting Cancel, we’ll see:
在点击Cancel之后,我们将看到。
Here, we see the message we’d coded in the controller’s method cancel.
这里,我们看到我们在控制器的方法cancel中编码的信息。
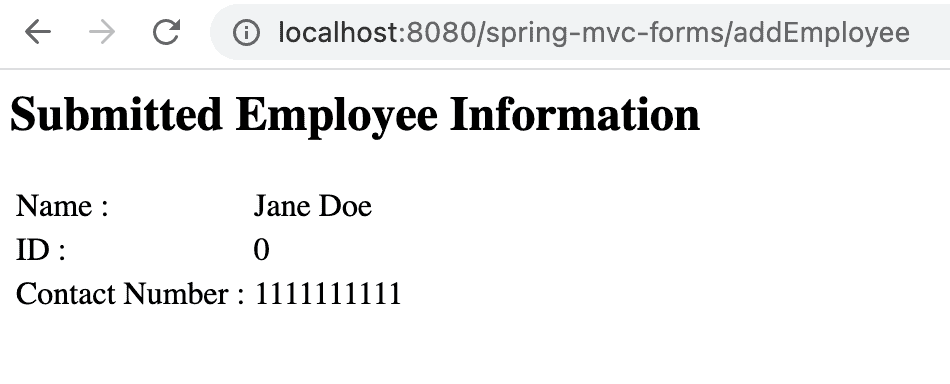
On clicking Submit, we see the keyed-in employee information as before:
在点击Submit时,我们看到键入的员工信息如前。
6. Conclusion
6.结语
In this tutorial, we learned how to add another button to the same form in a Spring MVC application that maps to the same RequestMapping on the controller.
在本教程中,我们学习了如何在Spring MVC应用程序的同一个表单中添加另一个按钮,该按钮映射到控制器上的同一个RequestMapping。
We can add more buttons if required using the same technique as demonstrated in the code snippets.
如果需要,我们可以使用代码片段中演示的相同技术添加更多的按钮。
As always, the source code is available over on GitHub.
像往常一样,源代码可在GitHub上获得。


