1. Overview
1.概述
In this tutorial, we’ll understand how to host a Maven repository on GitHub with sources using the site-maven plugin. This is an affordable alternative to using a repository like Nexus.
在本教程中,我们将了解如何使用Site-maven插件在GitHub上托管一个带有源代码的Maven资源库。这是使用Nexus等资源库的一个实惠的选择。
2. Prerequisites
2.前提条件
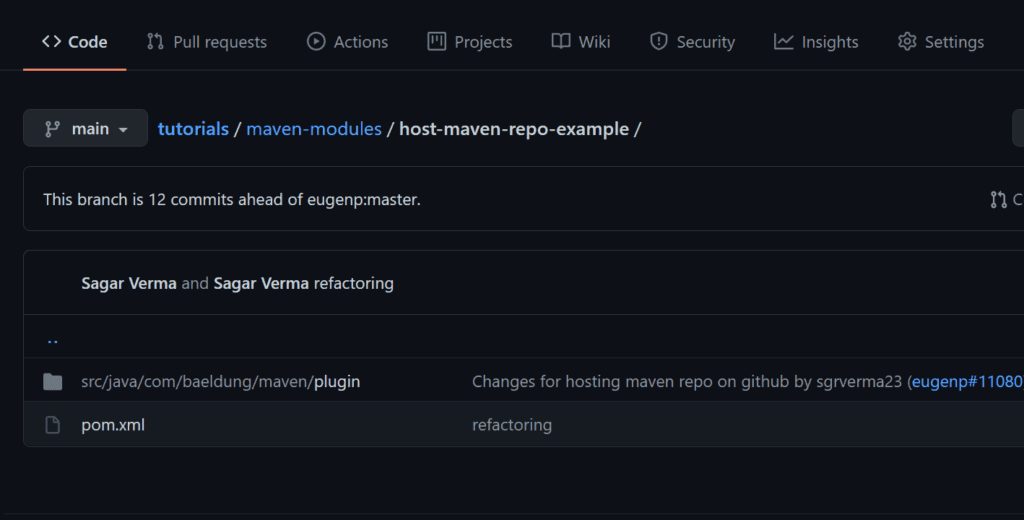
We need to create a repo for a Maven project on GitHub if we don’t have it already. In this article, we’re using one repository, “host-maven-repo-example“, and the branch “main“. This is an empty repo on GitHub:
如果我们还没有Maven项目,我们需要在GitHub上创建一个Repo。本文中,我们使用一个仓库”host-maven-repo-example“,以及分支”main“。这是GitHub上的一个空仓库。
3. Maven Project
3.Maven项目
Let’s create a simple Maven project. We’ll push the generated artifacts of this project to GitHub.
我们来创建一个简单的Maven项目。我们将把该项目生成的工件推送到GitHub。
Here’s the pom.xml of the project:
这里是项目的pom.xml。
<project xmlns="http://maven.apache.org/POM/4.0.0" xmlns:xsi="http://www.w3.org/2001/XMLSchema-instance"
xsi:schemaLocation="http://maven.apache.org/POM/4.0.0 http://maven.apache.org/xsd/maven-4.0.0.xsd">
    <modelVersion>4.0.0</modelVersion>
    <groupId>com.baeldung.maven.plugin</groupId>
    <artifactId>host-maven-repo-example</artifactId>
    <version>1.0-SNAPSHOT</version>
    <build>
        <pluginManagement>
            <plugins>
                <plugin>
                    <groupId>org.apache.maven.plugins</groupId>
                    <artifactId>maven-compiler-plugin</artifactId>
                    <configuration>
                        <source>1.8</source>
                        <target>1.8</target>
                    </configuration>
                </plugin>
            </plugins>
        </pluginManagement>
    </build>
<project>
First, we need to create an internal repo locally in our project. The Maven artifact will be deployed to this location in the project build directory before pushing to GitHub.
首先,我们需要在项目本地创建一个内部 repo。在推送到GitHub之前,Maven工件将被部署到项目构建目录的这个位置。
We’ll add the local repo definition to our pom.xml:
我们将在我们的pom.xml中添加本地 repo 定义。
<distributionManagement>
    <repository>
        <id>internal.repo</id>
        <name>Temporary Staging Repository</name>
        <url>file://${project.build.directory}/mvn-artifact</url>
    </repository>
</distributionManagement>
Now, let’s add the maven-deploy-plugin configuration to our pom.xml. We’ll use this plugin to add our artifact(s) to a local repository in the directory ${project.build.directory}/mvn-artifact:
现在,让我们将maven-deploy-plugin配置添加到我们的pom.xml。我们将使用该插件将工件添加到本地仓库的${project.build.directory}/mvn-artifact目录中。
<plugin>
    <artifactId>maven-deploy-plugin</artifactId>
    <version>2.8.2</version>
    <configuration>
        <altDeploymentRepository>
            internal.repo::default::file://${project.build.directory}/mvn-artifact
        </altDeploymentRepository>
    </configuration>
</plugin>
Also, if we want to push the source files with Maven artifacts to GitHub, then we need to include the source plugin as well:
另外,如果我们想把带有Maven工件的源文件推送到GitHub,那么我们也需要包含源插件。
<plugin>
    <groupId>org.apache.maven.plugins</groupId>
    <artifactId>maven-source-plugin</artifactId>
    <version>3.1.0</version>
    <executions>
        <execution>
            <id>attach-sources</id>
                <goals>
                    <goal>jar</goal>
                </goals>
        </execution>
    </executions>
</plugin>
Once the above configurations and plugins are added to pom.xml, the build will deploy the Maven artifact locally in the directory target/mvn-artifact.
一旦上述配置和插件被添加到pom.xml中,构建将把Maven工件部署到本地目录target/mvn-artifact。
Now, the next step is to deploy these artifacts to GitHub from the local directory.
现在,下一步是将这些工件从本地目录部署到GitHub。
4. Configure GitHub Authentication
4.配置GitHub认证
Before deploying artifacts to GitHub, we’ll configure authentication information in ~/.m2/settings.xml. This is to enable the site-maven-plugin to push the artifacts to GitHub.
在将工件部署到GitHub之前,我们要在~/.m2/settings.xml中配置认证信息。这是为了让Site-maven-plugin能够将工件推送到GitHub。
Depending on how we want to authenticate, we’ll add one of two configurations to our settings.xml. Let’s check these options next.
根据我们想要的认证方式,我们将在我们的settings.xml中添加两种配置之一。接下来让我们检查一下这些选项。
4.1. Using a GitHub Username and Password
4.1.使用GitHub用户名和密码
To use a GitHub username and password, we’ll configure them in our settings.xml:
为了使用GitHub的用户名和密码,我们将在settings.xml中进行配置。
<settings>
    <servers>
        <server>
            <id>github</id>
            <username>your Github username</username>
            <password>your Github password</password>
        </server>
    </servers>
</settings>
4.2. Using a Personal Access Token
4.2.使用个人访问令牌
The recommended way to authenticate when using the GitHub API or command line is to use a personal access token (PAT):
在使用GitHub API或命令行时,建议使用个人访问令牌(PAT)的方式来进行认证。
<settings>
    <servers>
        <server>
            <id>github</id>
            <password>YOUR GitHub OAUTH-TOKEN</password>
        </server>
    </servers>
</settings>
5. Push Artifact to GitHub Using site-maven-plugin
5.使用Site-maven-plugin向GitHub推送工件
And the last step is to configure the site-maven plugin to push our local staging repo. This staging repo is present in the target directory:
最后一步是配置Site-maven插件,推送我们的本地暂存版本。这个暂存版本存在于target目录中。
<plugin>
    <groupId>com.github.github</groupId>
    <artifactId>site-maven-plugin</artifactId>
    <version>0.12</version>
    <configuration>
        <message>Maven artifacts for ${project.version}</message>
        <noJekyll>true</noJekyll>
        <outputDirectory>${project.build.directory}</outputDirectory>
        <branch>refs/heads/${branch-name}</branch>
        <includes>
            <include>**/*</include>
        </includes>
        <merge>true</merge>
        <repositoryName>${repository-name}</repositoryName>
        <repositoryOwner>${repository-owner}</repositoryOwner>
        <server>github</server>
    </configuration>
    <executions>
        <execution>
            <goals>
                <goal>site</goal>
            </goals>
            <phase>deploy</phase>
        </execution>
    </executions>
</plugin>
As an example, for this tutorial, let’s say we have the repository eugenp/host-maven-repo-example. Then the repositoryName tag value will be host-maven-repo-example and the repositoryOwner tag value will be eugenp.
以本教程为例,假设我们有一个仓库eugenp/host-maven-repo-example。那么repositoryName标签值将是host-maven-repo-example,repositoryOwner标签值将是eugenp。
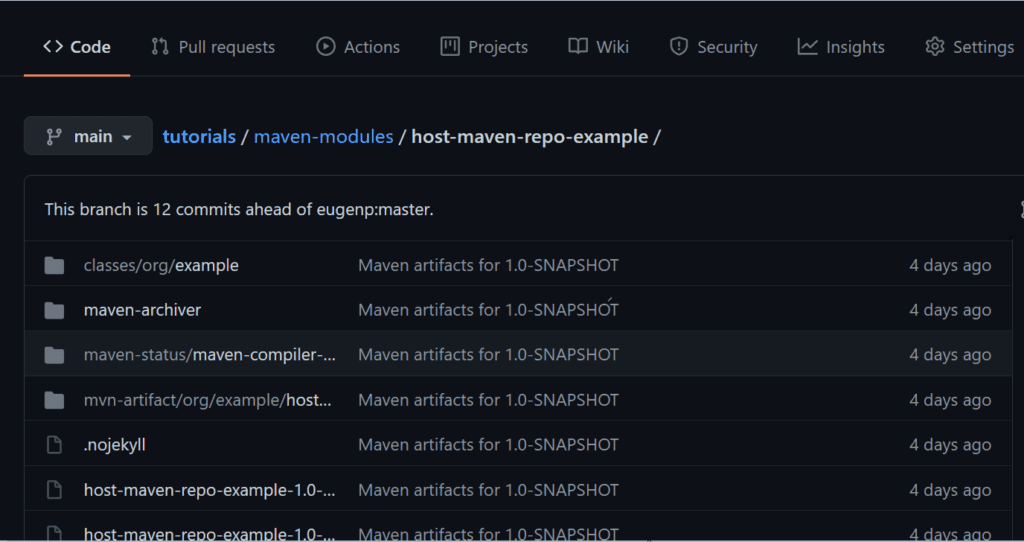
Now, we’ll execute the mvn deploy command to upload the artifact to GitHub. The main branch will automatically be created if not present. After a successful build, check the repo on GitHub in the browser and under the main branch. All our binaries will be present in the repo.
现在,我们将执行mvn deploy命令,将工件上传到GitHub。如果没有的话,main分支将被自动创建。构建成功后,在浏览器中查看GitHub上main分支下的repo。我们所有的二进制文件都会出现在这个 repo 中。
In our case, it will look like this:
在我们的案例中,它将看起来像这样。
6. Conclusion
6.结语
Finally, we’ve seen how to host Maven artifacts on GitHub using the site-maven-plugin.
最后,我们看到了如何使用site-maven-plugin在GitHub上托管Maven工件。
As always, the code for these examples is available over on GitHub.
像往常一样,这些例子的代码可以在GitHub上找到over。

