1. Overview
1.概述
In this tutorial, we’ll learn how to clone a Jenkins job. Cloning a job is useful when we want to reuse partially or totally its configuration. We’ll see various examples with different source trees.
在本教程中,我们将学习如何克隆Jenkins>作业。当我们想部分或全部重复使用作业的配置时,克隆作业是非常有用的。我们将看到各种不同源树的例子。
2. Example Setup
2.设置实例
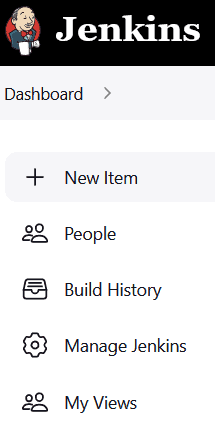
We’ll start by creating a new job. In Jenkins’ left panel, let’s click on New Item:
我们将从创建一个新作业开始。在Jenkins的左边面板上,让我们点击新项目。
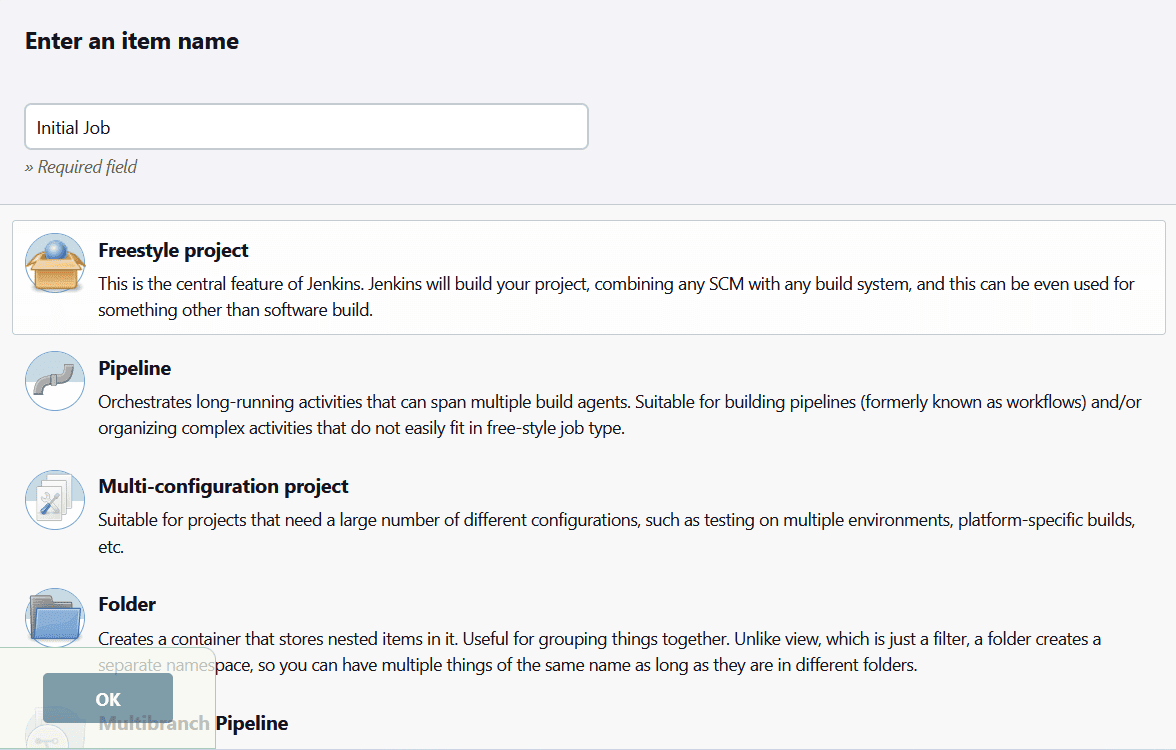
The interface for item creation appears. We’ll fill in the Enter an item name text field with Initial Job and select the Freestyle project option:
出现创建项目的界面。我们将在输入项目名称文本字段中填写初始工作,并选择自由风格项目选项:。
Let’s now validate. The job configuration tab appears. For the sake of this tutorial, we can leave all the fields empty and click directly on the Save button. This will finish the creation of the job. We can now move back to Jenkins’ home page and we’ll see that our Initial Job is listed in the main panel:
现在我们来验证一下。出现作业配置选项卡。在本教程中,我们可以让所有字段为空,直接点击Save按钮。这将完成作业的创建。我们现在可以移回Jenkins的主页,我们会看到我们的初始作业被列在主面板上。
3. Copy the Job Into the Same Folder
3.将作业复制到同一文件夹中
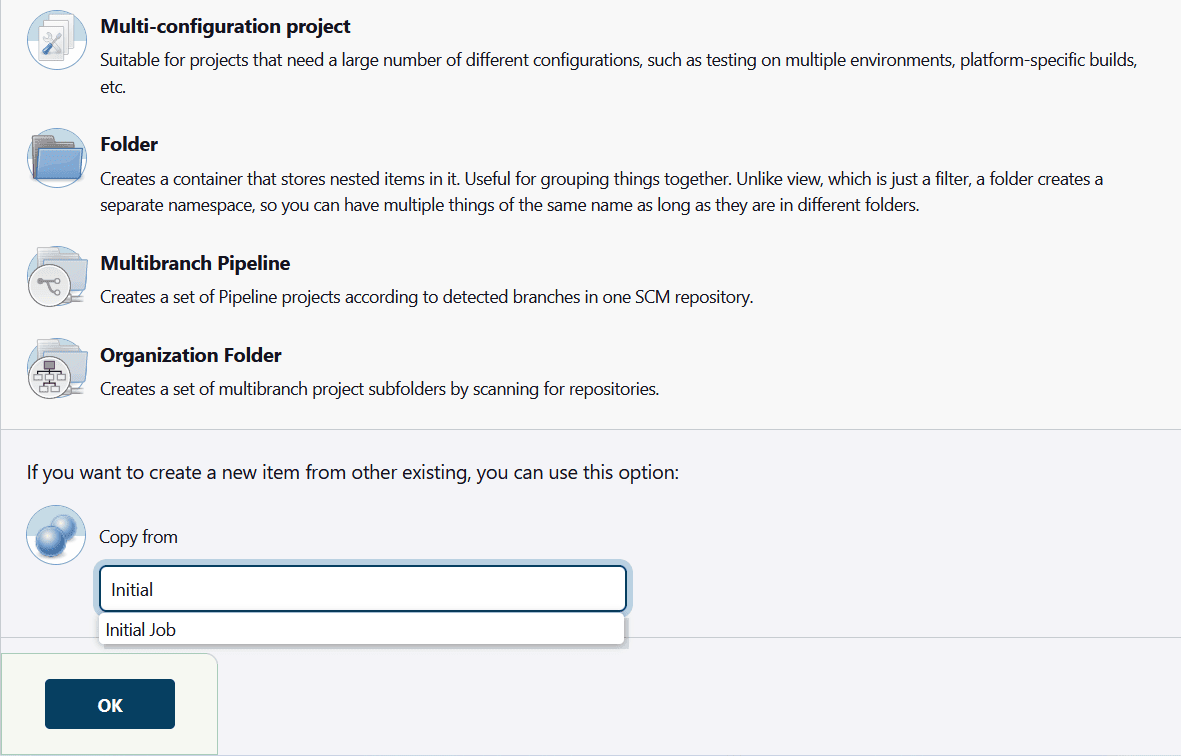
Let’s now click again on New Item. This time, in Enter an item name we’ll put the name Copy Job. We’ll now scroll down until the Copy from section:
现在让我们再次点击新项目。这一次,在输入项目名称中,我们将输入复制工作的名称。我们现在向下滚动,直到Copy from部分:。
As we can see on the screenshot, we can take advantage of the auto-completion to select our Initial Job. We can now validate, and as we did before, directly click Save to complete the job’s creation. On Jenkins’ home page, we’ll now see the updated job list:
正如我们在屏幕上看到的,我们可以利用自动完成来选择我们的Initial Job。我们现在可以进行验证,并像以前一样,直接点击Save来完成作业的创建。在Jenkins的主页上,我们现在会看到更新的作业列表。
4. Copy a Job Inside a Different Folder
4.在不同的文件夹中复制一个作业
As of now, we’ve only worked in Jenkins’ root directory. Let’s see how we can copy our job into other folders.
到目前为止,我们只在Jenkins的根目录下工作。让我们看看如何将我们的工作复制到其他文件夹。
4.1. Using a Relative Path
4.1.使用相对路径
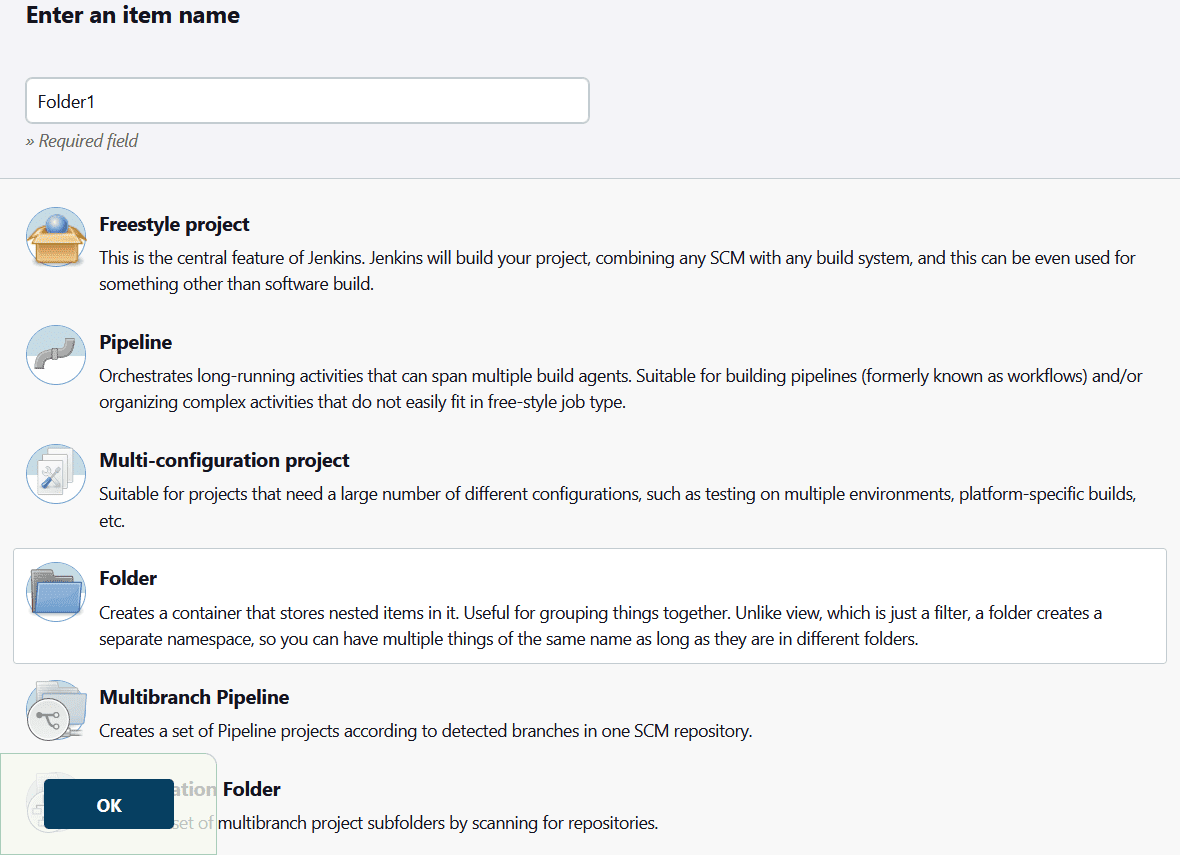
First, let’s create a new folder in Jenkins. Once again, we’ll click on New Item. This time, we’ll choose the Folder option. Let’s call it Folder1:
首先,让我们在Jenkins中创建一个新的文件夹。再次,我们将点击新项目。这一次,我们将选择Folder选项。让我们称它为Folder1。
We can validate, and, as always, directly save it.
我们可以验证,并且像往常一样,直接保存。
Let’s now come back to the home page. The folder Folder1 is now visible in the item list:
现在让我们回到主页。文件夹Folder1现在在项目列表中可见。
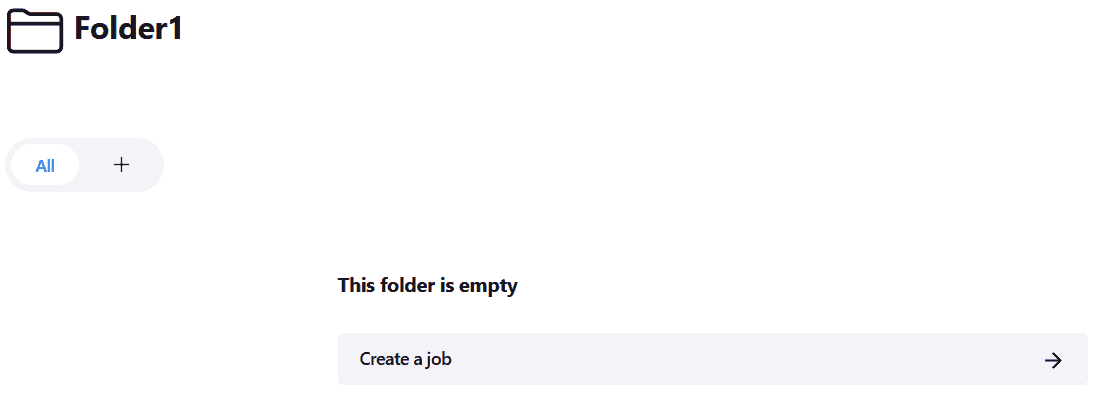
Let’s open Folder1. It’s empty:
让我们打开Folder1。它是空的。
We can click on the Create a job button. The item creation will appear once again. Let’s call our new job Copy Job In Folder1. As we’re creating a job this time, let’s remember to choose the Freestyle project option.
我们可以点击创建一个工作按钮。项目创建将再次出现。让我们称我们的新作业为 Copy Job In Folder1。由于我们这次是创建一个作业,让我们记得选择Freestyle项目选项。
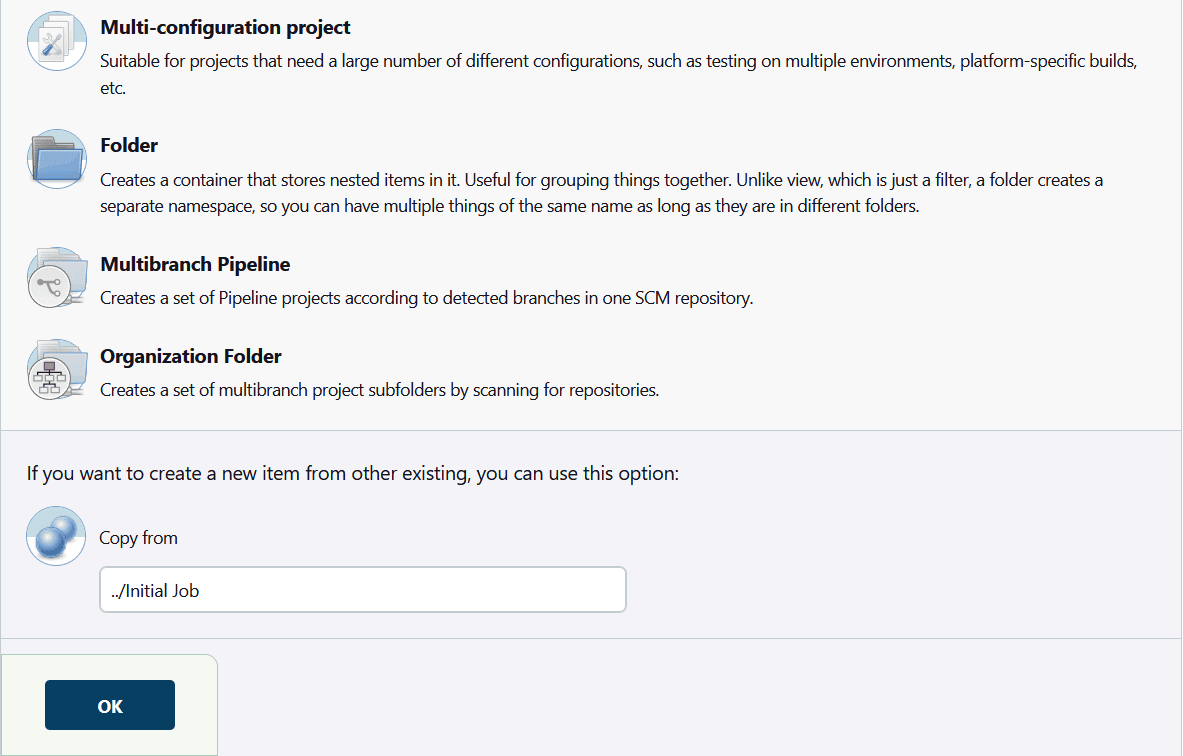
Let’s now scroll down to the Copy from field. Here, we’ll need to refer to the relative path of the Initial Job. It’s located in the parent directory, thus we’ll complete the field this way:
现在让我们向下滚动到Copy from字段。在这里,我们需要参考Initial Job的相对路径。它位于父目录中,因此我们将以这种方式完成该字段。
Similarly to what we did in the previous sections, we can validate and finish the job’s creation. This leads us to the job’s page:
类似于我们在前几节所做的,我们可以验证并完成作业的创建。这就把我们带到了工作的页面。
Let’s note the full project name: Folder1/Copy Job In Folder1, as we’ll use this information in the next section.
让我们注意一下项目的全称。Folder1/Copy Job In Folder1,因为我们将在下一节使用这一信息。
4.2. Using an Absolute Path
4.2.使用绝对路径
We’ll now go back to the home page and follow the steps to create a new folder once again. We’ll call this one Folder2, leading us to the following view from the home page:
我们现在回到主页,按照步骤再次创建一个新的文件夹。我们将称这个文件夹为Folder2,让我们从主页上看到以下视图。
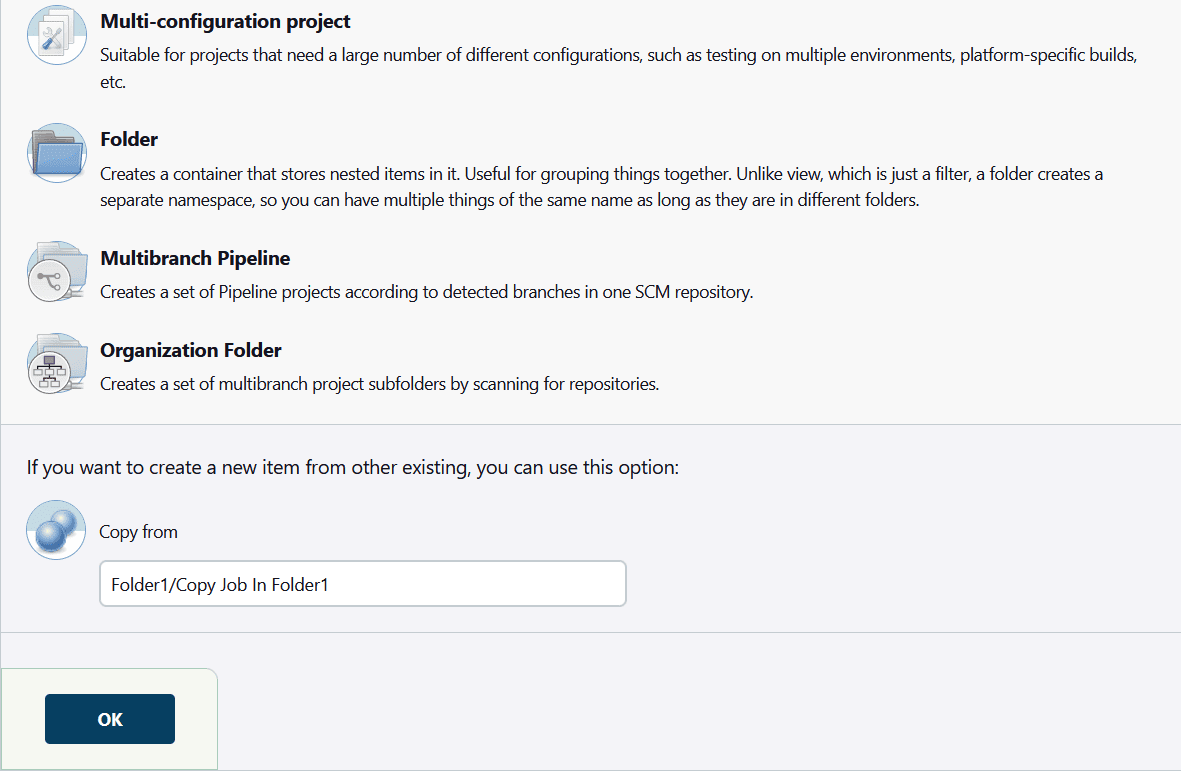
Let’s open Folder2 and create a new job inside it. We’ll call this job Copy Job In Folder2. This time, we want to copy the Copy Job In Folder1. As we remember its full project name Folder1/Copy Job In Folder1, we can enter it in the Copy from field:
让我们打开文件夹2并在其中创建一个新的作业。我们将这个作业称为Copy Job In Folder2。这一次,我们要复制Copy Job In Folder1。由于我们记得它的项目全称Folder1/Copy Job In Folder1,我们可以在Copy from字段中输入它。
We can now validate and we’re done!
我们现在可以验证了,我们已经完成了!
5. Conclusion
5.总结
In this article, we’ve discussed how to clone a Jenkins job. We’ve seen various ways to write the path of the source job.
在这篇文章中,我们讨论了如何克隆一个Jenkins作业。我们已经看到了写出源作业路径的各种方法。
