1. Overview
1.概述
In the Java ecosystem, as the new releases of JDK are introduced at least once a year, we’ll probably need to switch to a newer version at some point.
在Java生态系统中,由于JDK的新版本每年至少推出一次,我们可能需要在某个时候切换到较新的版本。
In this quick tutorial, we’ll show how to check the available JREs, add a JRE to Eclipse, and change a Java version in an Eclipse project, so we’ll be ready when that time comes.
在这个快速教程中,我们将展示如何检查可用的JRE,向Eclipse添加JRE,以及在Eclipse项目中更改Java版本,以便在时机到来时做好准备。
2. Check Whether the JRE Is Available in Eclipse
2.检查JRE在Eclipse中是否可用
After being sure that we have installed the version that we want to use, we’ll need to ensure that it’s available to use in Eclipse.
在确定我们已经安装了我们要使用的版本之后,我们需要确保它在Eclipse中可以使用。
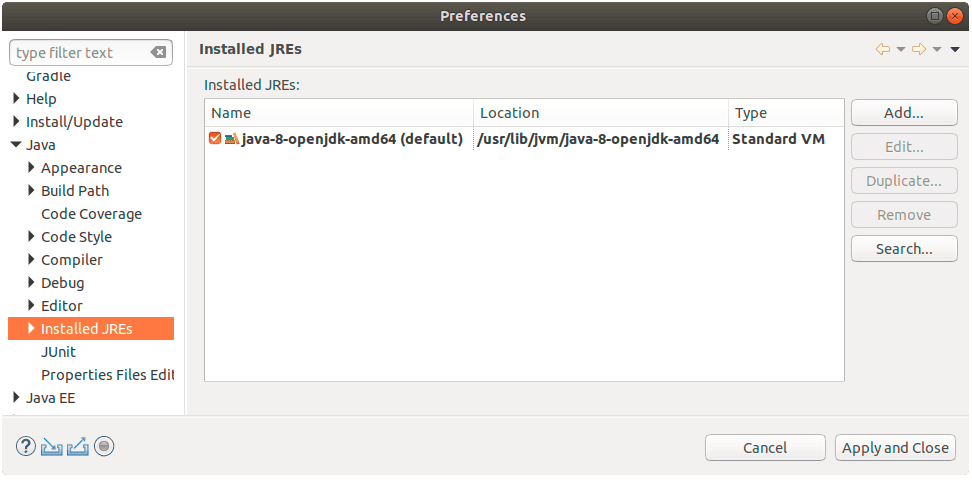
Let’s take a look at Window -> Preferences, and within that, Java -> Installed JREs:
让我们看看窗口->偏好,以及其中的Java ->安装的JREs。
If the JRE we want is listed, then we’re good to go.
如果我们想要的JRE被列出,那么我们就可以开始了。
But, suppose we need to use JRE 9, 10, or 11. Since we only have JDK 8 installed, we’ll have to add it to Eclipse.
但是,假设我们需要使用JRE 9、10或11。由于我们只安装了JDK 8,所以我们必须把它添加到Eclipse中。
3. Adding a JRE to Eclipse
3.在Eclipse中添加JRE
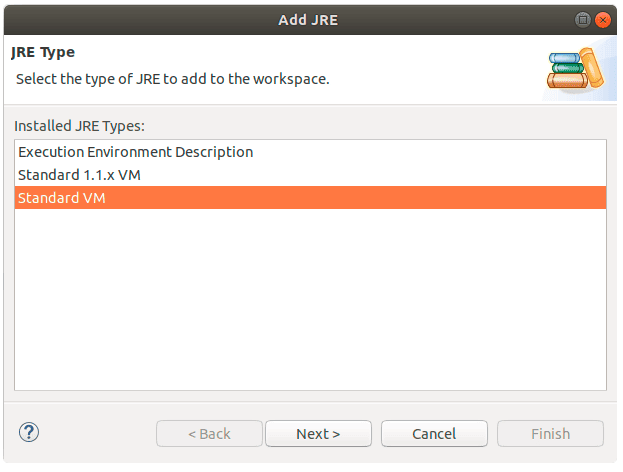
Next, from the Window -> Preferences dialog, let’s click the Add… button. From here, we need to specify the JRE type. We’ll choose Standard VM:
接下来,从窗口->首选项对话框,让我们点击添加…按钮。从这里,我们需要指定JRE的类型。我们将选择Standard VM。
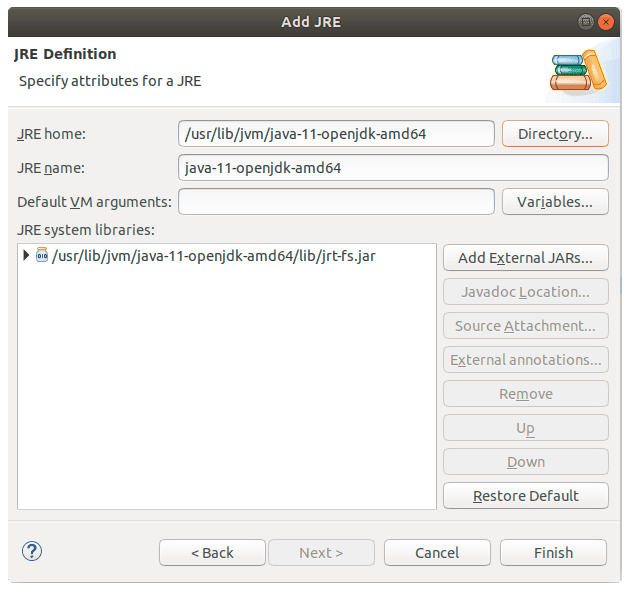
And finally, let’s specify the location of the new JRE (under the JRE home) and click Finish:
最后,让我们指定新JRE的位置(在JRE home下)并点击Finish。
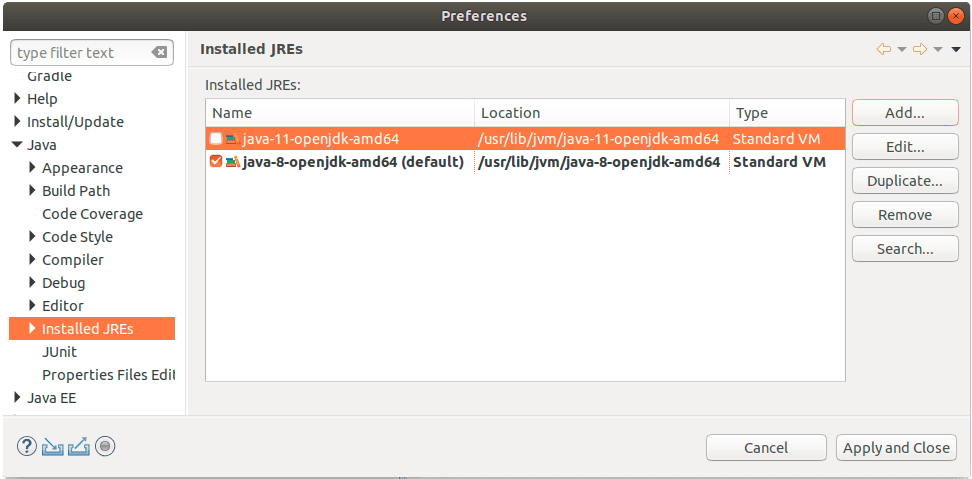
As a result, we now have two JREs configured in our IDE:
因此,现在我们的IDE中配置了两个JRE。
4. Change the Java Version of Our Project
4.改变我们项目的Java版本
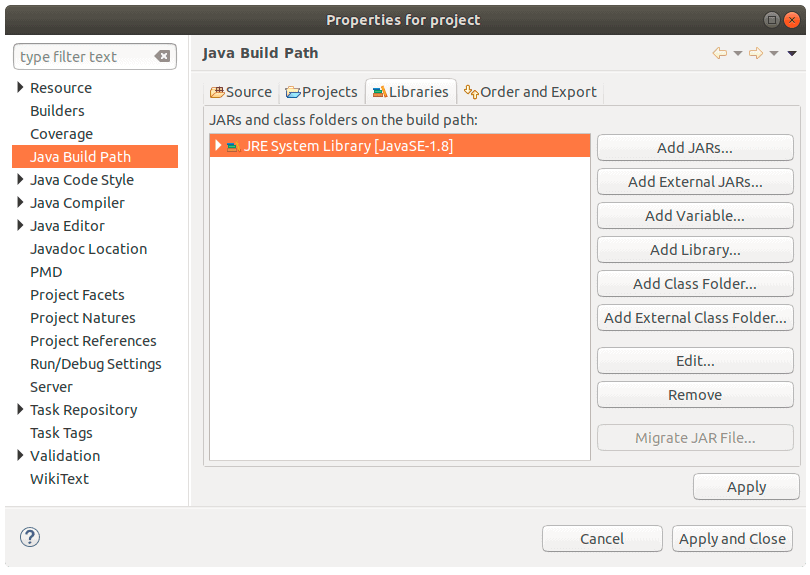
Now, let’s suppose that we were using Java 8 in our project and now we want to change it to Java 10:
现在,让我们假设我们在项目中使用的是Java 8,现在我们想把它改为Java 10。
First, we’ll navigate to the Project properties and then to the Java Build Path:
首先,我们将导航到项目属性,然后到Java构建路径。
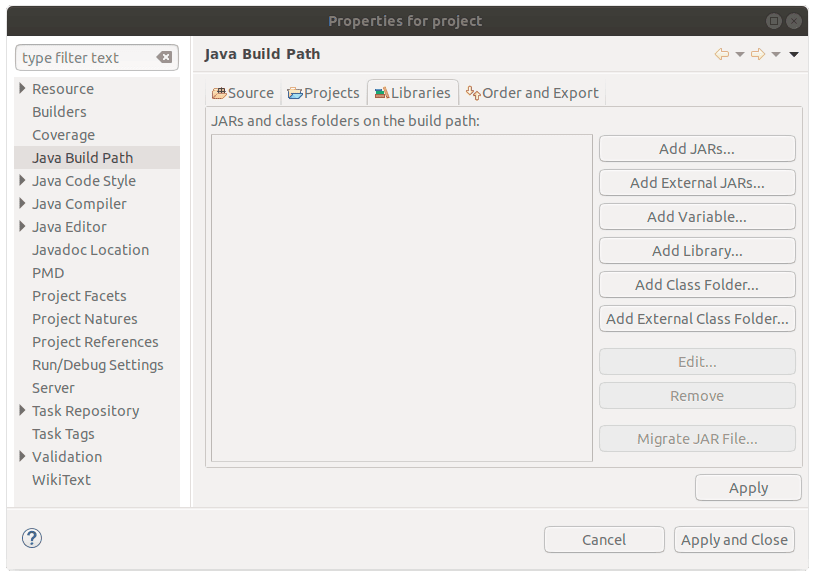
and hit the Remove button on the existing JRE:
并点击现有JRE上的Remove按钮。
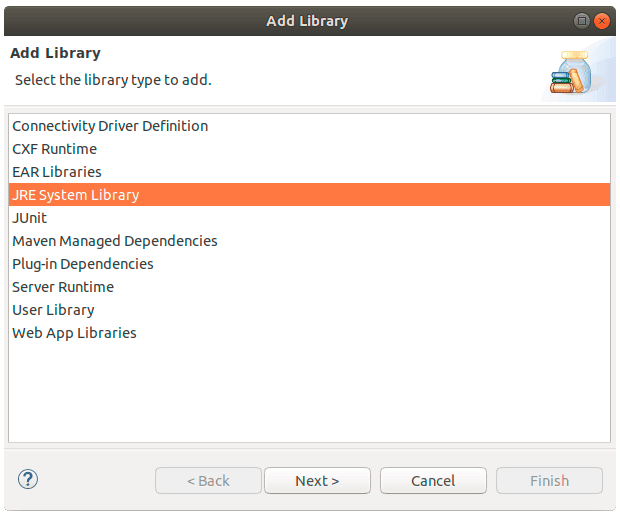
Now, we’ll use the Add Library button and choose the JRE System Library:
现在,我们将使用添加库按钮并选择JRE系统库。
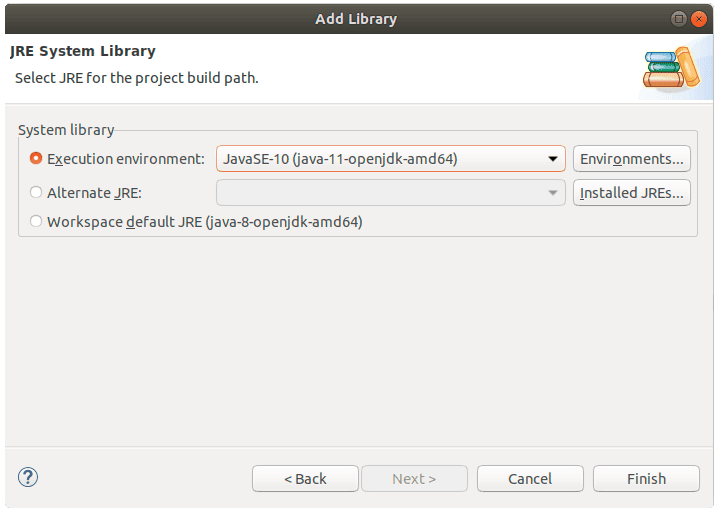
Let’s choose JavaSE-10 from the JDK that we recently installed and click the Finish button:
让我们从最近安装的JDK中选择JavaSE-10,然后点击Finish按钮。
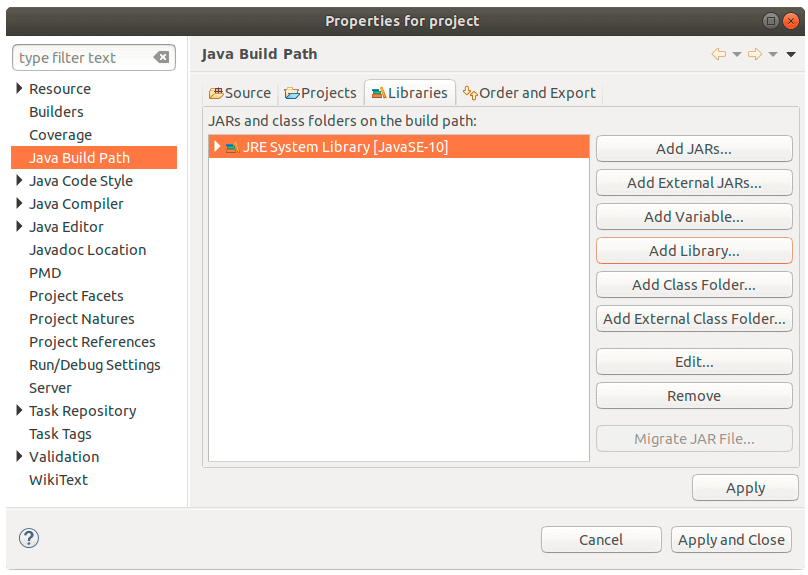
Now, as we can see, we’ve correctly configured our project’s Java Build Path:
现在,我们可以看到,我们已经正确配置了我们项目的Java构建路径。
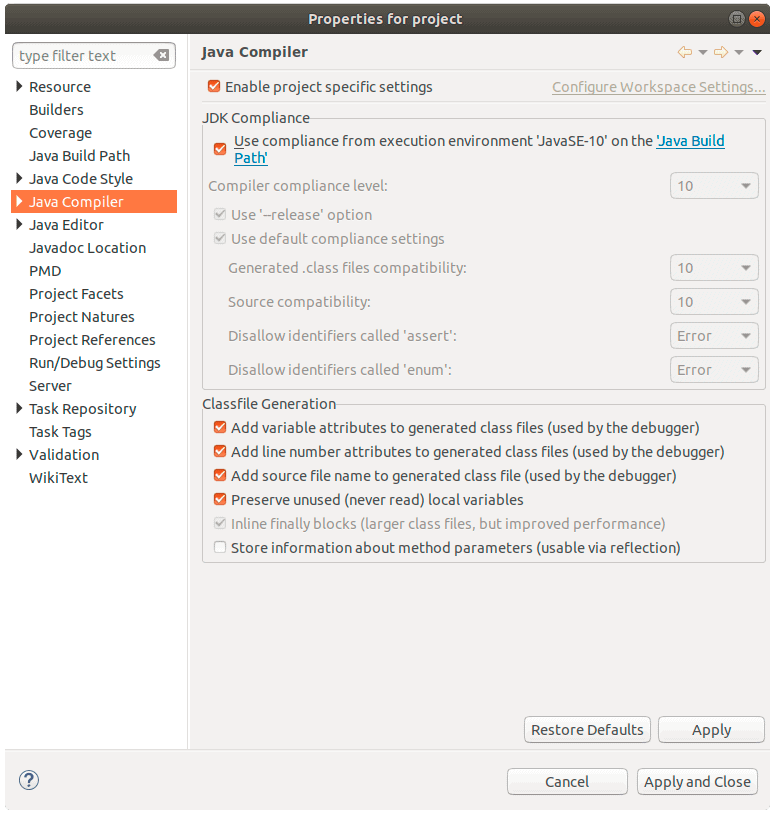
We need to do one additional step — make sure we’re using the correct Compiler Compliance Level for the Java Compiler:
我们需要做一个额外的步骤–确保我们为Java编译器使用了正确的编译器兼容级别。
In our case it says Java 10, so we’re all good:
在我们的例子中,它说的是Java 10,所以我们都很好。
In case the Compiler Compliance Level is not the correct one, we can simply uncheck the Use compliance from execution environment option and choose the correct one.
如果编译器符合性等级不正确,我们可以简单地取消选中Use compliance from execution environment选项,然后选择正确的选项。
5. Conclusion
5.结论
In this quick article, we learned how to add a new JRE into our Eclipse workspace and how to switch to a different Java version in our current Eclipse project.
在这篇快速文章中,我们学习了如何在我们的Eclipse工作区中添加一个新的JRE,以及如何在当前的Eclipse项目中切换到不同的Java版本。
