1. Introduction
1.绪论
In this tutorial, we’re going to learn how to resize (scale) an image using Java. We’ll explore both core Java and open-source third-party libraries that offer the image resize feature.
在本教程中,我们将学习如何使用Java来调整(缩放)图像的大小。我们将探讨核心Java和提供图像大小功能的开源第三方库。
It’s important to mention that we can scale images both up and down. In the code samples in this tutorial, we’ll resize images to smaller sizes since, in practice, that’s the most common scenario.
值得一提的是,我们可以向上和向下调整图像的大小。在本教程的代码示例中,我们将把图片的尺寸调整到较小,因为在实践中,这是最常见的情况。
2. Resize an Image Using Core Java
2.使用Core Java调整图像的大小
Core Java offers the following options for resizing images:
Core Java为调整图像的大小提供了以下选项。
- Resize using java.awt.Graphics2D
- Resize using Image#getScaledInstance
2.1. java.awt.Graphics2D
2.1 Java.awt.Graphics2D
Graphics2D is the fundamental class for rendering 2-dimensional shapes, text, and images on the Java platform.
Graphics2D是在Java平台上渲染二维图形、文本和图像的基本类。
Let’s start by resizing an image using Graphics2D:
让我们先用Graphics2D来调整图像的大小。
BufferedImage resizeImage(BufferedImage originalImage, int targetWidth, int targetHeight) throws IOException {
    BufferedImage resizedImage = new BufferedImage(targetWidth, targetHeight, BufferedImage.TYPE_INT_RGB);
    Graphics2D graphics2D = resizedImage.createGraphics();
    graphics2D.drawImage(originalImage, 0, 0, targetWidth, targetHeight, null);
    graphics2D.dispose();
    return resizedImage;
}
Let’s see what the image looks like before and after resizing:
让我们看看调整大小之前和之后的图像是什么样子。
The BufferedImage.TYPE_INT_RGB parameter indicates the color model of the image. A full list of available values is available in the official Java BufferedImage documentation.
BufferedImage.TYPE_INT_RGB参数表示图像的颜色模型。在官方JavaBufferedImage文档中提供了可用值的完整列表。
Graphics2D accepts additional parameters called RenderingHints. We use RenderingHints to influence different image processing aspects and most importantly image quality and processing time.
Graphics2D接受额外的参数,称为RenderingHints。我们使用RenderingHints来影响不同的图像处理方面,最重要的是图像质量和处理时间。
We can add a RenderingHint using the setRenderingHint method:
我们可以使用setRenderingHint方法添加一个RenderingHint。
graphics2D.setRenderingHint(RenderingHints.KEY_INTERPOLATION, RenderingHints.VALUE_INTERPOLATION_BILINEAR);A full list of RenderingHints can be found in this Oracle tutorial.
RenderingHints的完整列表可以在这个Oracle教程中找到。
2.2. Image.getScaledInstance()
2.2.Image.getScaledInstance()
This approach using Image is very simple and it produces images of satisfying quality:
这种使用Image的方法非常简单,它能产生质量令人满意的图像。
BufferedImage resizeImage(BufferedImage originalImage, int targetWidth, int targetHeight) throws IOException {
    Image resultingImage = originalImage.getScaledInstance(targetWidth, targetHeight, Image.SCALE_DEFAULT);
    BufferedImage outputImage = new BufferedImage(targetWidth, targetHeight, BufferedImage.TYPE_INT_RGB);
    outputImage.getGraphics().drawImage(resultingImage, 0, 0, null);
    return outputImage;
}
Let’s see what happens with a picture of something yummy:
让我们看看用一张好吃的东西的图片会发生什么。
We can also direct the scaling mechanism to use one of the available approaches by providing the getScaledInstance() method with a flag that indicates the type of algorithm to be used for our image resampling needs:
我们还可以通过为getScaledInstance()方法提供一个标志来指示缩放机制,以使用可用的方法之一,该标志表明将用于我们的图像重采样需求的算法类型。
Image resultingImage = originalImage.getScaledInstance(targetWidth, targetHeight, Image.SCALE_SMOOTH);All the available flags are described in the official Java Image documentation.
所有可用的标志在官方的Java Image文档中有所描述。
3. Imgscalr
3.尹志强
Imgscalr uses Graphic2D in the background. It has a simple API with a few different methods for image resizing.
Imgscalr在后台使用Graphic2D。它有一个简单的API,有几种不同的方法来调整图像大小。
Imgscalr provides us with either the best-looking result, the fastest result, or a balanced result depending on the scaling option we pick. Other image manipulation features are also available – like those for cropping and rotation. Let’s show how it works in a simple example.
Imgscalr为我们提供了最漂亮的结果,最快的结果,或者一个平衡的结果,这取决于我们选择的缩放选项。其他的图像处理功能也是可用的–比如那些用于剪裁和旋转的功能。让我们通过一个简单的例子来展示它是如何工作的。
We’ll add the following Maven dependency:
我们将添加以下Maven依赖项。
<dependency>
    <groupId>org.imgscalr</groupId>
    <artifactId>imgscalr-lib</artifactId>
    <version>4.2</version>
</dependency>
Check Maven Central for the latest version.
请查看Maven中心的最新版本。
The simplest way to use Imgscalr is:
使用Imgscalr的最简单方法是。
BufferedImage simpleResizeImage(BufferedImage originalImage, int targetWidth) throws Exception {
    return Scalr.resize(originalImage, targetWidth);
}
Where originalImage is the BufferedImage to be resized and targetWidth is the width of a result image. This approach will keep the original image proportions and use default parameters – Method.AUTOMATIC and Mode.AUTOMATIC.
其中originalImage是要调整大小的BufferedImage,targetWidth是结果图像的宽度。这种方法将保持原始图像的比例,并使用默认参数 – Method.AUTOMATIC和Mode.AUTOMATIC。
How does it do with a picture of delicious fruit? Let’s see:
它与美味的水果图片的关系如何?让我们来看看。
The library also allows multiple configuration options, and, it handles image transparency in the background.
该库还允许多种配置选项,并且,它可以处理背景中的图像透明度。
The most important parameters are:
最重要的参数是。
- mode – used to define the resizing modes that the algorithm will use. For example, we can define whether we would like to keep proportions of the image (options are AUTOMATIC, FIT_EXACT, FIT_TO_HEIGHT, and FIT_TO_WIDTH)
- method – instructs the resizing process so that its focus is on speed, quality, or both. Possible values are AUTOMATIC, BALANCED, QUALITY, SPEED, ULTRA_QUALITY
It’s also possible to define additional resize properties that will provide us with logging or direct the library to do some color modifications on the image (make it lighter, darker, grayscale, and so on).
也可以定义额外的调整大小的属性,为我们提供记录或指导库对图像做一些颜色的修改(使其变亮、变暗、变灰度等等)。
Let’s use the full resize() method parameterization:
让我们使用完整的 resize()方法参数化。
BufferedImage resizeImage(BufferedImage originalImage, int targetWidth, int targetHeight) throws Exception {
    return Scalr.resize(originalImage, Scalr.Method.AUTOMATIC, Scalr.Mode.AUTOMATIC, targetWidth, targetHeight, Scalr.OP_ANTIALIAS);
}
And now we get:
而现在我们得到的是。
Imgscalr works with all files supported by Java Image IO – JPG, BMP, JPEG, WBMP, PNG, and GIF.
Imgscalr适用于Java Image IO支持的所有文件–JPG、BMP、JPEG、WBMP、PNG和GIF。
4. Thumbnailator
4.缩略图器
Thumbnailator is an open-source image resizing library for Java that uses progressive bilinear scaling. It supports JPG, BMP, JPEG, WBMP, PNG, and GIF.
Thumbnailator是一个开源的Java图像调整库,它使用渐进式双线性缩放。它支持JPG、BMP、JPEG、WBMP、PNG和GIF。
We’ll include it in our project by adding the following Maven dependency to our pom.xml:
我们将在我们的项目中加入以下Maven依赖项 pom.xml。
<dependency>
    <groupId>net.coobird</groupId>
    <artifactId>thumbnailator</artifactId>
    <version>0.4.11</version>
</dependency>
Available dependency versions can be found on Maven Central.
可用的依赖版本可以在Maven Central上找到。
It has a very simple API and allows us to set output quality in percentage:
它有一个非常简单的API,并允许我们以百分比来设置输出质量。
BufferedImage resizeImage(BufferedImage originalImage, int targetWidth, int targetHeight) throws Exception {
    ByteArrayOutputStream outputStream = new ByteArrayOutputStream();
    Thumbnails.of(originalImage)
        .size(targetWidth, targetHeight)
        .outputFormat("JPEG")
        .outputQuality(1)
        .toOutputStream(outputStream);
    byte[] data = outputStream.toByteArray();
    ByteArrayInputStream inputStream = new ByteArrayInputStream(data);
    return ImageIO.read(inputStream);
}
Let’s see how this smiling photograph looks before and after resizing:
让我们看看这张微笑的照片在调整大小之前和之后的样子。
It also has an option for batch processing:
它也有一个批处理的选项。
Thumbnails.of(new File("path/to/directory").listFiles())
    .size(300, 300)
    .outputFormat("JPEG")
    .outputQuality(0.80)
    .toFiles(Rename.PREFIX_DOT_THUMBNAIL);
As Imgscalr, Thumblinator works with all files supported by Java Image IO – JPG, BMP, JPEG, WBMP, PNG, and GIF.
与Imgscalr一样,Thumblinator可以处理Java Image IO支持的所有文件–JPG、BMP、JPEG、WBMP、PNG和GIF。
5. Marvin
5.马文
Marvin is a handy tool for image manipulation and it offers a lot of useful basic (crop, rotate, skew, flip, scale) and advanced (blur, emboss, texturing) features.
Marvin是一个方便的图像处理工具,它提供了很多有用的基本(裁剪、旋转、倾斜、翻转、缩放)和高级(模糊、浮雕、纹理)功能。
As before, we’ll add Maven dependencies needed for Marvin resizing:
和以前一样,我们将添加Marvin调整大小所需的Maven依赖项。
<dependency>
    <groupId>com.github.downgoon</groupId>
    <artifactId>marvin</artifactId>
    <version>1.5.5</version>
    <type>pom</type>
</dependency>
<dependency>
    <groupId>com.github.downgoon</groupId>
    <artifactId>MarvinPlugins</artifactId>
    <version>1.5.5</version>
</dependency>
Available Marvin dependency versions can be found on Maven Central, along with the Marvin Plugins versions.
可用的Marvin依赖性版本可以在Maven Central上找到,同时还有Marvin Plugins版本。
The downside of Marvin is that it doesn’t offer an additional scaling configuration. Also, the scale method requires an image and image clone which is a bit cumbersome:
马文的缺点是,它没有提供额外的缩放配置。另外,缩放方法需要一个图像和图像克隆,这有点麻烦。
BufferedImage resizeImage(BufferedImage originalImage, int targetWidth, int targetHeight) {
    MarvinImage image = new MarvinImage(originalImage);
    Scale scale = new Scale();
    scale.load();
    scale.setAttribute("newWidth", targetWidth);
    scale.setAttribute("newHeight", targetHeight);
    scale.process(image.clone(), image, null, null, false);
    return image.getBufferedImageNoAlpha();
}
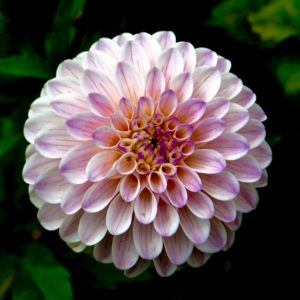
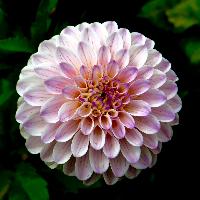
Let’s now resize an image of a flower and see how it goes:
现在让我们调整一张花的图片的大小,看看情况如何。
6. Best Practice
6.最佳实践
Image processing is an expensive operation in terms of resources, so picking the highest quality is not necessarily the best option when we don’t really need it.
就资源而言,图像处理是一项昂贵的操作,因此,当我们并不真正需要它时,挑选最高质量的图像并不一定是最好的选择。
Let’s see the performance of all of the approaches. We took one 1920×1920 px image, and scaled it to 200×200 px. The resulting observed times are as follows:
让我们看看所有方法的性能。我们取了一张1920×1920 px的图像,并将其缩放为200×200 px。最后的观察时间如下。
- java.awt.Graphics2D – 34ms
- Image.getScaledInstance() – 235ms
- Imgscalr – 143ms
- Thumbnailator – 547ms
- Marvin – 361ms
Also, while defining the target image width and height, we should pay attention to the image aspect ratio. This way image will preserve its original proportions and will not be stretched.
此外,在定义目标图像的宽度和高度时,我们应该注意图像的长宽比。这样,图像将保持其原始比例,不会被拉长。
7. Conclusion
7.结语
This article illustrated a few ways to resize an image in Java. We also learned how many different factors can influence the resize process.
这篇文章说明了在Java中调整图像大小的几种方法。我们还了解到许多不同的因素会影响调整大小的过程。
Complete code samples are available over on GitHub.
完整的代码样本可在GitHub上获得over。


