1. Introduction
1.绪论
CRaSH is a reuseable shell that deploys in a JVM and helps us interact with the JVM.
CRaSH是一个可重复使用的外壳,它部署在JVM中,帮助我们与JVM进行交互。
In this tutorial, we’ll see how to install CRaSH as a standalone application. Also, we’ll embed in a Spring Web application and create some custom commands.
在本教程中,我们将看到如何将CRaSH安装为一个独立的应用程序。此外,我们还将在Spring Web应用程序中嵌入,并创建一些自定义命令。
2. Standalone Installation
2.独立安装
Let’s install CRaSH as a standalone application by downloading the distribution from CRaSH’s official website.
让我们通过从CRaSH的官方网站下载发行版,将CRaSH安装为一个独立的应用程序。
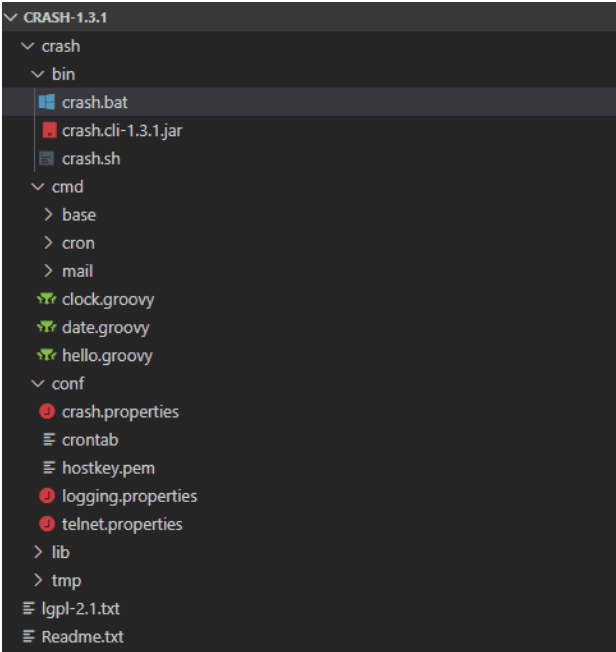
The CRaSH directory structure contains three important directories cmd, bin, and conf:
CRaSH目录结构包含三个重要的目录cmd, bin,和conf:。
The bin directory contains the standalone CLI scripts to start CRaSH.
bin目录包含启动CRaSH的独立CLI脚本。
The cmd directory holds all the commands that it supports out of the box. Also, this is where we can put our custom commands. We’ll look into that in the later sections of this article.
cmd目录保存了所有它支持的开箱即用的命令。此外,这也是我们可以放置我们的自定义命令的地方。我们将在本文后面的章节中研究这个问题。
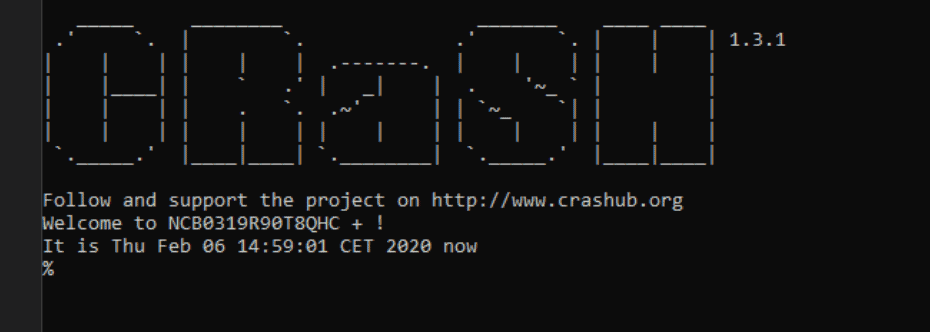
To start the CLI, we go to bin and start the standalone instance with either the crash.bat or crash.sh:
要启动CLI,我们进入bin,用crash.bat或crash.sh:启动独立实例。
3. Embedding CRaSH in a Spring Web Application
3.将CRaSH嵌入Spring Web应用程序中
Let’s embed CRaSH into a Spring web application. First, we’ll need some dependencies:
让我们把CRaSH嵌入到一个Spring网络应用中。首先,我们需要一些依赖项。
<dependency>
    <groupId>org.crashub</groupId>
    <artifactId>crash.embed.spring</artifactId>
    <version>1.3.2</version>
</dependency>
<dependency>
    <groupId>org.crashub</groupId>
    <artifactId>crash.cli</artifactId>
    <version>1.3.2</version>
</dependency>
<dependency>
    <groupId>org.crashub</groupId>
    <artifactId>crash.connectors.telnet</artifactId>
    <version>1.3.2</version>
</dependency>
We can check for the latest version in Maven Central.
我们可以在Maven中心检查最新版本。
CRaSH supports both Java and Groovy, so we’ll need to add Groovy for the Groovy scripts to work:
CRaSH同时支持Java和Groovy,所以我们需要添加Groovy以使Groovy脚本工作。
<dependency>
    <groupId>org.codehaus.groovy</groupId>
    <artifactId>groovy</artifactId>
    <version>3.0.0-rc-3</version>
</dependency>
Its latest version is also in Maven Central.
其最新版本也在Maven中心。
Next, we need to add a listener in our web.xml:
接下来,我们需要在我们的web.xml中添加一个监听器:。
<listener>
    <listener-class>org.crsh.plugin.WebPluginLifeCycle</listener-class>
</listener>
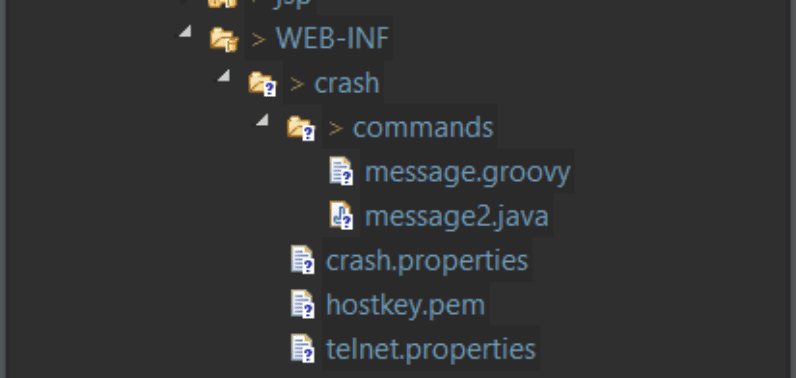
With the listener now ready, let’s add properties and commands in the WEB-INF directory. We’ll create a directory named crash and put commands and properties inside it:
现在监听器准备好了,让我们在WEB-INF目录中添加属性和命令。我们将创建一个名为crash的目录,把命令和属性放在里面。
Once we deploy the application, we can connect to the shell via telnet:
一旦我们部署了该应用程序,我们就可以通过telnet连接到shell。
telnet localhost 5000
We can change the telnet port in the crash.properties file using crash.telnet.port property.
我们可以在crash.properties文件中使用crash.telnet.port属性改变telnet端口。
Alternatively, we can also create a Spring bean to configure the properties and override the command’s directory locations:
另外,我们也可以创建一个Spring Bean来配置属性并覆盖命令的目录位置。
<bean class="org.crsh.spring.SpringWebBootstrap">
    <property name="cmdMountPointConfig" value="war:/WEB-INF/crash/commands/" />
    <property name="confMountPointConfig" value="war:/WEB-INF/crash/" />
    <property name="config">
        <props>
             <prop key="crash.telnet.port">5000</prop>
         </props>
     </property>
</bean>
4. CRaSH and Spring Boot
4.CRaSH和Spring Boot
Spring Boot used to offer CRaSH as an embedded sell, via its remote shell:
Spring Boot曾经通过其远程外壳提供CRaSH作为一个嵌入式卖点。
<dependency>
    <groupId>org.springframework.boot</groupId>
    <artifactId>spring-boot-starter-remote-shell</artifactId>
</dependency>
Unfortunately, the support is now deprecated. If we still want to use the shell along with a Spring Boot application, we can use the attach mode. In the attach mode, CRaSH hooks into the JVM of the Spring Boot application instead of its own:
不幸的是,这种支持现在已被废弃。如果我们仍然想在使用Spring Boot应用程序的同时使用shell,我们可以使用attach模式。在attach模式下,CRaSH将钩住Spring Boot应用程序的JVM而不是自己的JVM。
crash.sh <PID>PID> the process id of that JVM instance. We can retrieve the process ids for JVM’s running on a host using the jps
PID>该JVM实例的进程ID。我们可以使用jps
5. Creating a Custom Command
5.创建一个自定义命令
Now, let’s create a custom command for our crash shell. There are two ways we can create and use the commands; one using Groovy, and also with Java. We’ll look into them one by one.
现在,让我们为我们的crash shell创建一个自定义命令。我们有两种方法可以创建和使用命令;一种是使用Groovy,还有一种是使用Java。我们将逐一研究它们。
5.1. Command with Groovy
5.1.使用Groovy的命令
First, let’s create a simple command with Groovy:
首先,让我们用Groovy创建一个简单的命令。
class message {

    @Usage("show my own message")
    @Command
    Object main(@Usage("custom message") @Option(names=["m","message"]) String message) {
        if (message == null) {
            message = "No message given...";
        }
        return message;
    }
}
The @Command annotation marks the method as a command, @Usage is used to display the usage and parameters of the command, and finally, the @Option is for any parameters to be passed to the command.
@Command注解将该方法标记为一个命令,@Usage用于显示该命令的用法和参数,最后,@Option用于向该命令传递任何参数。
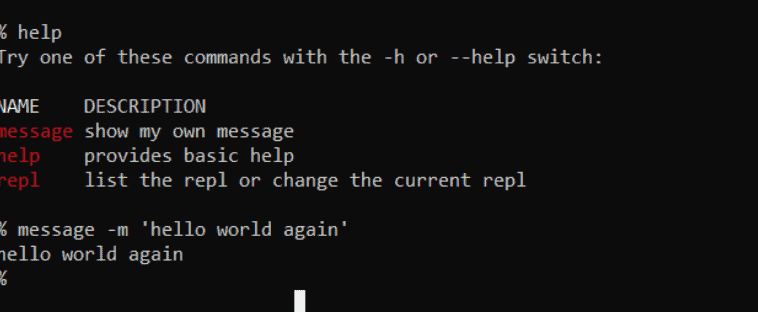
Let’s test the command:
让我们测试一下这个命令。
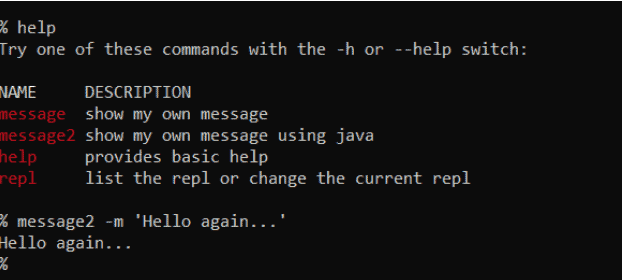
5.2. Command with Java
5.2.使用Java的命令
Let’s create the same command with Java:
让我们用Java创建同样的命令。
public class message2 extends BaseCommand {
    @Usage("show my own message using java")
    @Command
    public Object main(@Usage("custom message")
      @Option(names = { "m", "message" }) String message) {
        if (message == null) {
            message = "No message given...";
        }
        return message;
    }
}
The command is similar to that of Groovy, but here we need to extend the org.crsh.command.BaseCommand.
该命令与Groovy的命令类似,但这里我们需要扩展org.crsh.command.BaseCommand.。
So, let’s test again:
因此,让我们再次测试。
6. Conclusion
6.结语
In this tutorial, we looked in to installing CRaSH as a standalone application, embedding it in a Spring web application. Also, we created customs commands with Groovy as well as Java.
在本教程中,我们研究了如何将CRaSH作为一个独立的应用程序来安装,并将其嵌入Spring网络应用程序中。此外,我们还用Groovy和Java创建了海关命令。
As always, the code is available over on GitHub.
一如既往,代码可在GitHub上获得。
