1. Overview
1.概述
In this tutorial, we’ll explore using H2 with Spring Boot. Just like other databases, there’s full intrinsic support for it in the Spring Boot ecosystem.
在本教程中,我们将探讨在Spring Boot中使用H2。就像其他数据库一样,在Spring Boot生态系统中对它有充分的内在支持。
2. Dependencies
2.依赖性
Let’s begin with the h2 and spring-boot-starter-data-jpa dependencies:
让我们从h2和spring-boot-starter-data-jpa的依赖关系开始。
<dependency>
    <groupId>org.springframework.boot</groupId>
    <artifactId>spring-boot-starter-data-jpa</artifactId>
</dependency>
<dependency>
    <groupId>com.h2database</groupId>
    <artifactId>h2</artifactId>
    <scope>runtime</scope>
</dependency>
3. Database Configuration
3.数据库配置
By default, Spring Boot configures the application to connect to an in-memory store with the username sa and an empty password.
默认情况下,Spring Boot将应用程序配置为以用户名sa和空密码连接到内存中的存储。
However, we can change those parameters by adding the following properties to the application.properties file:
然而,我们可以通过在application.properties文件中添加以下属性来改变这些参数。
spring.datasource.url=jdbc:h2:mem:testdb
spring.datasource.driverClassName=org.h2.Driver
spring.datasource.username=sa
spring.datasource.password=password
spring.jpa.database-platform=org.hibernate.dialect.H2Dialect
Alternatively, we can also use YAML for the database configuration of the application by adding the corresponding properties to the application.yaml file:
另外,我们也可以通过在application.yaml文件中添加相应的属性来使用YAML进行应用程序的数据库配置。
spring:
  datasource:
    url: jdbc:h2:mem:mydb
    username: sa
    password: password
    driverClassName: org.h2.Driver
  jpa:
    spring.jpa.database-platform: org.hibernate.dialect.H2Dialect
By design, the in-memory database is volatile, and results in data loss after application restart.
根据设计,内存数据库是不稳定的,在应用程序重新启动后会导致数据丢失。
We can change that behavior by using file-based storage. To do this we need to update the spring.datasource.url property:
我们可以通过使用基于文件的存储来改变这种行为。要做到这一点,我们需要更新spring.datasource.url属性。
spring.datasource.url=jdbc:h2:file:/data/demoSimilarly, In application.yaml, we can add the same property for file-based storage:
同样地,在application.yaml中,我们可以为基于文件的存储添加同样的属性。
spring:
  datasource:
    url: jdbc:h2:file:/data/demo
The database can also operate in other modes.
该数据库还可以以其他模式操作。
4. Database Operations
4.数据库操作
Carrying out CRUD operations with H2 within Spring Boot is the same as with other SQL databases, and our tutorials in the Spring Persistence series do a good job of covering this.
在 Spring Boot 中使用 H2 进行 CRUD 操作与使用其他 SQL 数据库相同,我们在 Spring Persistence 系列中的教程对此做了很好的介绍。
4.1. DataSource Initialization
4.1.数据源初始化
We can use basic SQL scripts to initialize the database. In order to demonstrate this, let’s add a data.sql file under src/main/resources directory:
我们可以使用基本的SQL脚本来初始化数据库。为了证明这一点,让我们在src/main/resources目录下添加一个data.sql文件。
INSERT INTO countries (id, name) VALUES (1, 'USA');
INSERT INTO countries (id, name) VALUES (2, 'France');
INSERT INTO countries (id, name) VALUES (3, 'Brazil');
INSERT INTO countries (id, name) VALUES (4, 'Italy');
INSERT INTO countries (id, name) VALUES (5, 'Canada');
Here, the script populates the countries table in our schema with some sample data.
在这里,该脚本用一些样本数据填充了我们模式中的countries表。
Spring Boot will automatically pick up this file and run it against an embedded in-memory database, such as our configured H2 instance. This is a good way to seed the database for testing or initialization purposes.
Spring Boot会自动接收这个文件,并针对嵌入式内存数据库(如我们配置的H2实例)运行它。这是一个为测试或初始化目的播种数据库的好方法。
We can disable this default behavior by setting the spring.sql.init.mode property to never. Additionally, multiple SQL files can also be configured to load the initial data.
我们可以通过将spring.sql.init.mode属性设置为never来禁用这种默认行为。此外,多个SQL文件也可以被配置为加载初始数据。
Our article about loading initial data covers this topic in more detail.
我们关于加载初始数据的文章更详细地介绍了这个话题。
4.2. Hibernate and data.sql
4.2.Hibernate和data.sql
By default, the data.sql script executes before Hibernate initialization. This aligns the script-based initialization with other database migration tools such as Flyway and Liquibase. As we’re recreating the schema generated by Hibernate each time, we need to set an additional property:
默认情况下,data.sql脚本会在Hibernate初始化之前执行。这使基于脚本的初始化与其他数据库迁移工具保持一致,例如Flyway和Liquibase。由于我们每次都要重新创建由Hibernate生成的模式,我们需要设置一个额外的属性。
spring.jpa.defer-datasource-initialization=trueThis modifies the default Spring Boot behavior and populates the data after the schema is generated by Hibernate. Furthermore, we can also use a schema.sql script to build upon the Hibernate-generated schema prior to the population with data.sql. However, this mixing of different schema-generation mechanisms is not recommended.
这修改了Spring Boot的默认行为,并在Hibernate生成模式后填充了数据。此外,我们还可以使用schema.sql脚本,在用data.sql填充之前,在Hibernate生成的模式的基础上进行构建。然而,我们不建议混合使用不同的模式生成机制。
5. Accessing the H2 Console
5.访问H2控制台
H2 database has an embedded GUI console for browsing the contents of a database and running SQL queries. By default, the H2 console is not enabled in Spring.
H2数据库有一个嵌入式GUI控制台,用于浏览数据库的内容和运行SQL查询。默认情况下,H2控制台在Spring中未被启用。
To enable it, we need to add the following property to application.properties:
要启用它,我们需要在application.properties中添加以下属性。
spring.h2.console.enabled=trueIf we’re using YAML configuration, we need to add the property to application.yaml:
如果我们使用YAML配置,我们需要在application.yaml中添加该属性。
spring:
  h2:
    console.enabled: true
Then, after starting the application, we can navigate to http://localhost:8080/h2-console, which will present us with a login page.
然后,在启动应用程序后,我们可以导航到http://localhost:8080/h2-console,它将向我们展示一个登录页面。
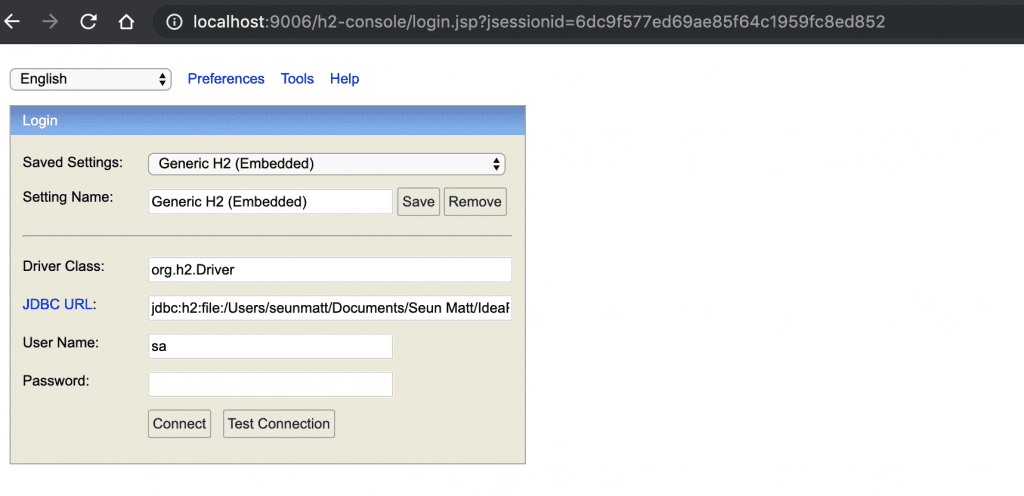
On the login page, we’ll supply the same credentials that we used in the application.properties:
在登录页面,我们将提供我们在application.properties中使用的相同凭证。
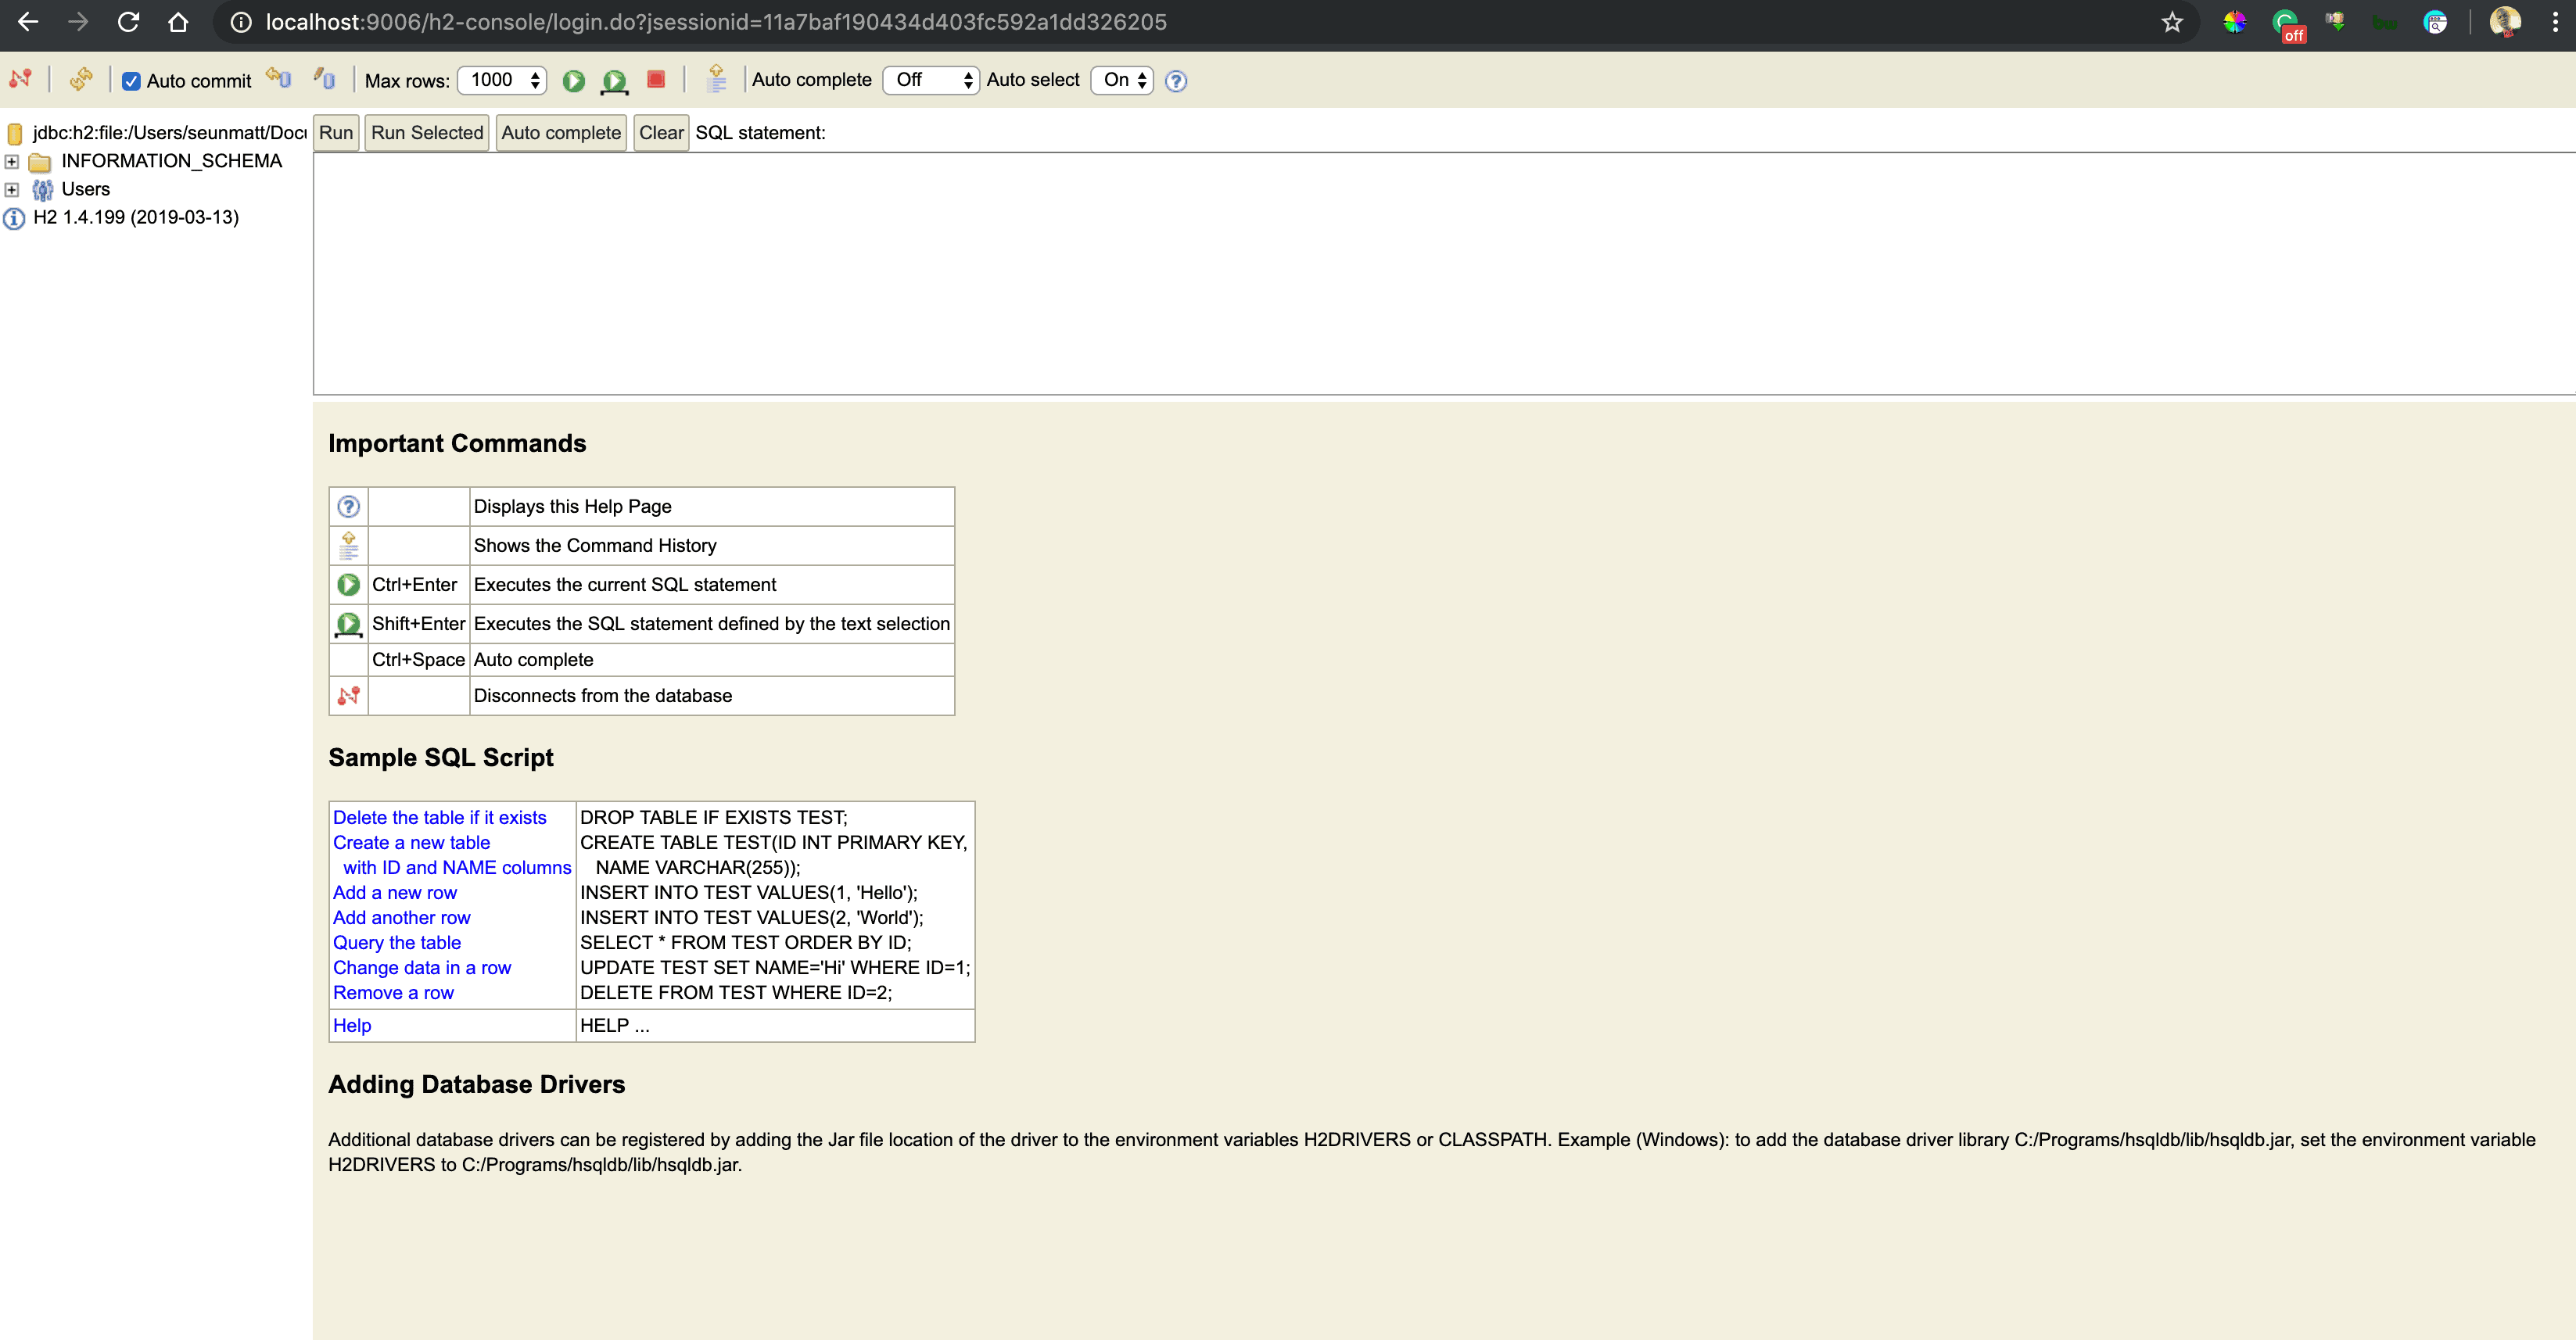
Once we connect, we’ll see a comprehensive webpage that lists all the tables on the left side of the page and a textbox for running SQL queries:
一旦我们连接,我们会看到一个全面的网页,在页面的左侧列出所有的表,还有一个文本框用于运行SQL查询。
The web console has an auto-complete feature that suggests SQL keywords. The fact that the console is lightweight makes it handy for visually inspecting the database or executing raw SQL directly.
网络控制台有一个自动完成功能,建议使用SQL关键字。控制台是轻量级的,这使得它在视觉上检查数据库或直接执行原始SQL时很方便。
Moreover, we can further configure the console by specifying the following properties in the project’s application.properties with our desired values:
此外,我们可以通过在项目的application.properties中用我们想要的值指定以下属性来进一步配置该控制台。
spring.h2.console.path=/h2-console
spring.h2.console.settings.trace=false
spring.h2.console.settings.web-allow-others=false
Likewise, when using YAML configuration, we can add the above properties as:
同样地,当使用YAML配置时,我们可以将上述属性添加为。
spring:
  h2:
    console:
      path: /h2-console
      settings.trace: false
      settings.web-allow-others: false
In the snippets above, we set the console path to be /h2-console, which is relative to the address and port of our running application. Therefore, if our app is running at http://localhost:9001, the console will be available at http://localhost:9001/h2-console.
在上面的片段中,我们将控制台路径设置为/h2-console,这是相对于我们正在运行的应用程序的地址和端口而言。因此,如果我们的应用程序在http://localhost:9001上运行,控制台将在http://localhost:9001/h2-console.上可用。
Furthermore, we set spring.h2.console.settings.trace to false to prevent trace output, and we can also disable remote access by setting spring.h2.console.settings.web-allow-others to false.
此外,我们将spring.h2.console.settings.trace设置为false以防止跟踪输出,我们还可以通过将spring.h2.console.settings.web-allow-others设置为false来禁止远程访问。
6. Conclusion
6.结论
The H2 database is fully compatible with Spring Boot. We’ve seen how to configure it and how to use the H2 console for managing our running database.
H2数据库与Spring Boot完全兼容。我们已经看到了如何配置它以及如何使用H2控制台来管理我们正在运行的数据库。
The complete source code is available over on GitHub.
完整的源代码可以在GitHub上获得。

