1. Introduction
1.绪论
In this short tutorial, we’re going to see how to configure Swagger UI to include a JSON Web Token (JWT) when it calls our API.
在这个简短的教程中,我们将看到如何配置Swagger UI,使其在调用我们的API时包含一个JSON Web Token(JWT)。
2. Maven Dependencies
2.Maven的依赖性
In this example, we’ll be using springfox-boot-starter, which includes all the necessary dependencies to start working with Swagger and Swagger UI. Let’s add it to our pom.xml file:
在这个例子中,我们将使用springfox-boot-starter,其中包括开始使用Swagger和Swagger UI的所有必要依赖。让我们把它添加到我们的pom.xml文件中。
<dependency>
    <groupId>org.springframework.boot</groupId>
    <artifactId>spring-boot-starter-web</artifactId>
</dependency>
<dependency>
    <groupId>io.springfox</groupId>
    <artifactId>springfox-boot-starter</artifactId>
    <version>3.0.0</version>
</dependency>
3. Swagger Configuration
3.Swagger配置
First, we need to define our ApiKey to include JWT as an authorization header:
首先,我们需要定义我们的ApiKey,包括JWT作为授权头。
private ApiKey apiKey() {
    return new ApiKey("JWT", "Authorization", "header");
}
Next, let’s configure the JWT SecurityContext with a global AuthorizationScope:
接下来,让我们用一个全局的AuthorizationScope来配置JWT SecurityContext。
private SecurityContext securityContext() {
    return SecurityContext.builder().securityReferences(defaultAuth()).build();
}

private List<SecurityReference> defaultAuth() {
    AuthorizationScope authorizationScope = new AuthorizationScope("global", "accessEverything");
    AuthorizationScope[] authorizationScopes = new AuthorizationScope[1];
    authorizationScopes[0] = authorizationScope;
    return Arrays.asList(new SecurityReference("JWT", authorizationScopes));
}
And then, we configure our API Docket bean to include API info, security contexts, and security schemes:
然后,我们配置我们的API Docket bean,以包括API信息、安全上下文和安全方案。
@Bean
public Docket api() {
    return new Docket(DocumentationType.SWAGGER_2)
      .apiInfo(apiInfo())
      .securityContexts(Arrays.asList(securityContext()))
      .securitySchemes(Arrays.asList(apiKey()))
      .select()
      .apis(RequestHandlerSelectors.any())
      .paths(PathSelectors.any())
      .build();
}
private ApiInfo apiInfo() {
    return new ApiInfo(
      "My REST API",
      "Some custom description of API.",
      "1.0",
      "Terms of service",
      new Contact("Sallo Szrajbman", "www.baeldung.com", "salloszraj@gmail.com"),
      "License of API",
      "API license URL",
      Collections.emptyList());
}
4. REST Controller
4.REST控制器
In our ClientsRestController, let’s write a simple getClients endpoint to return a list of clients:
在我们的ClientsRestController中,让我们写一个简单的getClients端点来返回一个客户列表。
@RestController(value = "/clients")
@Api( tags = "Clients")
public class ClientsRestController {

    @ApiOperation(value = "This method is used to get the clients.")
    @GetMapping
    public List<String> getClients() {
        return Arrays.asList("First Client", "Second Client");
    }
}
5. Swagger UI
5.Swagger UI
Now, when we start our application, we can access the Swagger UI at the http://localhost:8080/swagger-ui/ URL.
现在,当我们启动我们的应用程序时,我们可以通过http://localhost:8080/swagger-ui/ URL访问Swagger UI。
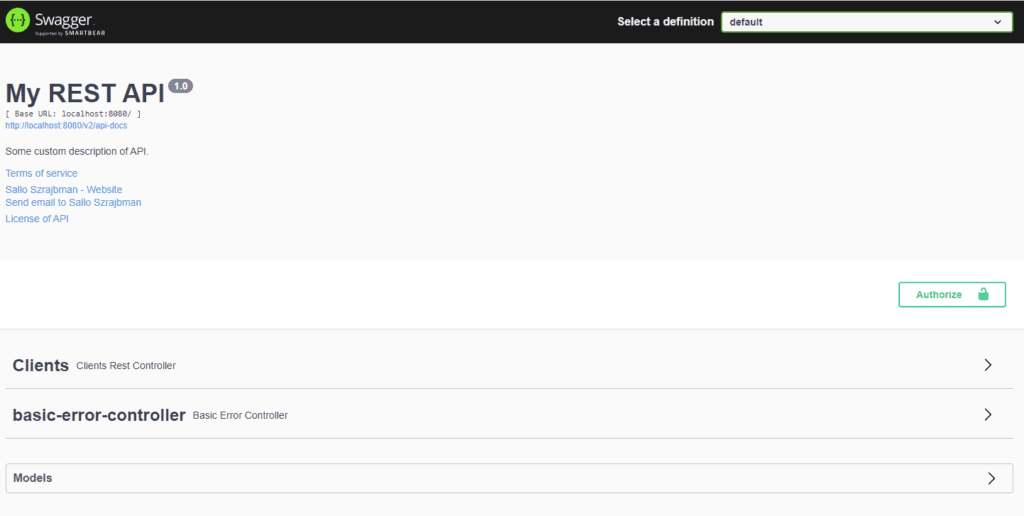
Here’s a look at the Swagger UI with Authorize button:
下面是带有Authorize按钮的Swagger用户界面。
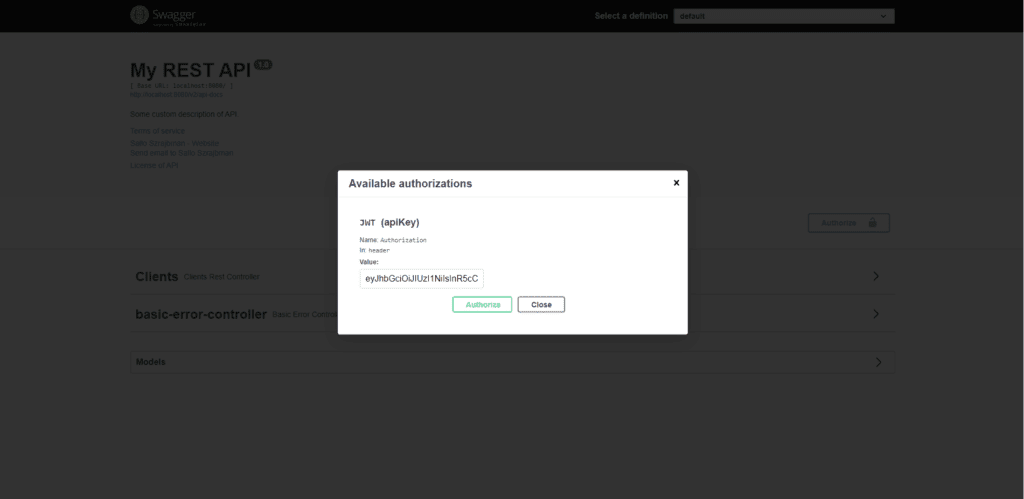
When we click the Authorize button, Swagger UI will ask for the JWT.
当我们点击Authorize按钮时,Swagger UI将要求提供JWT。
We just need to input our token and click on Authorize, and from then on, all the requests made to our API will automatically contain the token in the HTTP headers:
我们只需要输入我们的令牌并点击Authorize,从那时起,所有向我们的API发出的请求将自动在HTTP头中包含令牌。
6. API Request with JWT
6.使用JWT的API请求
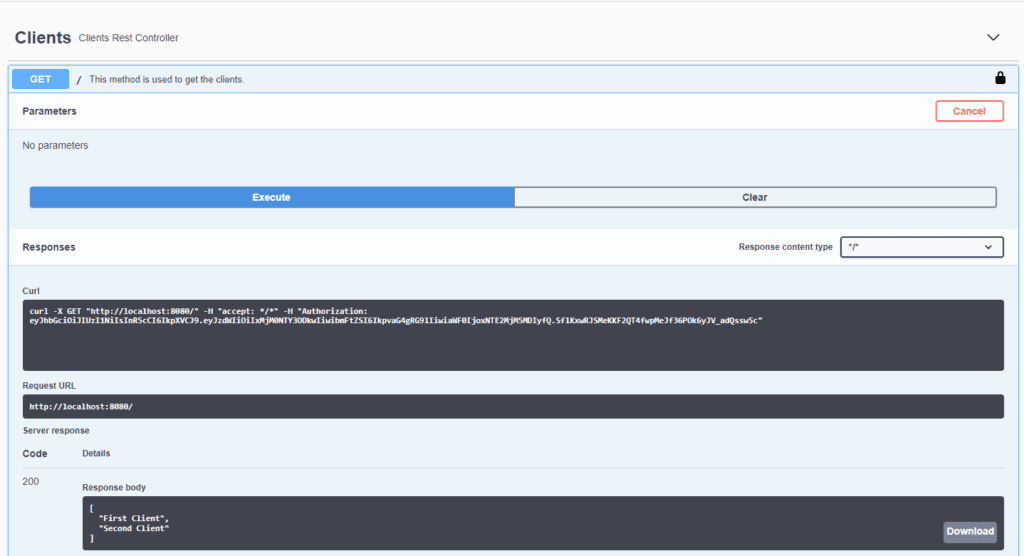
When sending the request to our API, we can see that there’s an “Authorization” header with our token value:
当向我们的API发送请求时,我们可以看到有一个 “授权 “头和我们的令牌值。
7. Conclusion
7.结语
In this article, we saw how Swagger UI provides custom configurations to set up JWT, which can be helpful when dealing with our application authorization. After authorizing in Swagger UI, all the requests will automatically include our JWT.
在这篇文章中,我们看到了Swagger UI是如何提供自定义配置来设置JWT的,这在处理我们的应用授权时可能会有帮助。在Swagger UI中进行授权后,所有的请求都会自动包含我们的JWT。
The source code in this article is available over on GitHub.
本文的源代码可在GitHub上获得超过。


