1. Overview
1.概述
Lombok is a library that facilitates many tedious tasks and reduces Java source code verbosity.
Lombok是一个库,它可以促进许多繁琐的工作,并减少Java源代码的冗长性。
Of course, we usually want to be able to use the library in an IDE, which requires additional setup.
当然,我们通常希望能够在IDE中使用该库,这需要额外的设置。
In this tutorial, we’ll talk about configuring Lombok in two of the most popular Java IDEs — IntelliJ IDEA and Eclipse.
在本教程中,我们将讨论如何在两个最流行的Java IDE中配置Lombok – IntelliJ IDEA和Eclipse。
2. Lombok in IntelliJ IDEA
2.IntelliJ IDEA中的Lombok
As of IntelliJ version 2020.3, we don’t need to configure the IDE to use Lombok anymore. The IDE comes bundled with the plugin. Also, the annotation processing will be enabled automatically.
从IntelliJ版本2020.3开始,我们不需要再配置IDE来使用Lombok。IDE与该插件捆绑在一起。另外,注释处理也将自动启用。
In earlier versions of IntelliJ, we need to perform the below steps to use Lombok. Also, if we use the latest version and the IDE doesn’t recognize the Lombok annotation, we need to verify that the below configuration was not disabled manually.
在早期版本的IntelliJ中,我们需要执行以下步骤来使用Lombok。另外,如果我们使用最新的版本,IDE不能识别Lombok注解,我们需要验证以下配置是否被手动禁用。
2.1. Enabling Annotation Processing
2.1.启用注释处理
Lombok uses annotation processing through APT. So, when the compiler calls it, the library generates new source files based on annotations in the originals.
Lombok通过APT使用注释处理。因此,当编译器调用它时,该库会根据原文件中的注释生成新的源文件。
Annotation processing isn’t enabled by default, though.
虽然默认情况下并没有启用注释处理功能。
Therefore, the first thing to do is to enable annotation processing in our project.
因此,首先要做的是在我们的项目中启用注释处理。
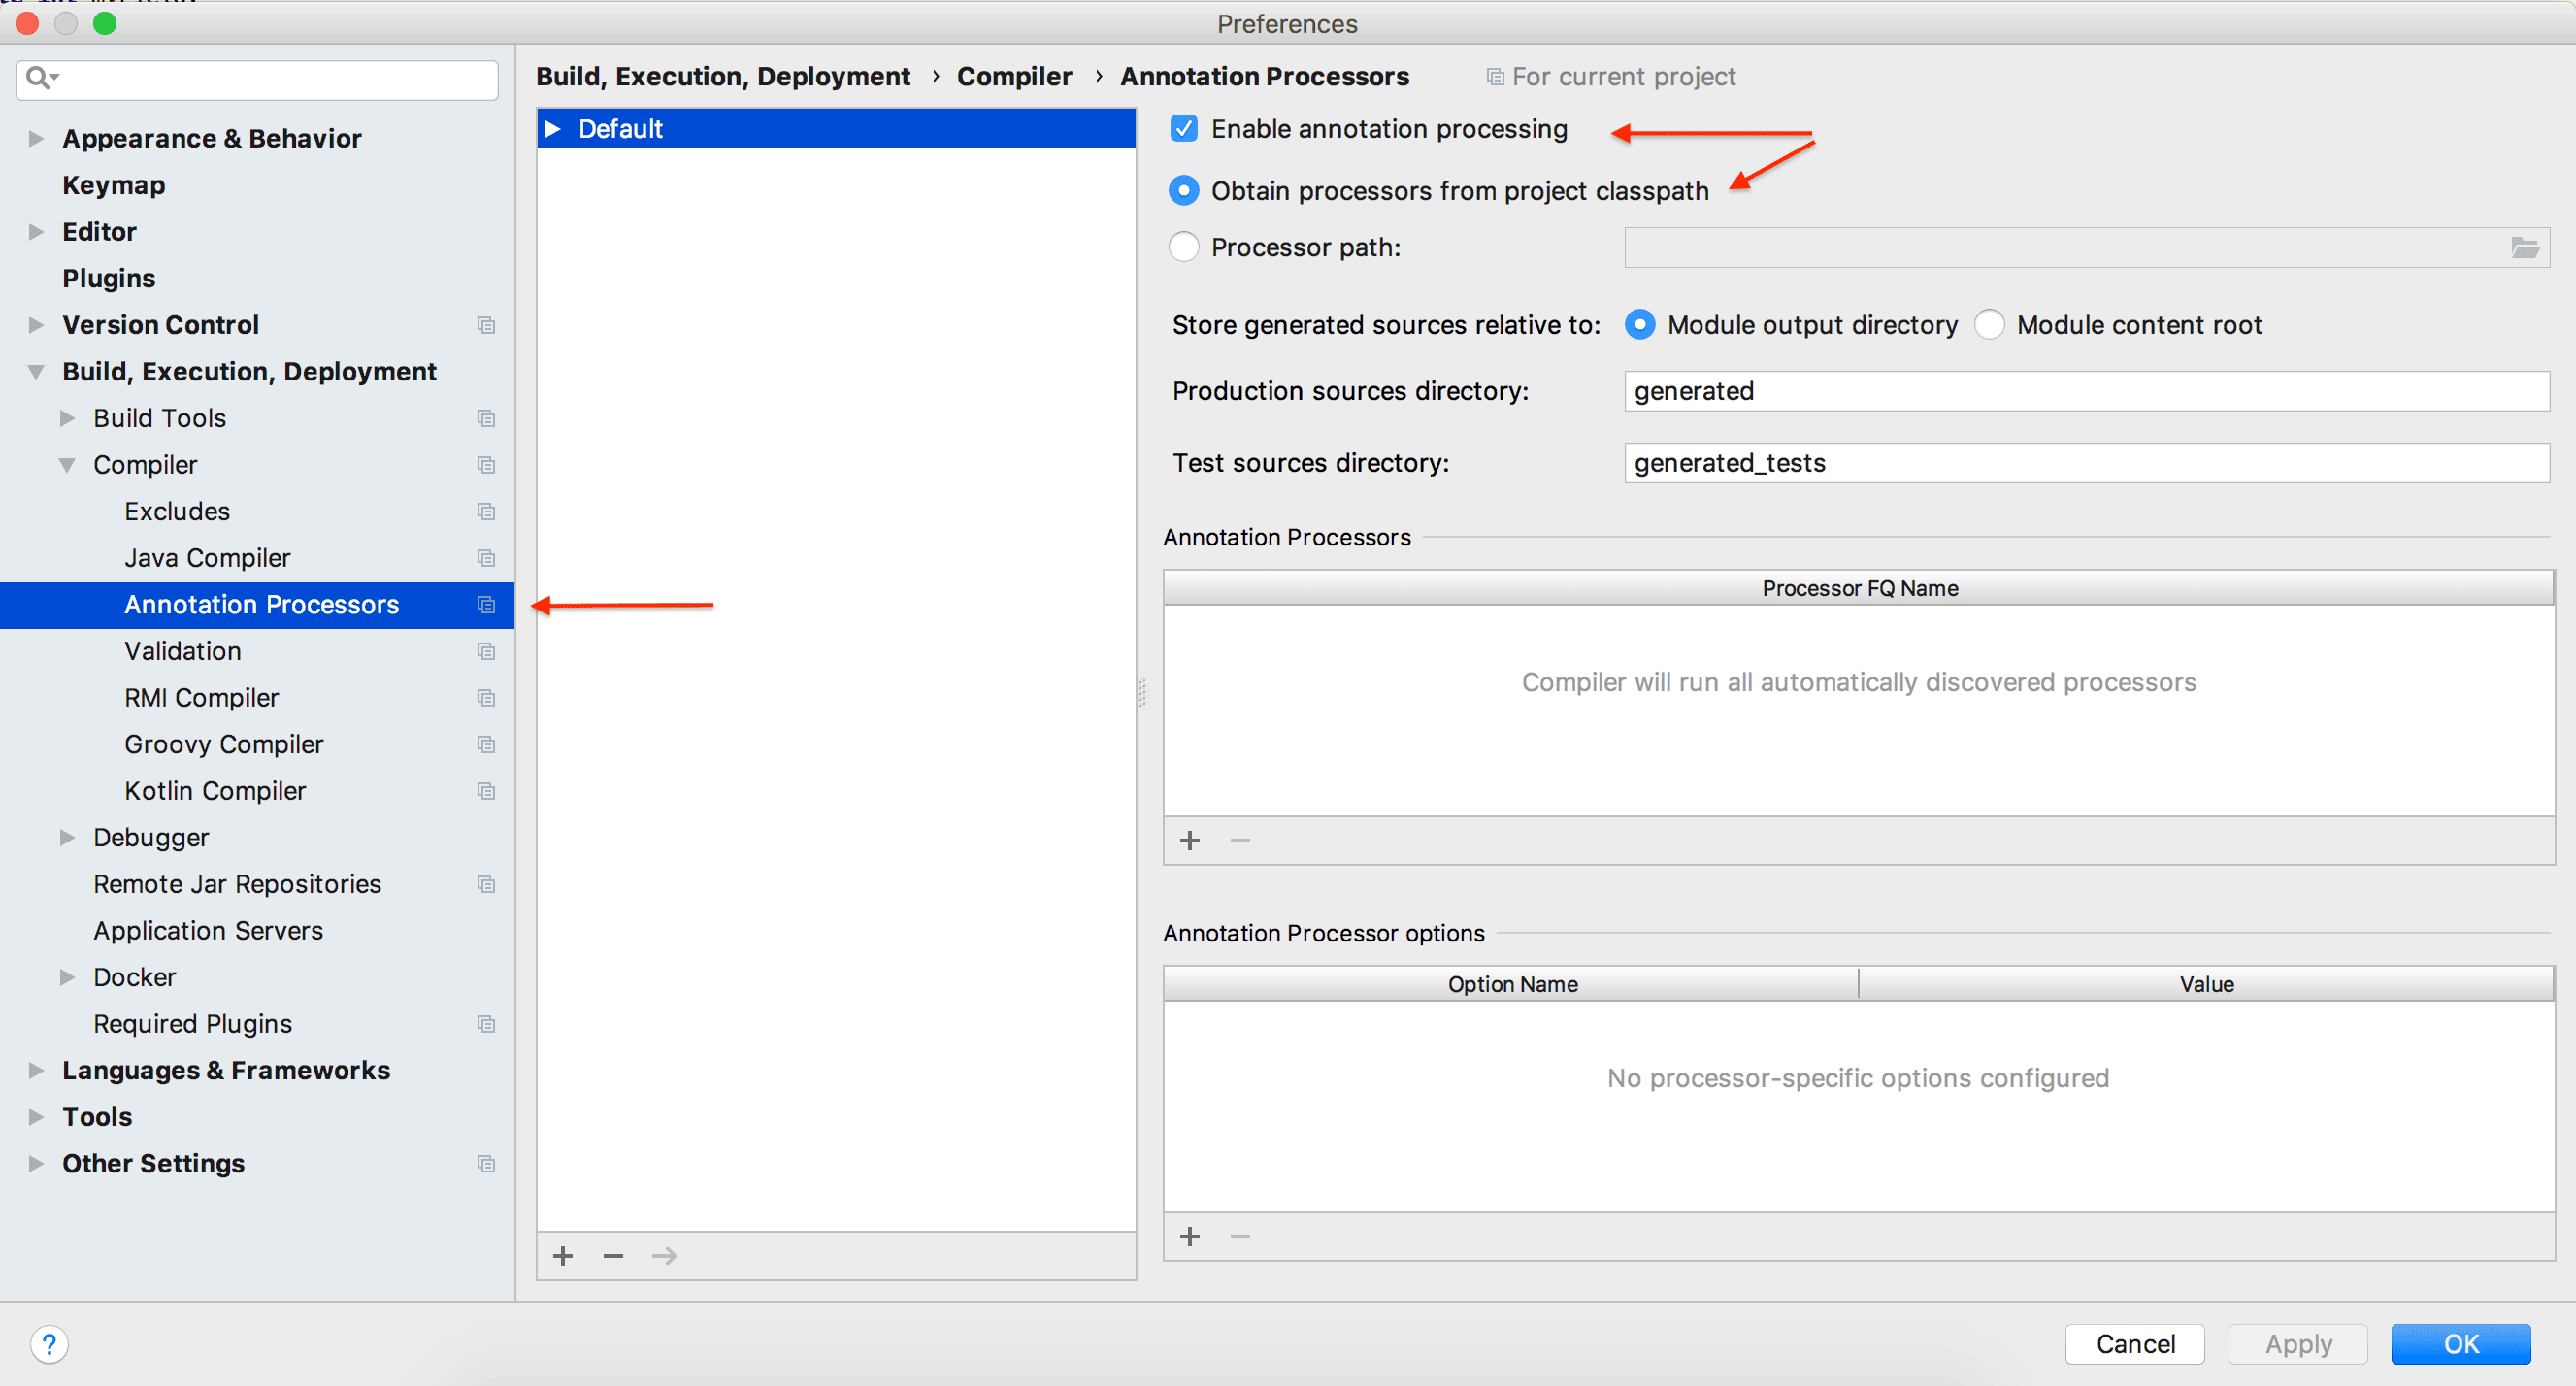
We need to go to the Preferences | Build, Execution, Deployment | Compiler | Annotation Processors and make sure of the following:
我们需要进入Preferences | Build, Execution, Deployment | Compiler | Annotation Processors并确保以下几点。
- Enable annotation processing box is checked
- Obtain processors from project classpath option is selected
2.2. Installing the IDE Plugin
2.2.安装IDE插件
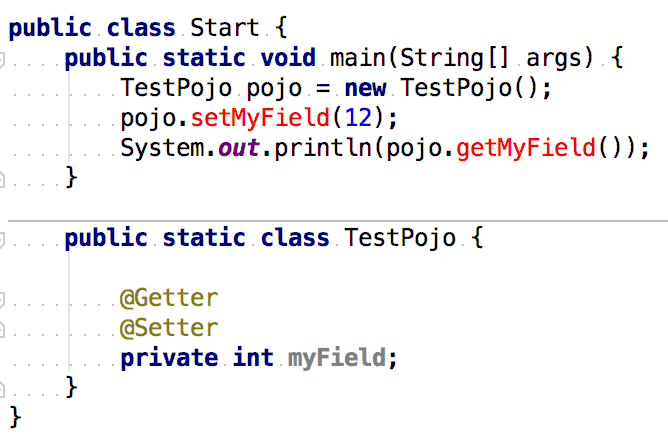
While Lombok generates code only during compilation, the IDE highlights errors in raw source code:
虽然Lombok只在编译过程中生成代码,但IDE会突出显示原始源代码中的错误。
There is a dedicated plugin that makes IntelliJ aware of the source code to be generated. After installing it, the errors go away and regular features like Find Usages and Navigate To start working.
有一个专门的插件可以让IntelliJ知道要生成的源代码。安装后,错误消失了,像Find Usages和Navigate To等常规功能开始工作。
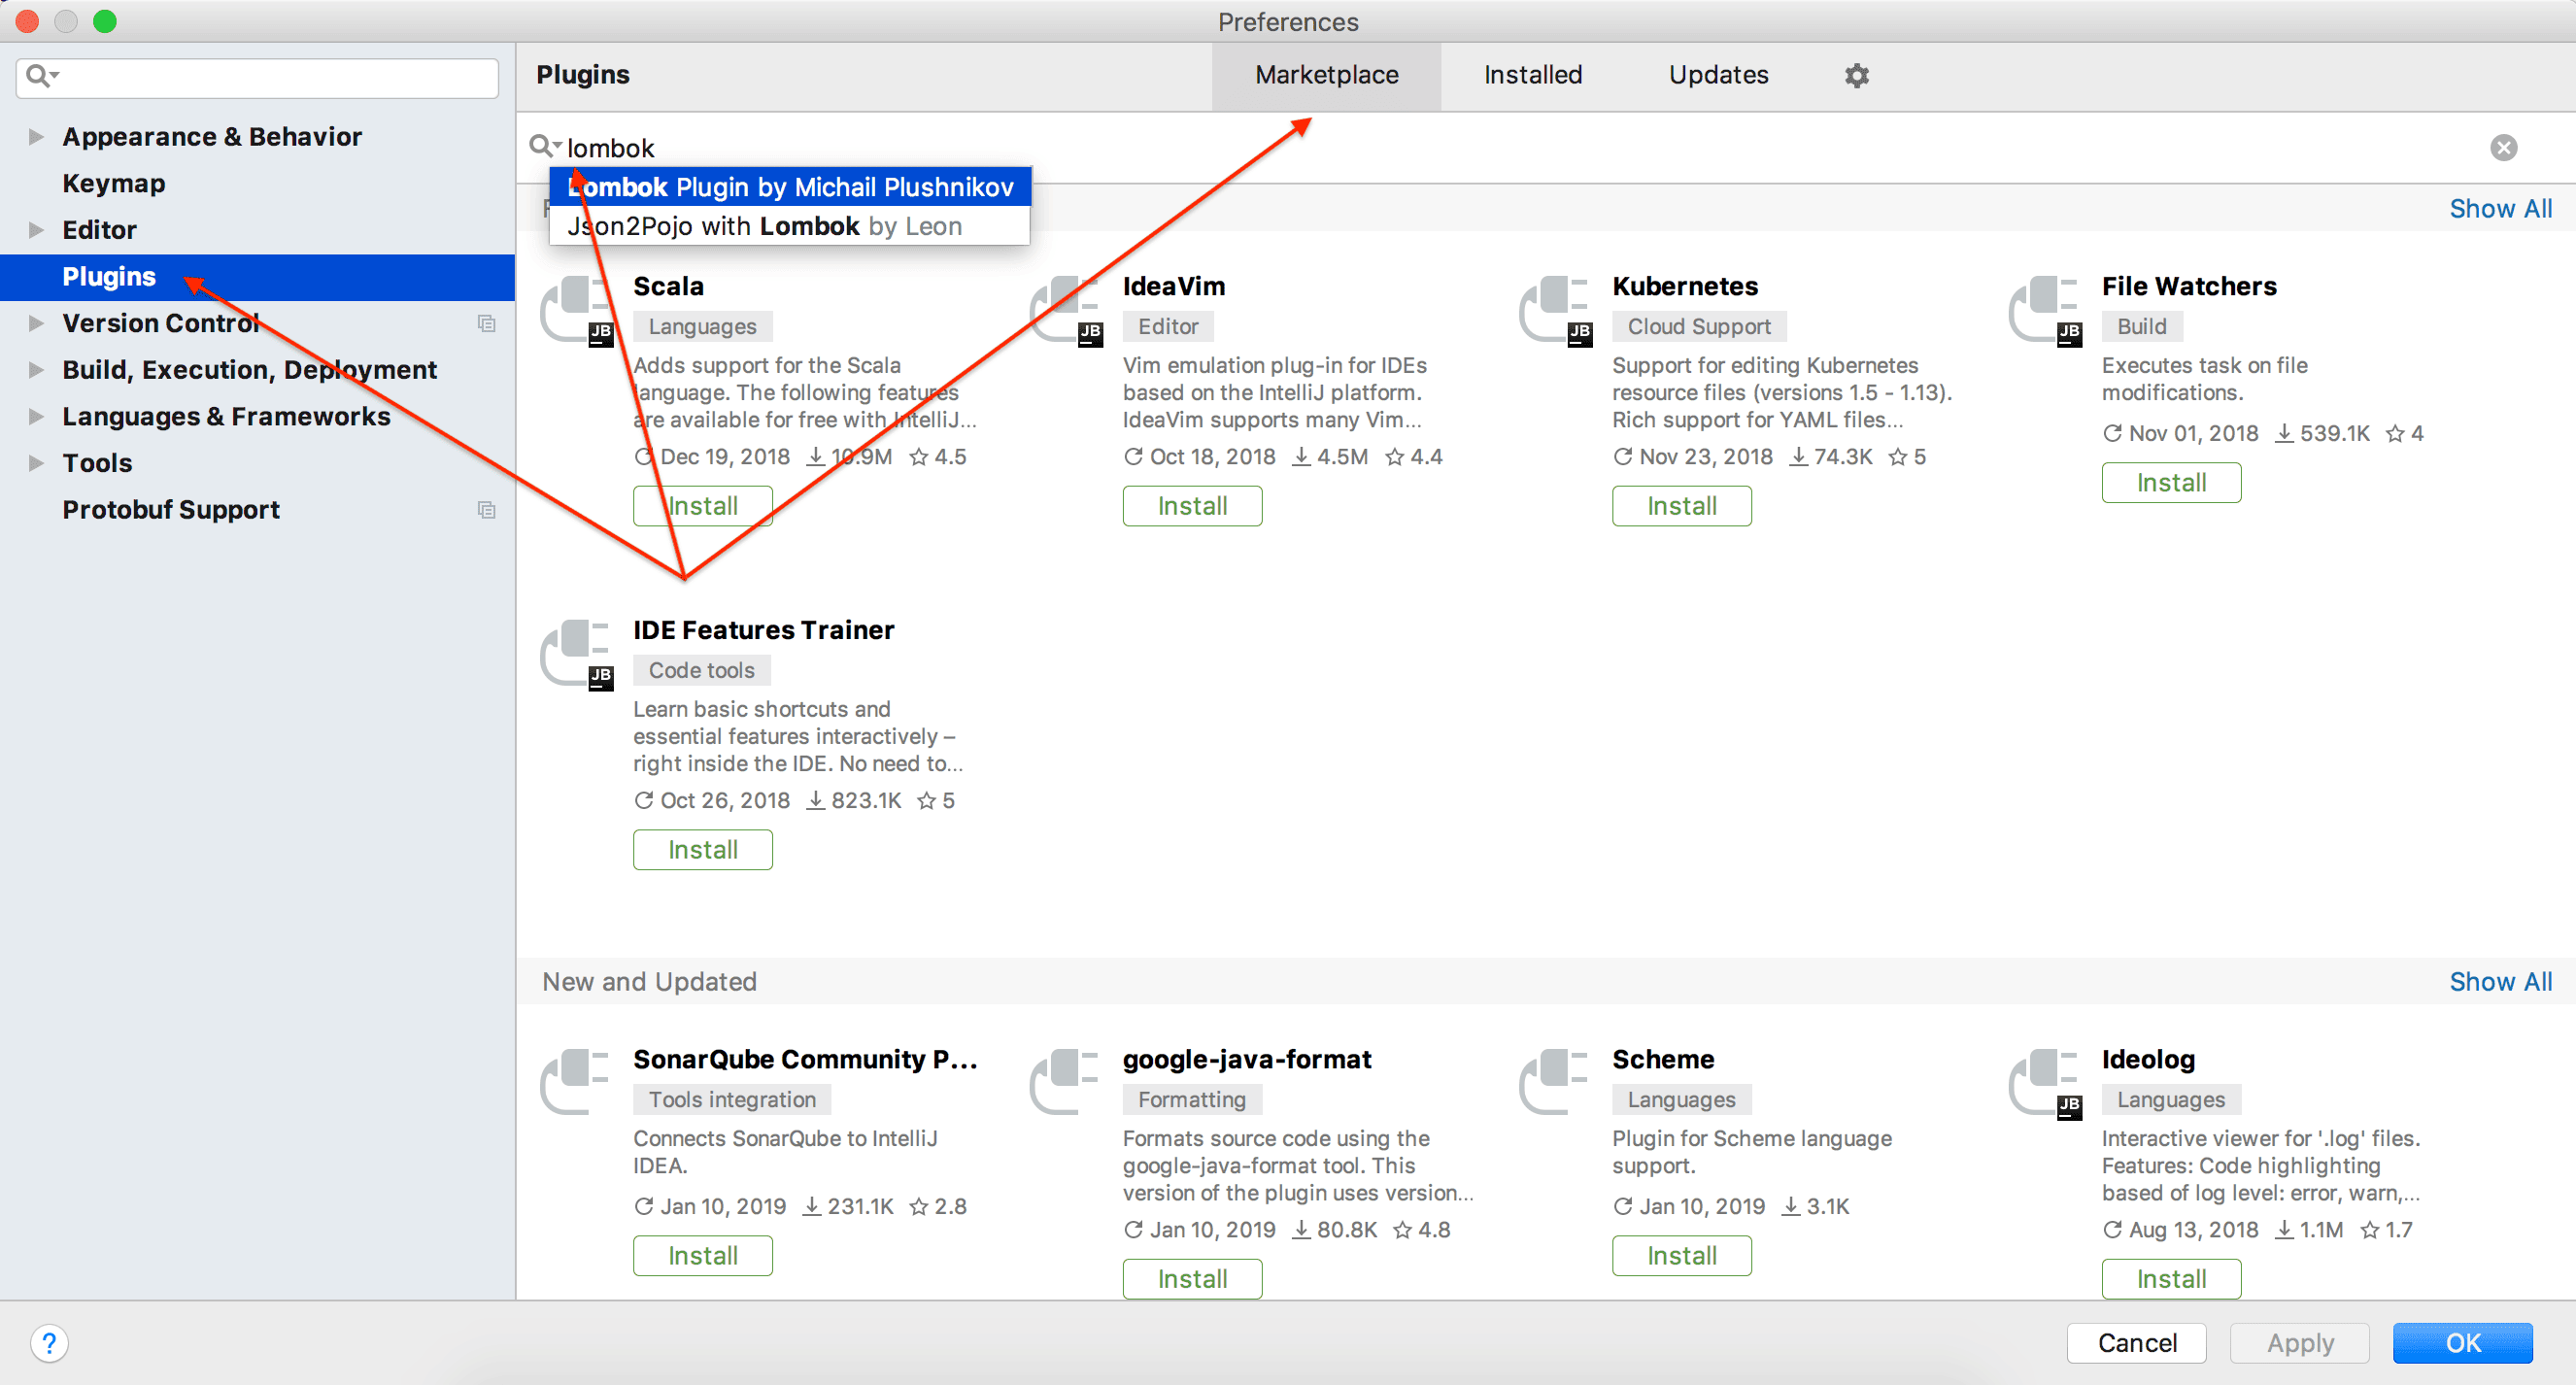
We need to go to the Preferences | Plugins, open the Marketplace tab, type “lombok” and choose Lombok Plugin by Michail Plushnikov:
我们需要进入Preferences | Plugins,打开Marketplace标签,输入 “lombok “并选择Lombok Plugin by Michail Plushnikov。
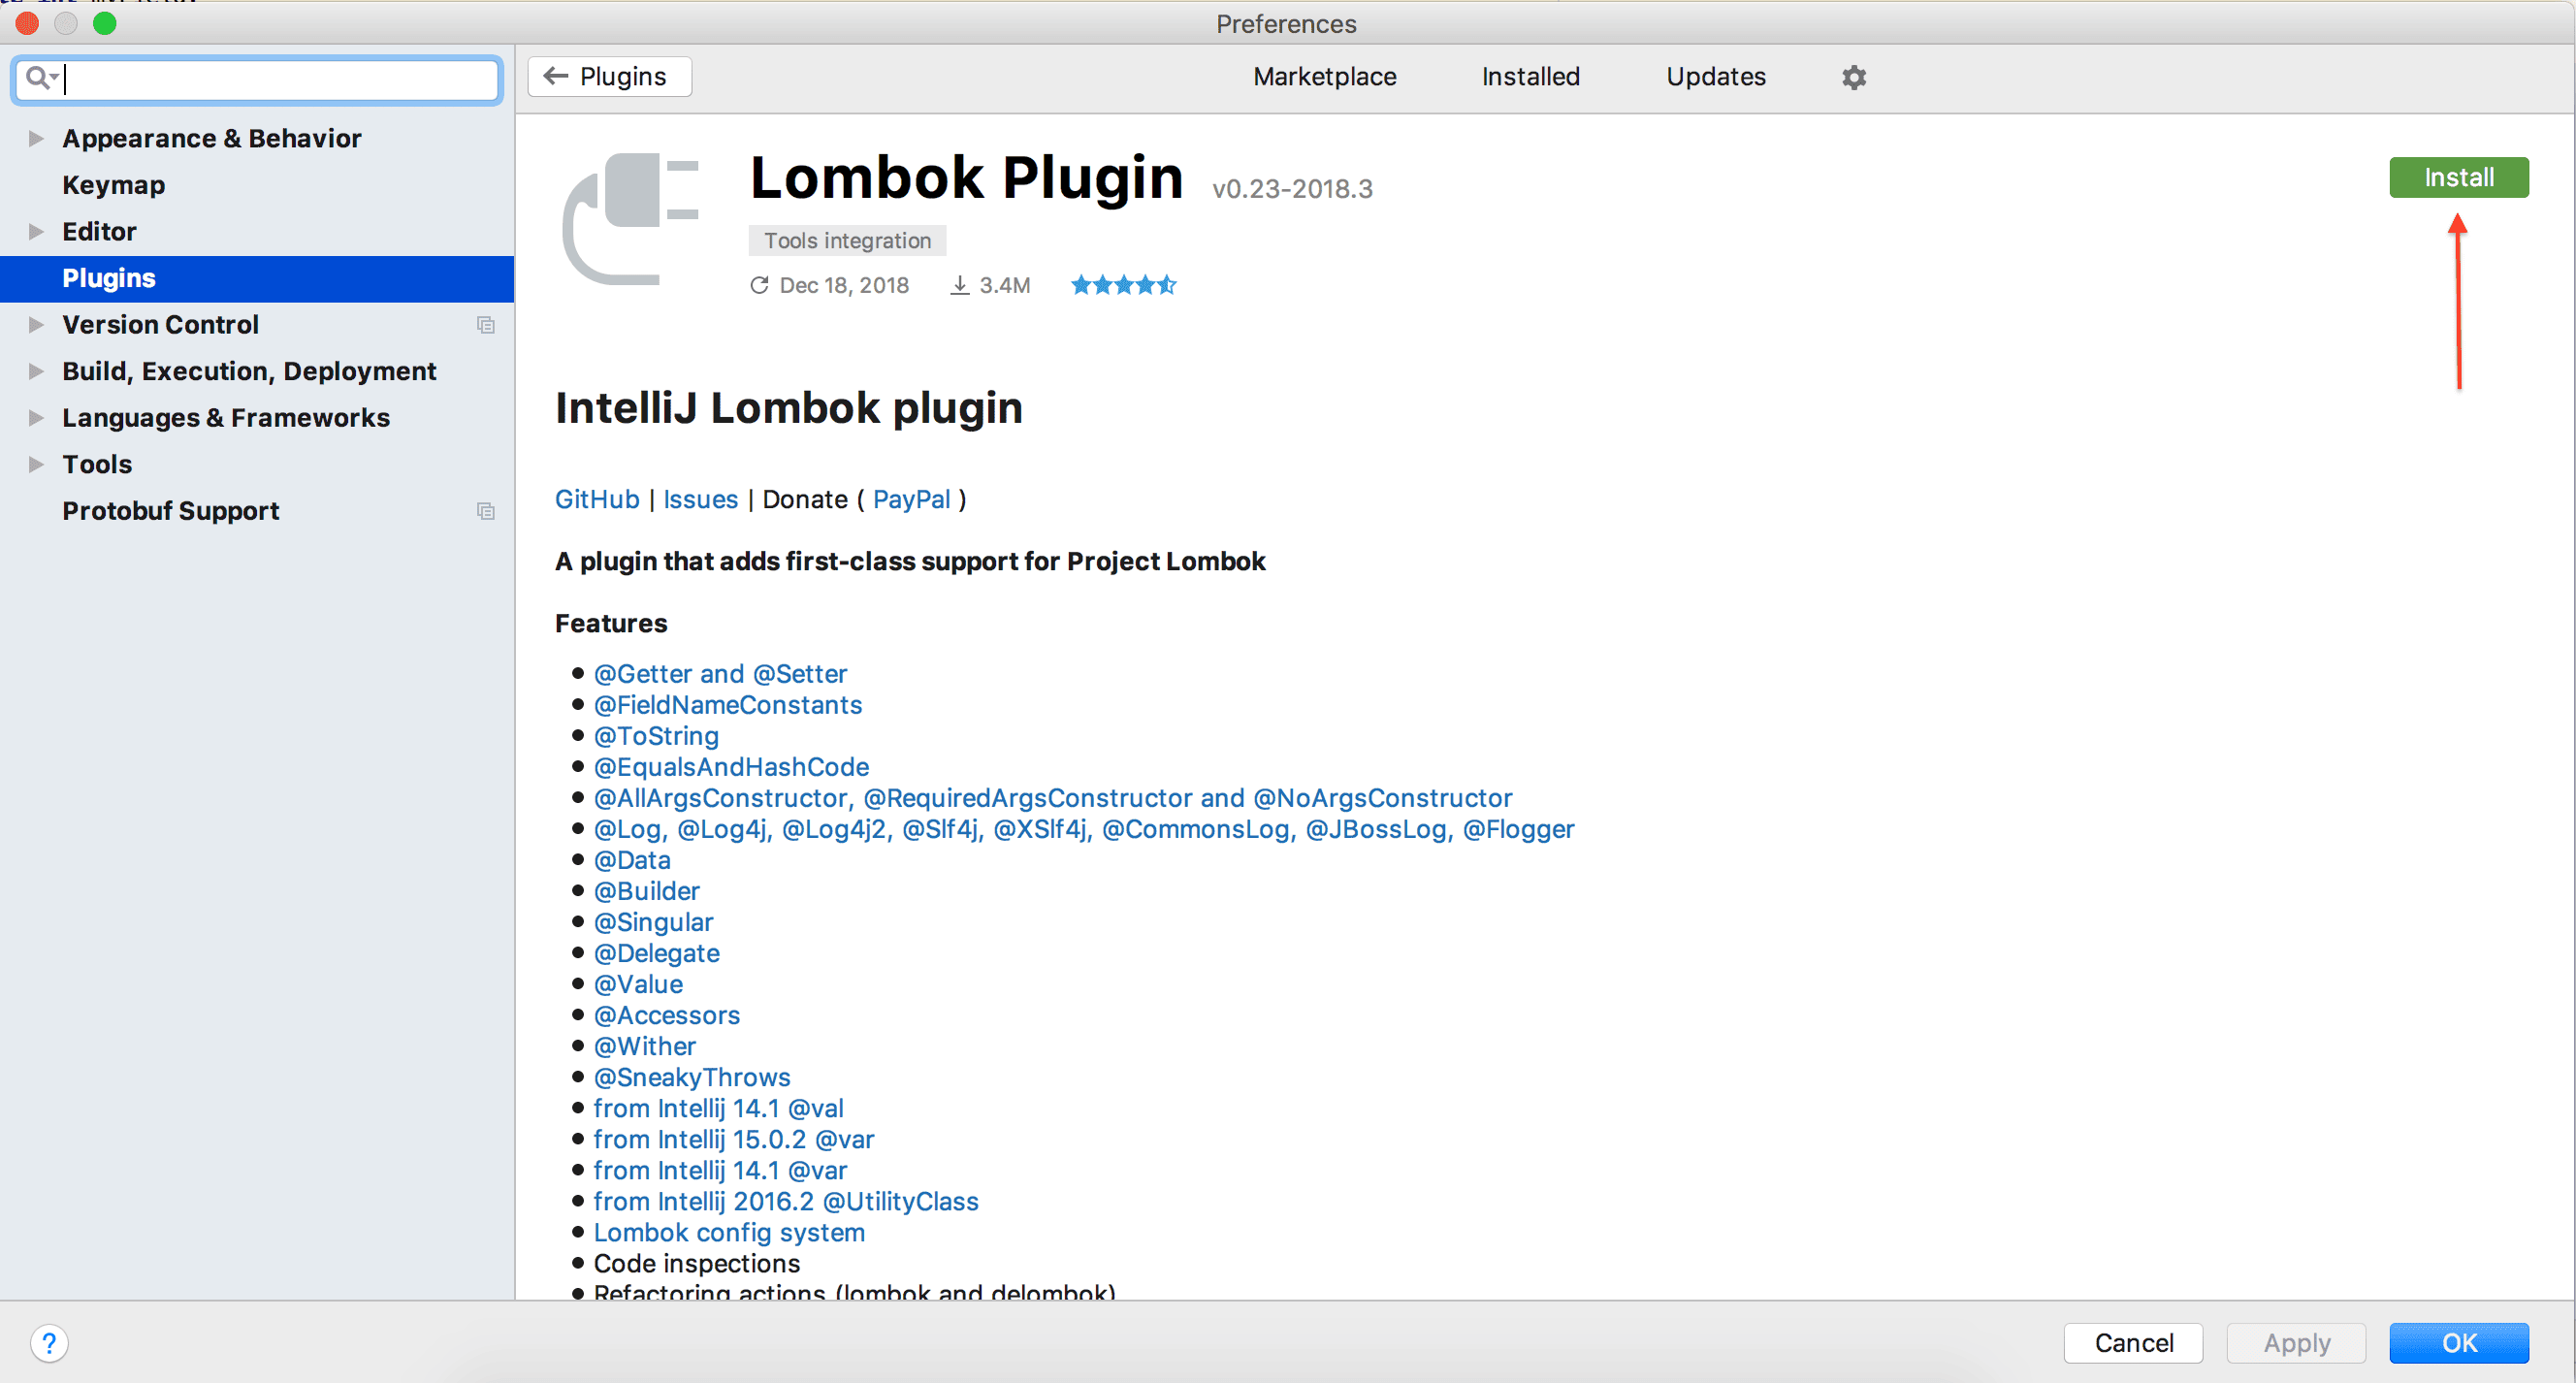
Next, click the Install button on the plugin page:
接下来,点击插件页面上的安装按钮。
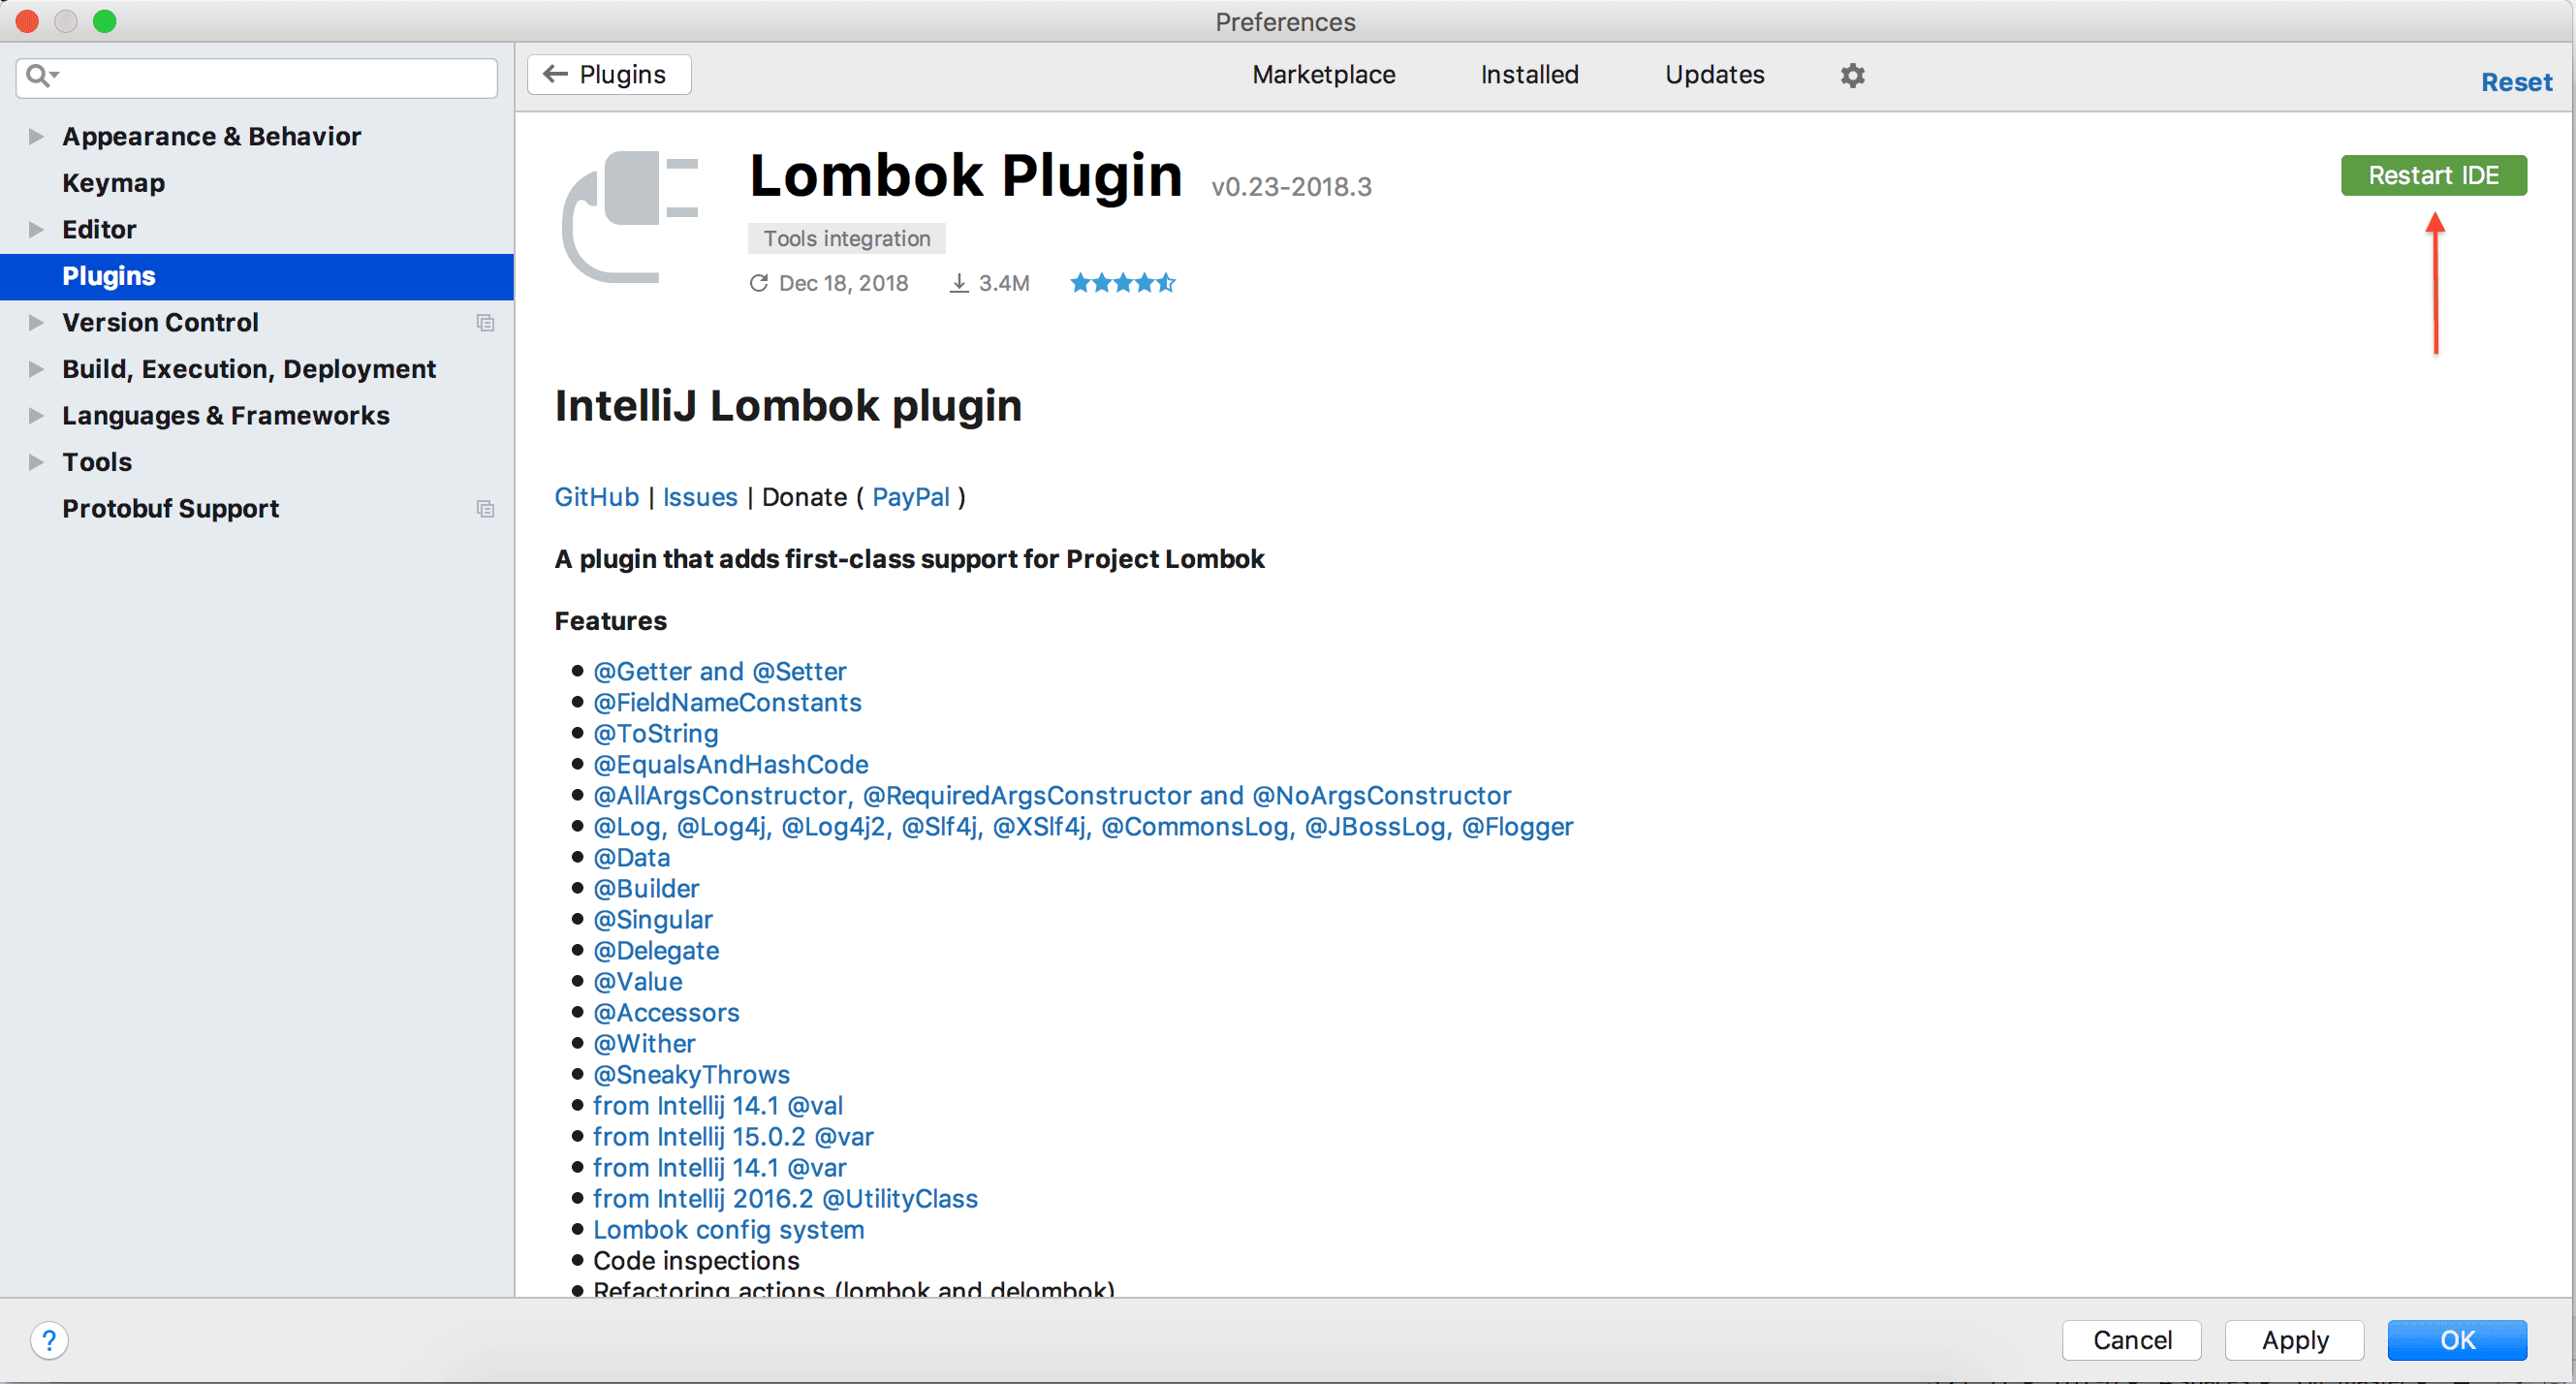
After the installation, click the Restart IDE button:
安装完成后,点击重新启动IDE按钮。
3. Lombok in Eclipse
3.日蚀中的Lombok
If we’re using Eclipse IDE, we need to get the Lombok jar first. The latest version is located on Maven Central.
如果我们使用Eclipse IDE,我们需要先获得Lombok jar。最新版本位于Maven中心。
For our example, we’re using lombok-1.18.4.jar.
对于我们的例子,我们使用的是lombok-1.18.4.jar。
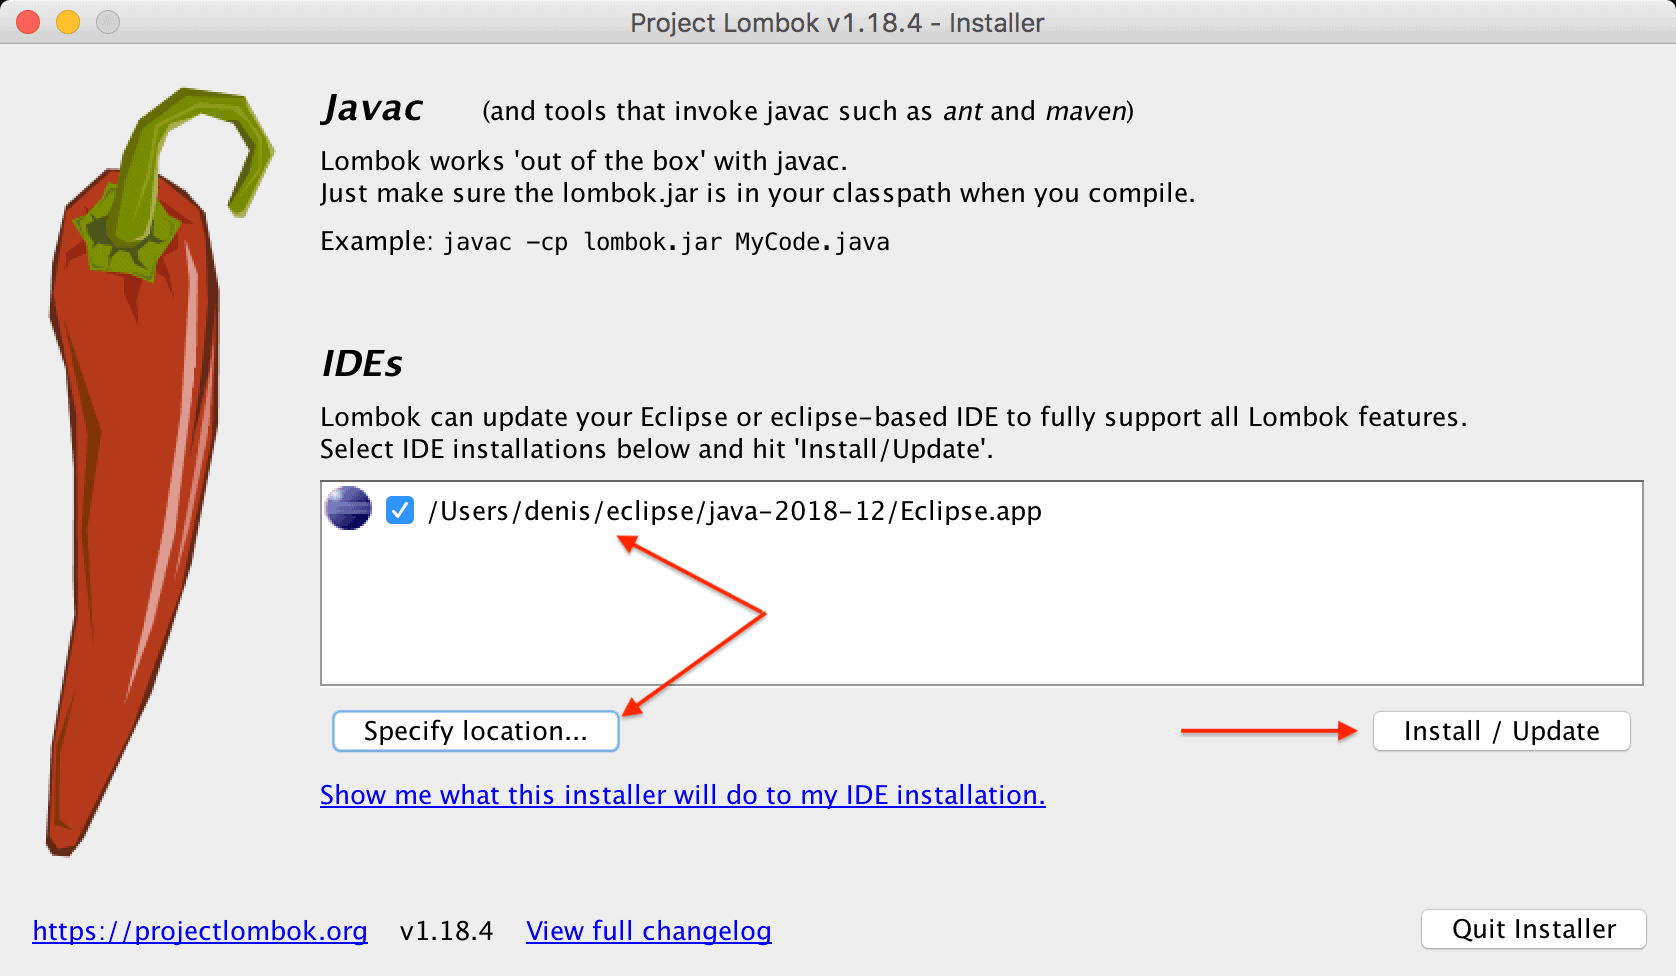
Next, we can run the jar via java -jar command, and an installer UI will open. This tries to automatically detect all available Eclipse installations, but it’s also possible to specify the location manually.
接下来,我们可以通过java -jar命令来运行这个jar,一个安装程序UI就会打开。这将尝试自动检测所有可用的Eclipse安装,但也可以手动指定位置。
Once we’ve selected the installations, we press the Install/Update button:
一旦我们选择了安装,我们按下安装/更新按钮。
If the installation is successful, we can exit the installer.
如果安装成功,我们可以退出安装程序。
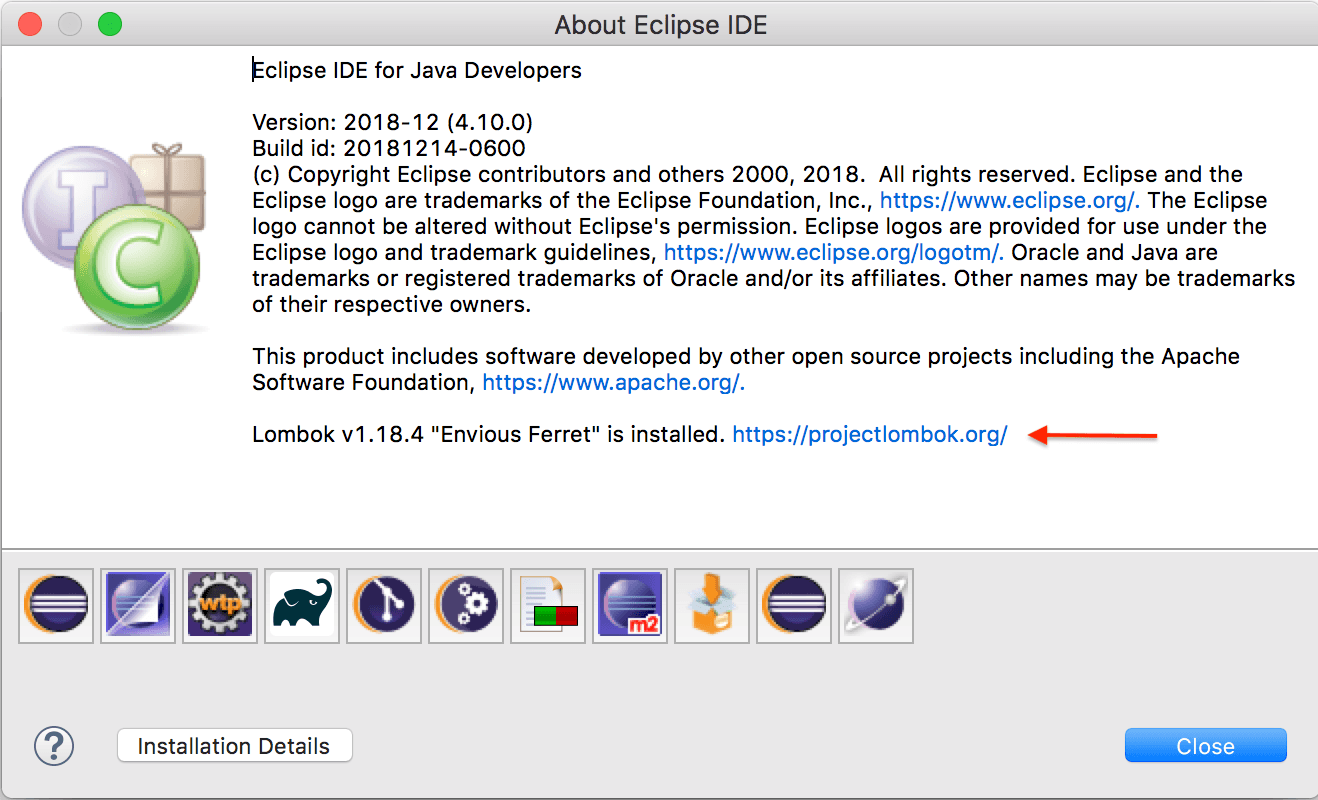
After installing the plugin, we need to restart the IDE and ensure that Lombok is correctly configured. We can check this in the About dialog:
安装完该插件后,我们需要重新启动IDE,并确保Lombok配置正确。我们可以在About对话框中检查。
4. Adding Lombok to the Compile Classpath
4.将Lombok添加到编译类路径中
The last remaining part is to ensure that Lombok binaries are on the compiler classpath. Using Maven, we can add the dependency to the pom.xml:
最后剩下的部分是确保Lombok二进制文件在编译器的classpath上。使用Maven,我们可以在pom.xml中添加该依赖项。
<dependencies>
    <dependency>
        <groupId>org.projectlombok</groupId>
        <artifactId>lombok</artifactId>
        <version>1.18.20</version>
        <scope>provided</scope>
    </dependency>
</dependencies>
The most recent version is located on Maven Central.
最新的版本位于Maven Central。
Everything should be fine now. The source code should be shown without errors in the IDE, correctly compiled and executed:
现在一切都应该正常了。源代码应该在IDE中没有错误地显示,正确地编译和执行。
public class UserIntegrationTest {

    @Test
    public void givenAnnotatedUser_thenHasGettersAndSetters() {
        User user = new User();
        user.setFirstName("Test");
        assertEquals(user.gerFirstName(), "Test");
    }

    @Getter @Setter
    class User {
        private String firstName;
    }
}
5. Conclusion
5.结论
Lombok does a great job of reducing Java verbosity and covering boilerplate stuff under the hood. In this article, we checked how to configure the tool for the two most popular Java IDEs.
Lombok在减少Java的冗长语言方面做得很好,并且覆盖了引擎盖下的模板东西。在这篇文章中,我们检查了如何为两个最流行的Java IDE配置该工具。
The source code for the examples is available over on GitHub.
这些例子的源代码可以在GitHub上找到over。
