1. Overview
1.概述
In this tutorial, let’s explore two methods to extract data from Apache JMeter and write it into an external file.
在本教程中,让我们探讨从Apache JMeter中提取数据并将其写入外部文件的两种方法。
2. Setting up a Basic JMeter Script
2.设置一个基本的JMeter脚本
Let’s now start by creating a basic JMeter script. Let’s create a Thread Group with a single thread (this is the default when creating a Thread Group):
现在让我们开始创建一个基本的JMeter脚本。让我们创建一个只有一个线程的Thread Group(这是创建Thread Group时的默认值)。

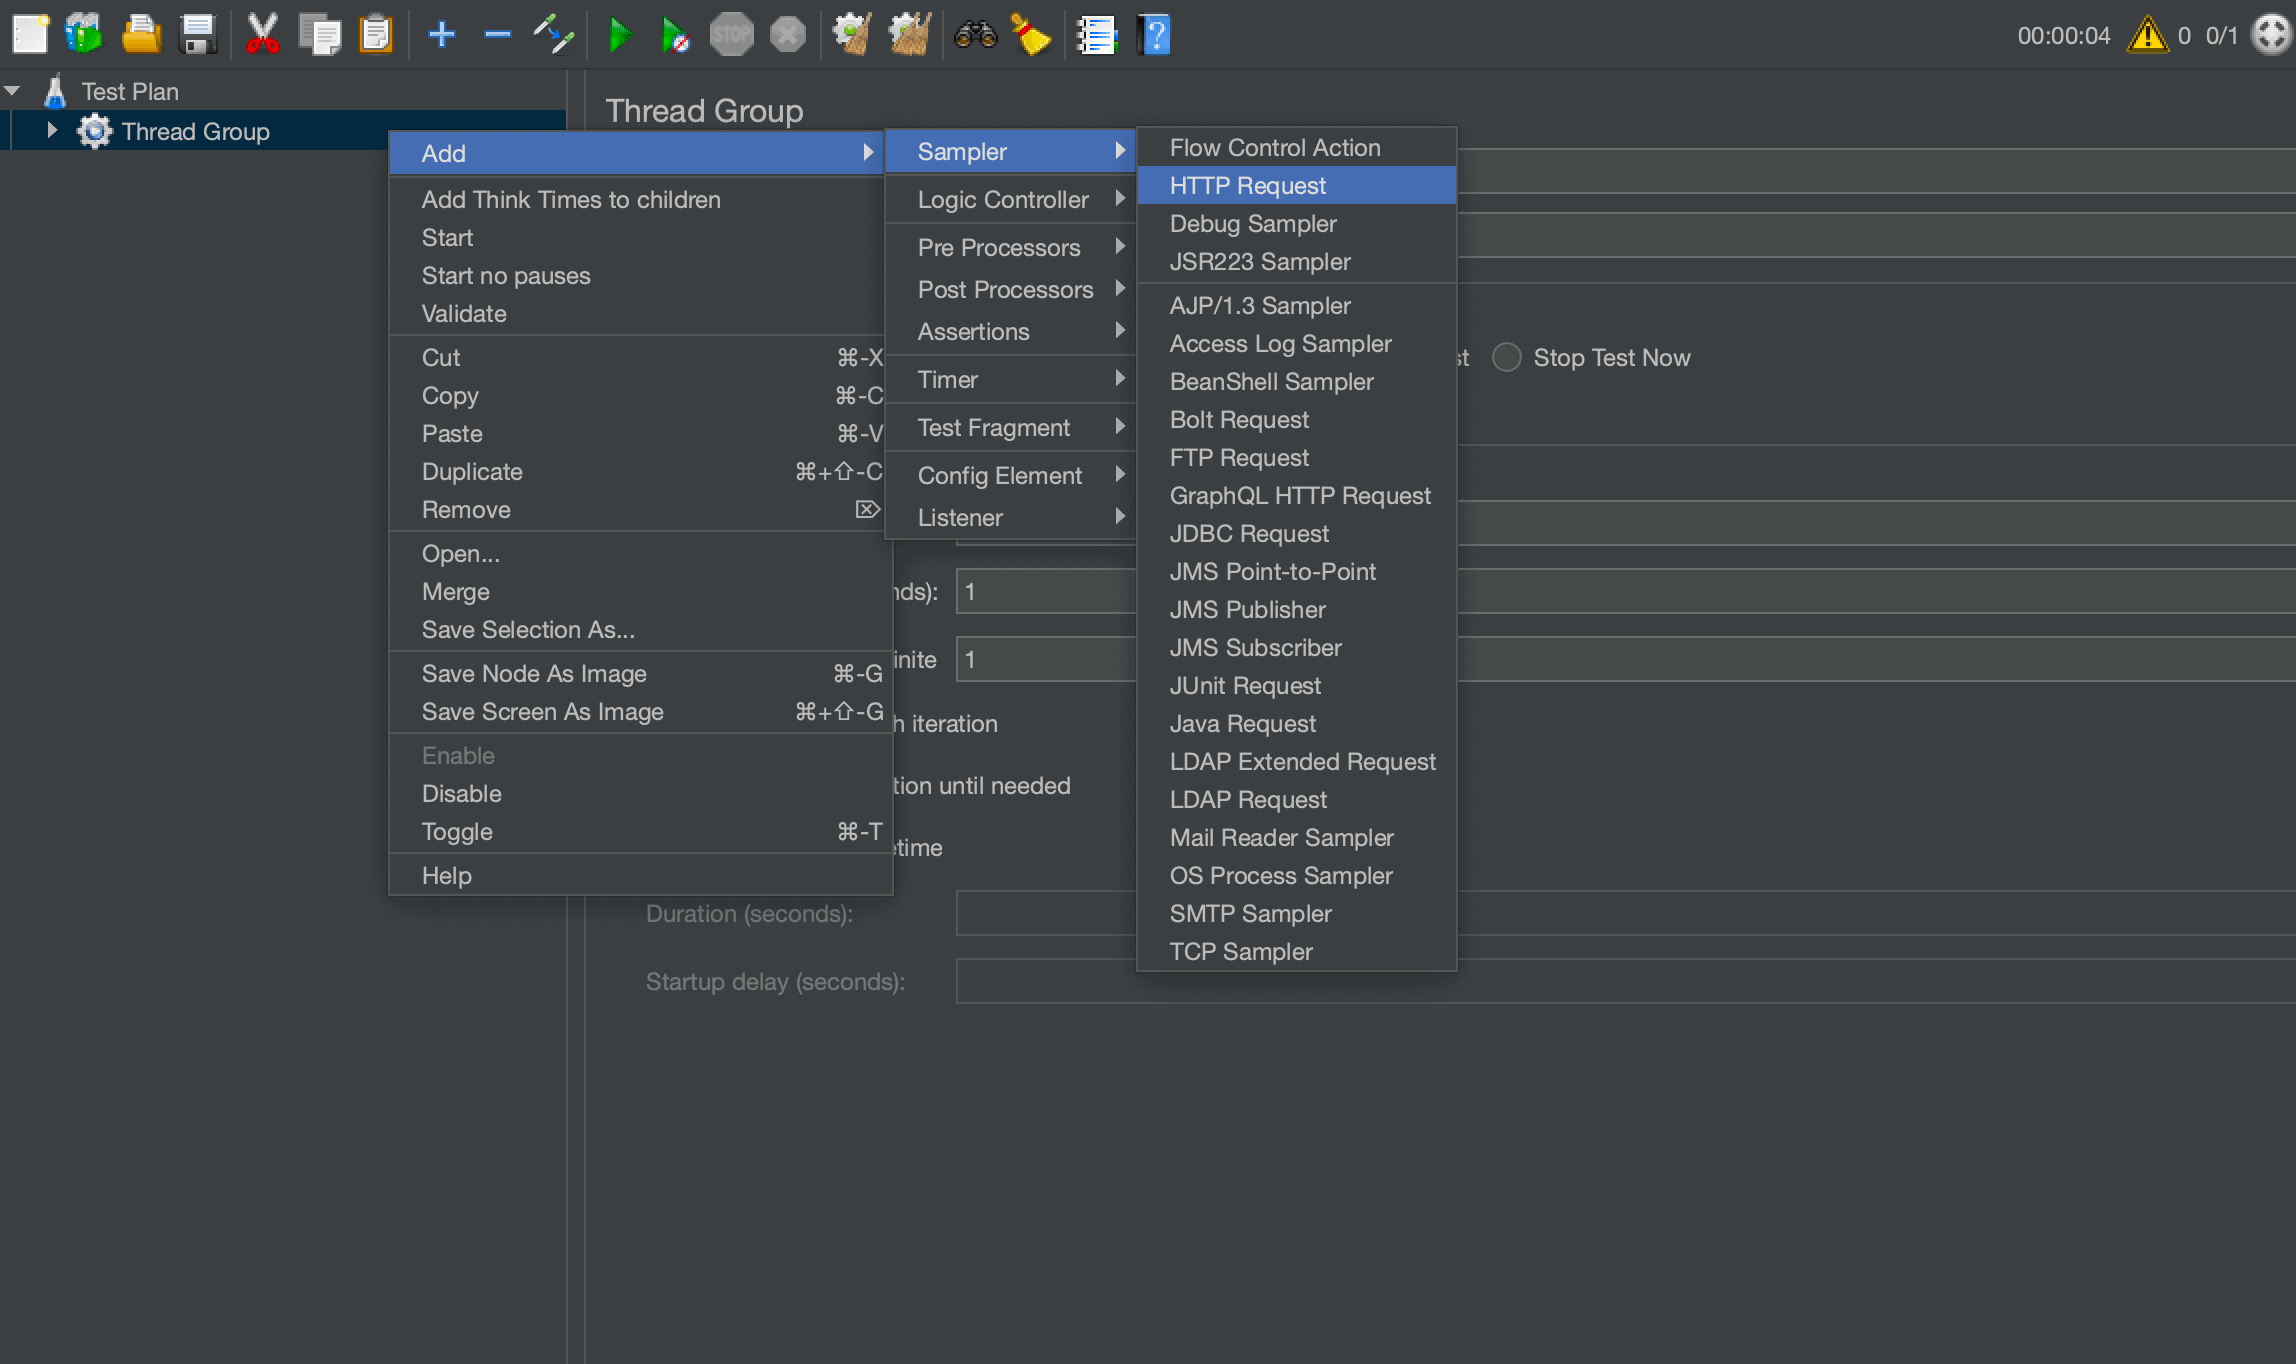
Within this Thread Group, let’s now create an HTTP Sampler:
在这个线程组中,我们现在来创建一个HTTP采样器。
Let’s set up our HTTP Sampler to call an API running on localhost. We can start by defining the API with a simple REST controller:
让我们来设置我们的HTTP Sampler来调用运行在localhost上的API。我们可以先用一个简单的REST控制器来定义该API。
@RestController
public class RetrieveUuidController {

    @GetMapping("/api/uuid")
    public Response uuid() {
        return new Response(format("Test message... %s.", UUID.randomUUID()));
    }
}
In addition, let’s also define the Response instance that is returned by our controller as referenced above:
此外,让我们也定义一下Response 实例,如上所述,它将由我们的控制器返回。
public class Response {
    private Instant timestamp;
    private UUID uuid;
    private String message;

    // getters, setters, and constructor omitted
}
Let’s now use this to test our JMeter script. By default, this will run on port 8080. If we’re unable to use port 8080, then we’ll need to update the Port Number field in the HTTP Sampler accordingly.
现在让我们用它来测试我们的JMeter脚本。默认情况下,这将在8080端口运行。如果我们不能使用8080端口,那么我们就需要更新HTTP采样器中的端口号字段,以适应。
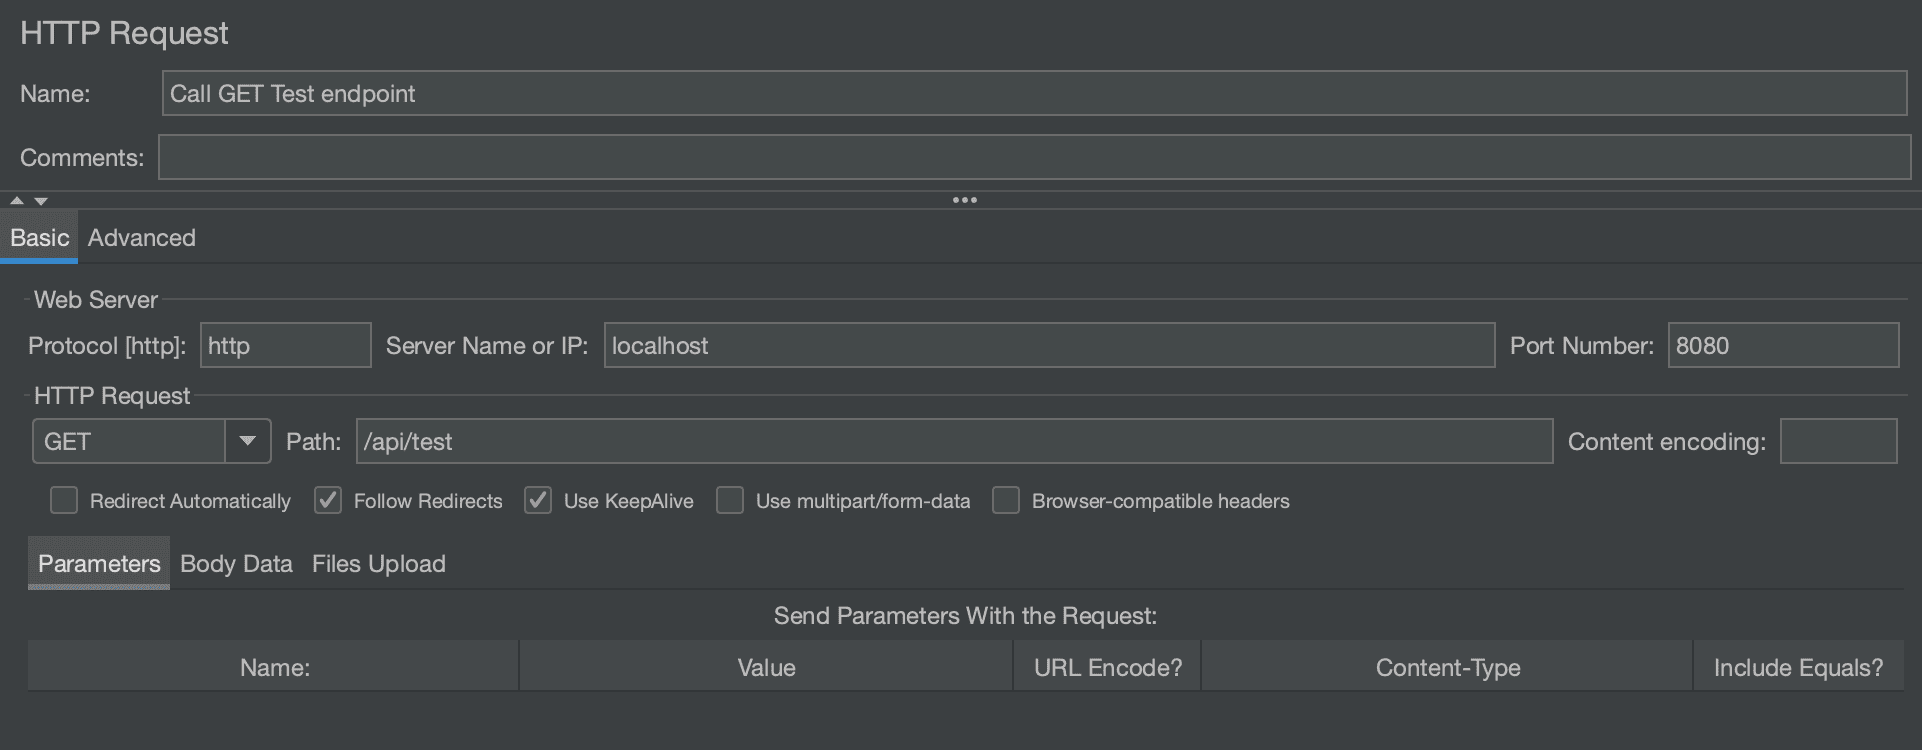
The HTTP Sampler request should look like this:
HTTP采样器请求应该看起来像这样。
3. Writing the Extracted Output Using a Listener
3.使用监听器编写提取的输出结果
Next, let’s use a listener of type Save Responses to a file to extract the data we want to a file:
接下来,让我们使用一个Save Responses to a file类型的监听器来提取我们想要的数据到一个文件。
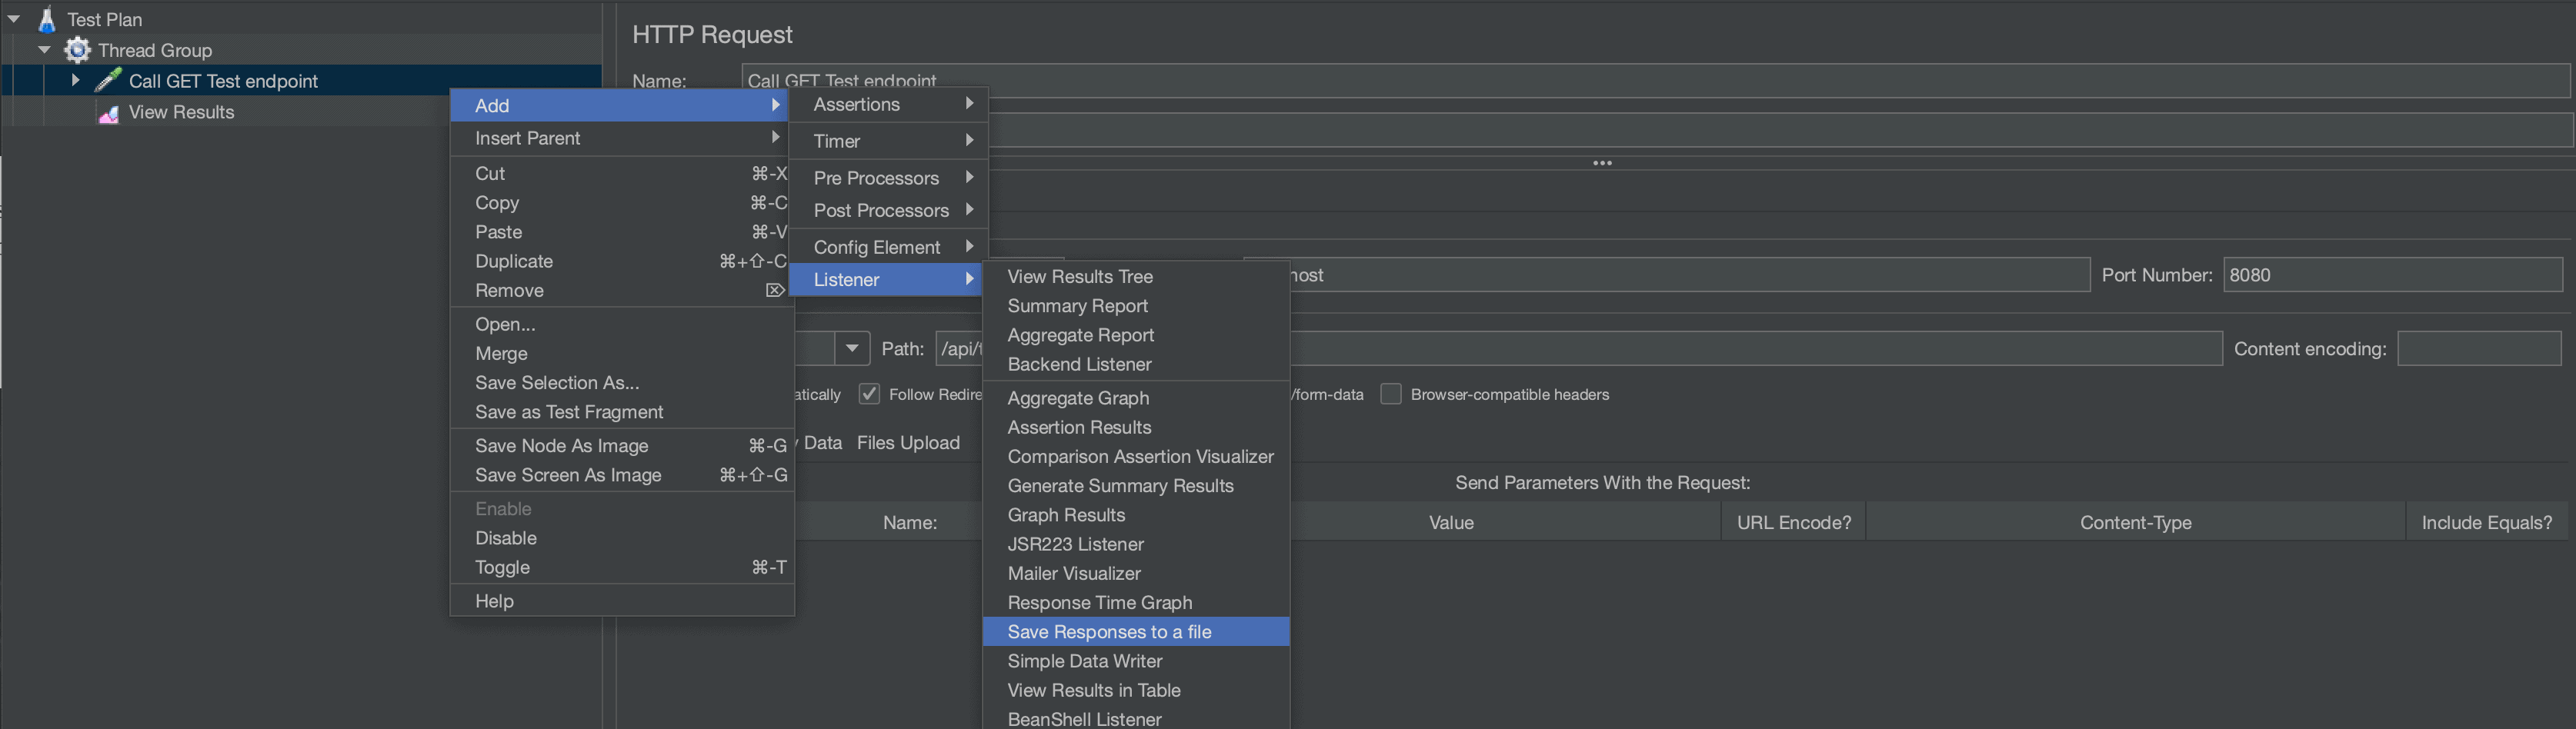
Using this listener is convenient but doesn’t allow much flexibility in what we can extract to a file. For our case, this will produce a JSON file that is saved to the location where JMeter is currently running (though the path can be configured in the Filename Prefix field).
使用这个监听器很方便,但在我们可以提取到文件的内容方面没有多少灵活性。对于我们的情况,这将产生一个JSON文件,保存在JMeter当前运行的位置(尽管可以在Filename Prefix字段中配置路径)。
4. Writing the Extracted Output Using PostProcessor
4.使用PostProcessor编写提取的输出
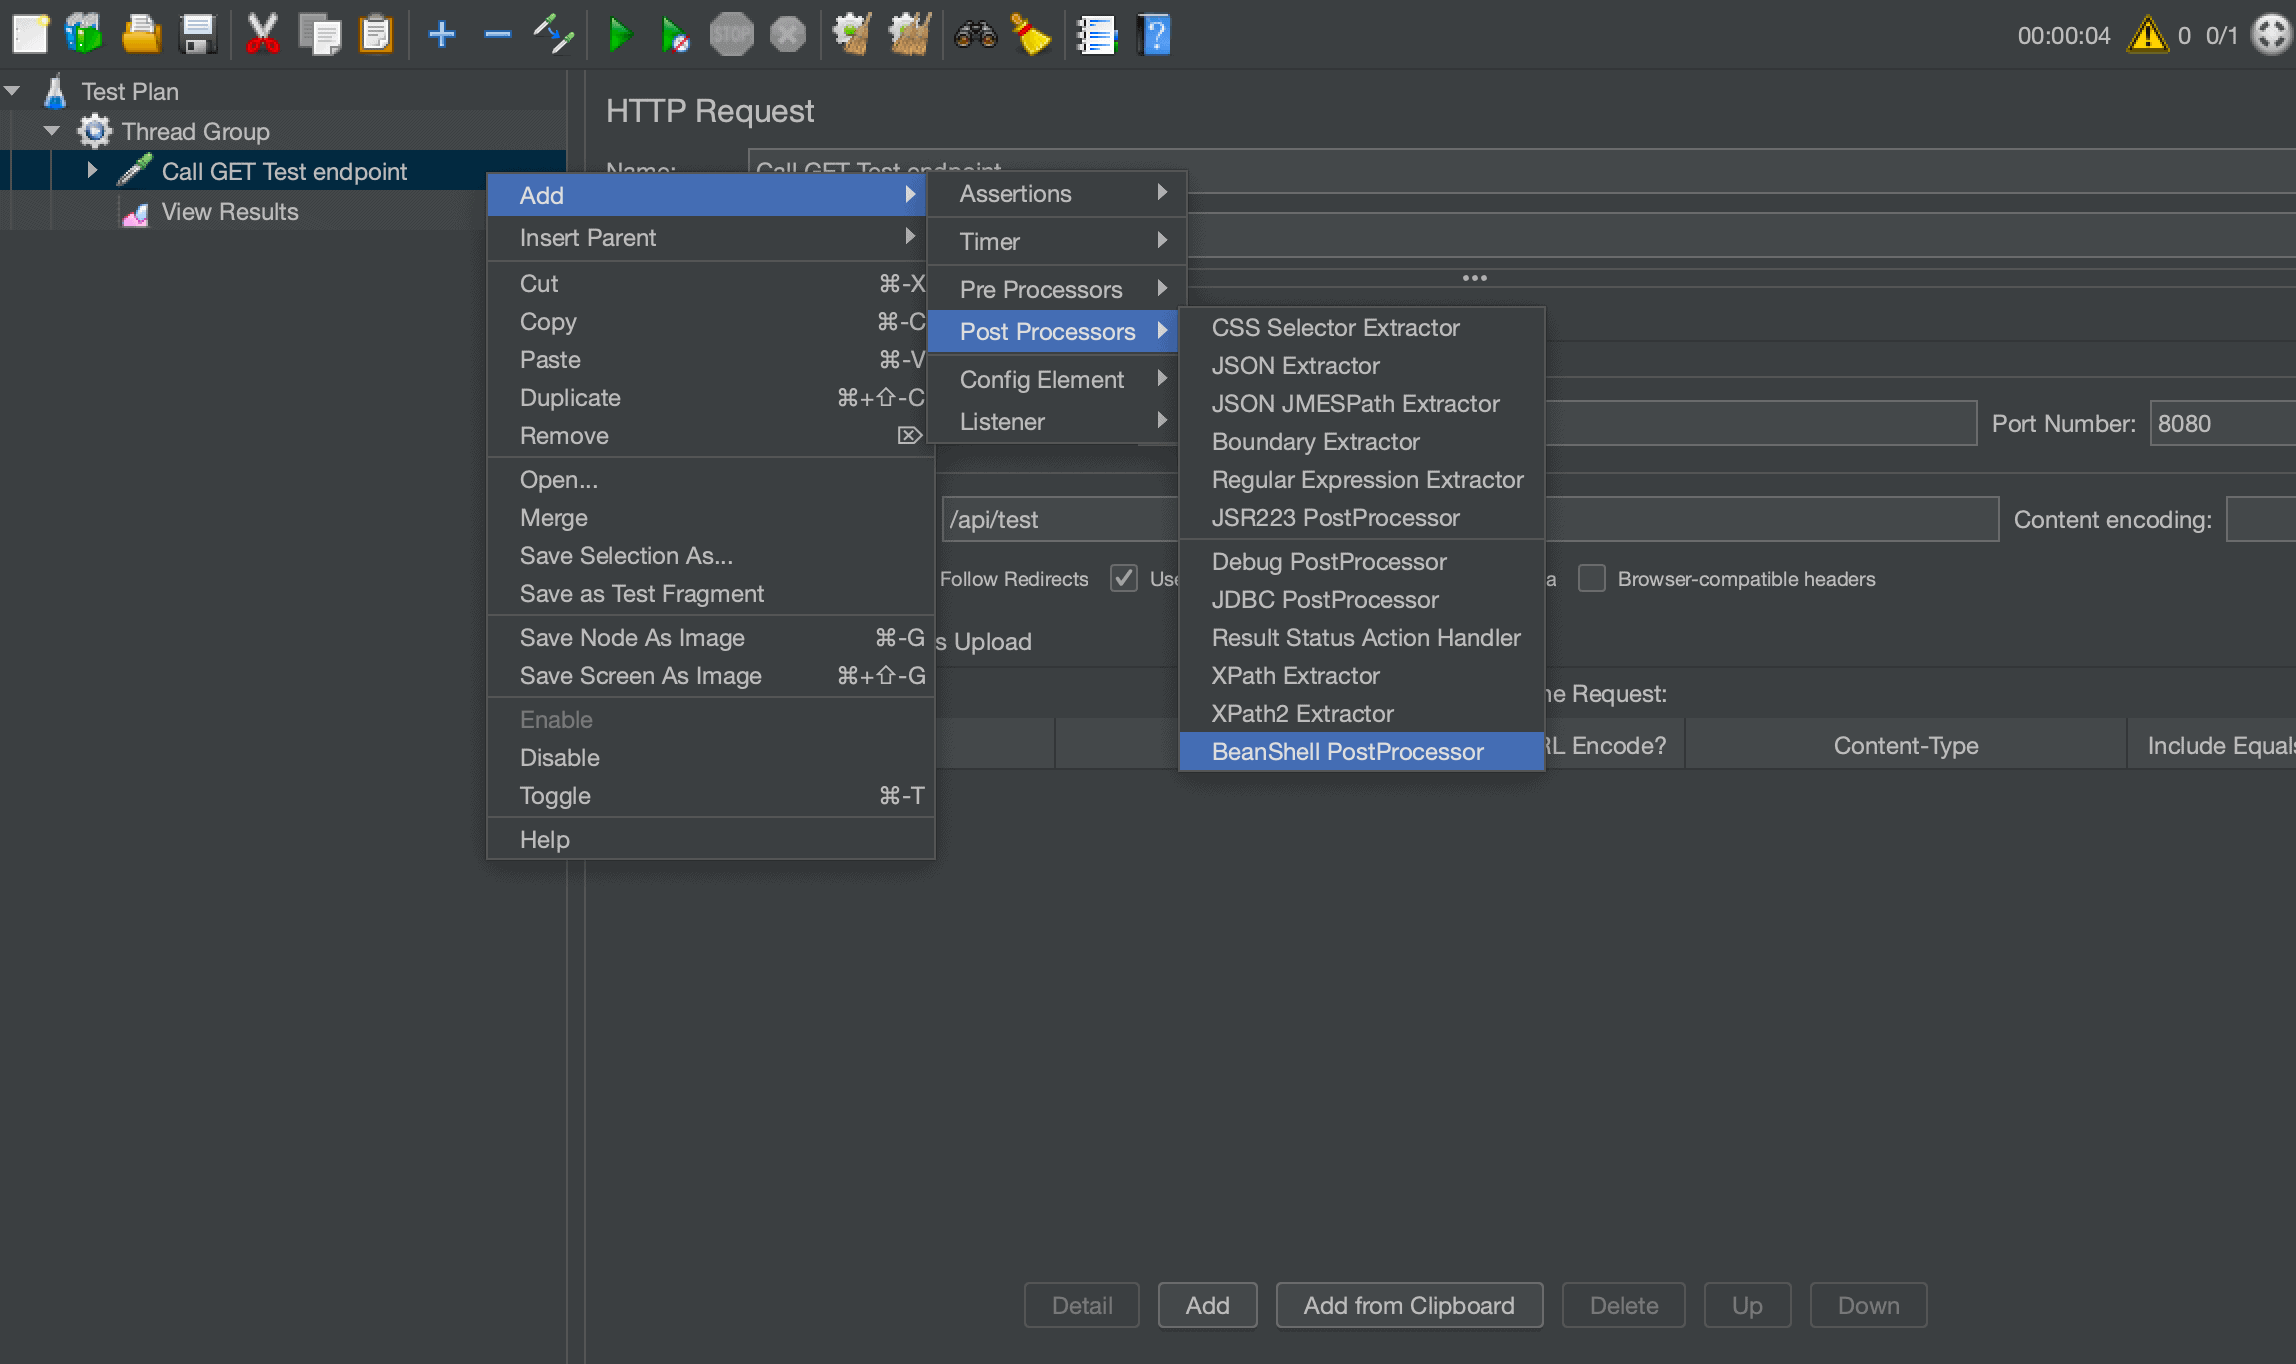
Another way we can extract data to a file is by creating a BeanShell PostProcessor. BeanShell is a very flexible scripting processor that allows us to write our script using Java code as well as make use of some built-in variables provided by JMeter.
另一种我们可以提取数据到文件的方法是创建一个BeanShell PostProcessor。BeanShell是一个非常灵活的脚本处理器,它允许我们使用Java代码编写脚本,以及利用JMeter提供的一些内置变量。
BeanShell can be used for a variety of different use cases. In this case, let’s create a BeanShell post-processor and add a script to help us extract some data to a file:
BeanShell可用于各种不同的用例。在这种情况下,让我们创建一个BeanShell后处理器,并添加一个脚本来帮助我们提取一些数据到一个文件中。
Let’s now add the following script to the Script section:
现在让我们在Script部分添加以下脚本。
FileWriter fWriter = new FileWriter("/<path>/result.txt", true);
BufferedWriter buff = new BufferedWriter(fWriter);

buff.write("data");

buff.close();
fWriter.close();
We now have a simple script that will output the string data to a file called result. One important point to note here is the 2nd parameter of the FileWriter constructor. This must be set to true so that our BeanShell will append to the file instead of overwriting it. This is very important when using multiple threads in JMeter.
我们现在有了一个简单的脚本,它将把字符串data输出到一个名为result的文件中。这里需要注意的一点是FileWriter构造器的第二个参数。这必须设置为true,这样我们的BeanShell就会追加到文件中,而不是覆盖它。 这在JMeter中使用多线程时非常重要。
Next, we want to extract something more meaningful to our use case. Let’s make use of the ctx variable that is provided by JMeter. This will allow us to access the context held by our single thread that is running the HTTP request.
接下来,我们要提取对我们的用例更有意义的东西。让我们利用JMeter提供的ctx变量。这将允许我们访问正在运行HTTP请求的单线程所持有的上下文。
From ctx, let’s get the response code, response headers, and response body and extract these to our file:
从ctx中,让我们得到响应代码、响应头和响应体,并将这些提取到我们的文件中。
buff.write("Response Code : " + ctx.getPreviousResult().getResponseCode());
buff.write(System.getProperty("line.separator"));
buff.write("Response Headers : " + ctx.getPreviousResult().getResponseHeaders());
buff.write(System.getProperty("line.separator"));
buff.write("Response Body : " + new String(ctx.getPreviousResult().getResponseData()));
If we want to gather specific field data and write it to our file, we can make use of the vars variable. It is a map we can use in PostProcessors to store and retrieve string data.
如果我们想收集特定的字段数据并将其写入我们的文件,我们可以利用vars变量。这是一个我们可以在PostProcessors中使用的映射,以存储和检索字符串数据。
For this more complex example, let’s create another PostProcessor before our file extractor. This will do a search through the JSON response from the HTTP request:
对于这个更复杂的例子,让我们在文件提取器之前创建另一个PostProcessor。这将在HTTP请求的JSON响应中进行搜索。
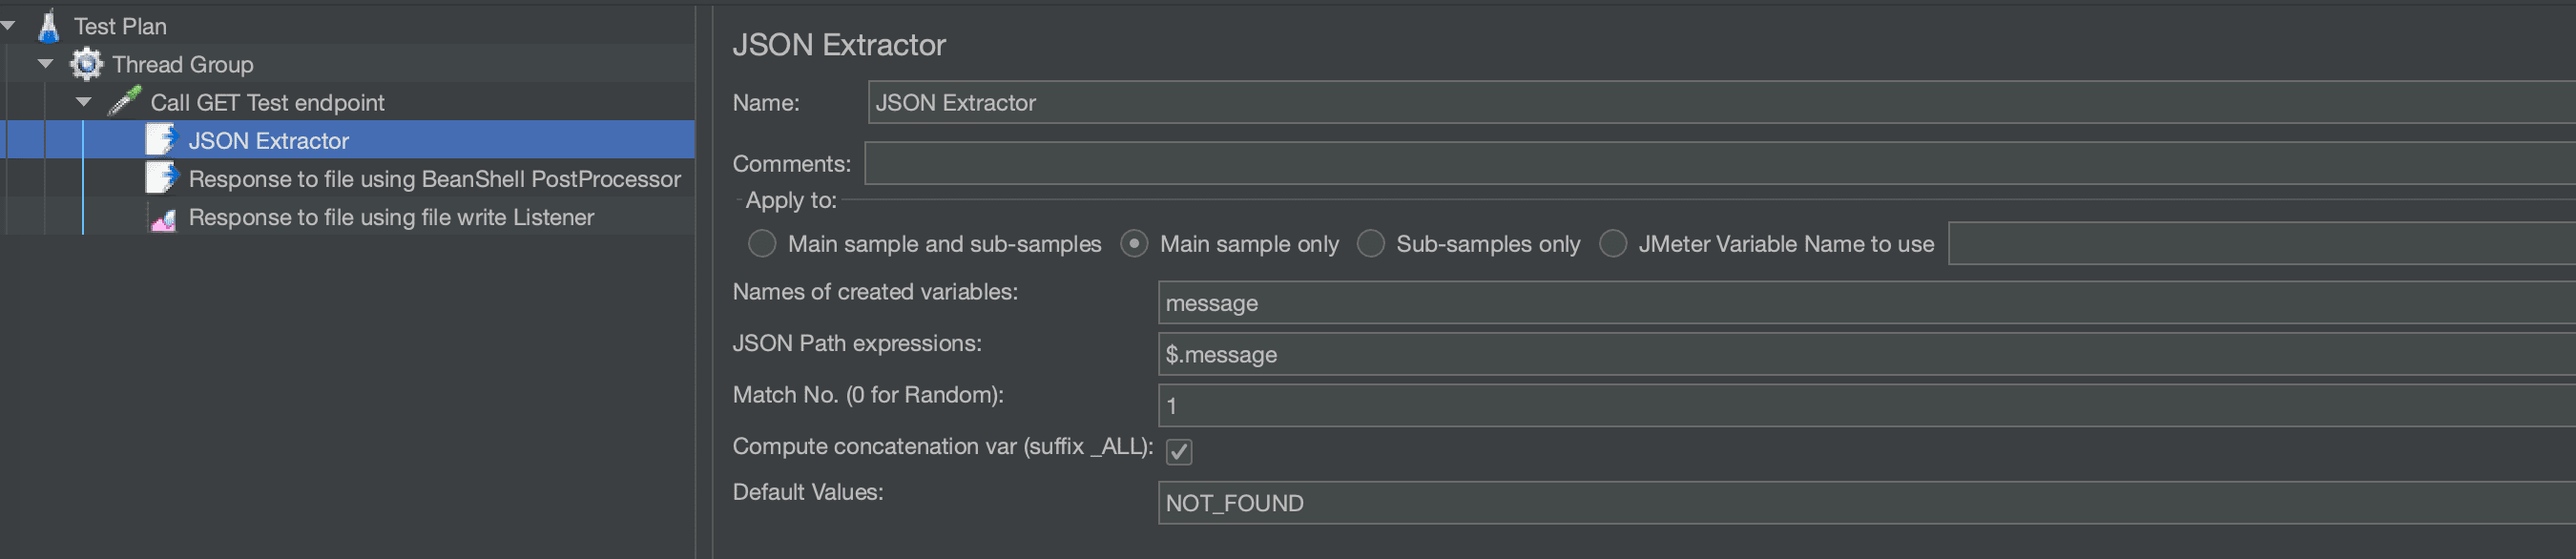
This extractor will create a variable called message. All that is left to do is to reference this variable in our file extractor to output it to our file:
这个提取器将创建一个名为message的变量。剩下的事情就是在我们的文件提取器中引用这个变量,将其输出到我们的文件中。
buff.write("More complex extraction : " + vars.get("message"));Note: We can use this approach in conjunction with other post-processors such as “Regular Expression Extractor” to gather information in a more bespoke manner.
注意:我们可以将这种方法与其他后处理程序(如 “正则表达式提取器”)结合起来使用,以便以一种更加定制的方式收集信息。
5. Conclusion
5.总结
In this tutorial, we covered how to extract data from JMeter to an external file using a BeanShell post-processor and a write listener. The JMeter Script and Spring REST application we used can be found over on GitHub.
在本教程中,我们介绍了如何使用BeanShell后处理程序和写监听器从JMeter中提取数据到外部文件。我们使用的JMeter脚本和Spring REST应用程序可以在GitHub上找到。。