1. Overview
1.概述
A good IDE is important for developer productivity. IntelliJ is currently one of the leading IDEs and supports many programming languages.
一个好的集成开发环境对开发者的生产力很重要。IntelliJ是目前领先的IDE之一,支持许多编程语言。
In this tutorial, we’ll start with some of the basic configurations in IntelliJ, focusing on the Java programming language. We’ll also list the most common shortcuts in IntelliJ for boosting developer productivity.
在本教程中,我们将从IntelliJ中的一些基本配置开始,重点介绍Java编程语言。我们还将列出IntelliJ中最常用的快捷方式,以提高开发人员的工作效率。
2. Installing IntelliJ
2.安装IntelliJ
First, we need to download and install IntelliJ for our platform. For the features that we are going to go over, either the Ultimate or Community edition will do great.
首先,我们需要下载并安装适合我们平台的 IntelliJ。对于我们将要讨论的功能,无论是终极版还是社区版都会有很好的效果。
3. Basic Project Configuration in IntelliJ
3.IntelliJ中的基本项目配置
3.1. Configuring JDK
3.1.配置JDK
IntelliJ is written in Java and comes with a packaged JRE for running the IDE.
IntelliJ是用Java编写的,并附带一个用于运行IDE的打包的JRE。。
However, we’ll need to configure IntelliJ with a JDK to do any Java development. It can be configured either globally or per project.
然而,我们需要用JDK来配置IntelliJ,以进行任何Java开发。它可以在全局或每个项目中进行配置。
First, let’s see how to configure a global JDK using the Switch IDE Boot JDK option:
首先,让我们看看如何使用Switch IDE Boot JDK选项来配置一个全局JDK。
The easiest way to find the Switch IDE Boot JDK option is from the “Find Action” wizard.
找到Switch IDE Boot JDK选项的最简单方法是通过 “查找动作 “向导。
We can get there from the Help menu or by typing Ctrl+Shift+A or Cmd+Shift+A. Usually, it will list every installed JDK and allow us to choose the desired one.
我们可以通过帮助菜单或输入Ctrl+Shift+A或Cmd+Shift+A来获得。通常情况下,它将列出每个已安装的JDK,并允许我们选择想要的。
Next, we’ll create a new Java project.
接下来,我们将创建一个新的Java项目。
3.2. Creating a Java Project
3.2.创建一个Java项目
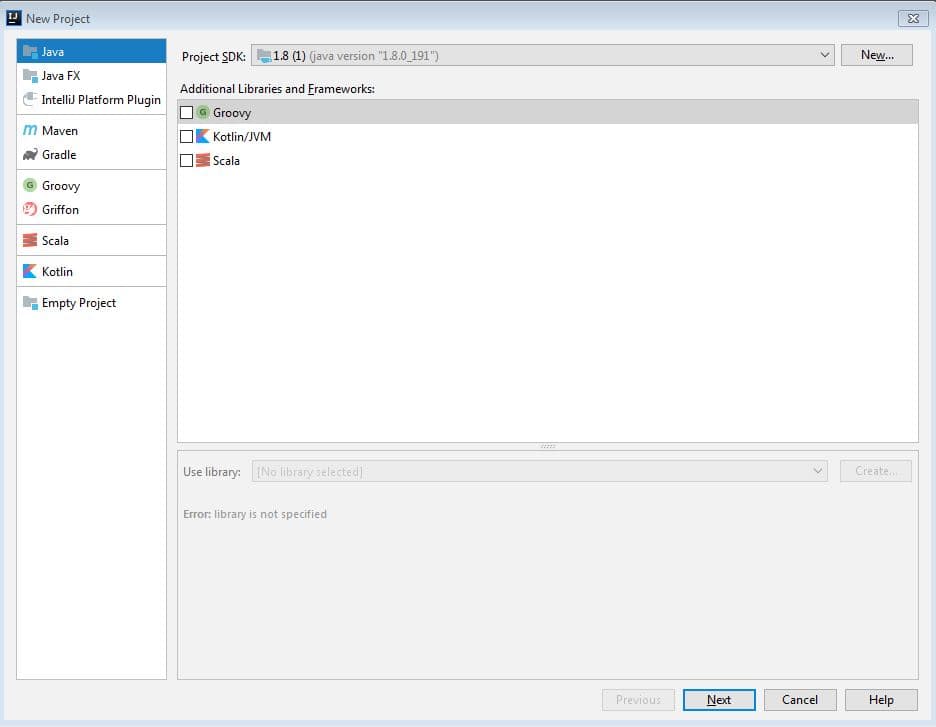
In order to create a new Java project, let’s bring up the New project wizard from File->New->Project:
为了创建一个新的Java项目,让我们从File->New->Project调出新项目向导。
Next, we’ll select Java in order to create a simple Java project.
接下来,我们将选择Java,以创建一个简单的Java项目。
Additionally, this window allows us to configure a project-specific JDK if we want to.
此外,如果我们想的话,这个窗口允许我们配置一个项目专用的JDK。
On the next screen, IntelliJ provides template projects like Hello World as a starting point, but let’s just select Finish and get started.
在下一个屏幕上,IntelliJ提供了像Hello World这样的模板项目作为起点,但我们还是选择完成并开始吧。
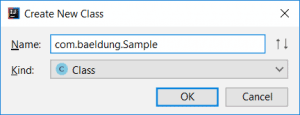
Now that we have a basic project structure, we can add a Java class by selecting the src folder and then either right-clicking or typing Alt+Insert. We’ll select Java Class from this menu and get a dialog where we can give it a name:
现在我们有了一个基本的项目结构,我们可以通过选择src文件夹,然后右击或输入Alt+Insert来添加一个Java类。我们将从这个菜单中选择Java Class,并得到一个对话框,我们可以给它一个名字。
3.3. Configuring Libraries
3.3.配置图书馆
A Java project usually depends on a lot of external or third-party libraries. And while Maven and Gradle are the typical go-tos for managing this, let’s take a look at how to do this natively in IntelliJ.
一个Java项目通常需要依赖大量的外部或第三方库。虽然Maven和Gradle是管理这一问题的典型做法,但让我们看看如何在IntelliJ中实现这一目标。
Let’s say we want to use the StringUtils API from the commons-lang3 library.
假设我们想使用commons-lang3库的StringUtilsAPI。
Like the JDK settings, we can also configure libraries at global and project level. Global libraries are shared by all projects. Both global and project specific libraries can be added by accessing the Project Structure dialog (File->Project Structure).
与JDK的设置一样,我们也可以在全局和项目层面配置库。全局库是由所有项目共享的。通过访问项目结构对话框(文件->项目结构),可以添加全局和项目特定的库。
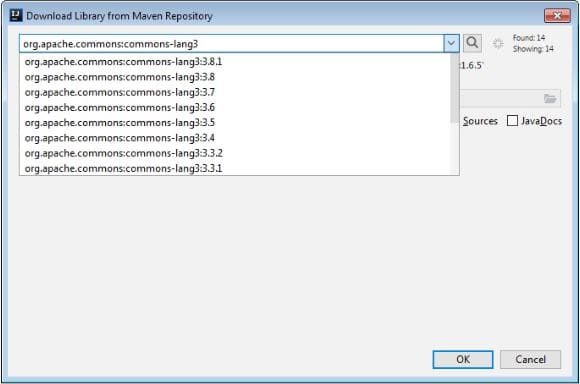
In order to add the library, we must download it first. Normally, the common source for any external library is the Maven Repository. Hence, IntelliJ allows us to download it directly from any pre-configured Maven repository. And of course, if no repository is configured, it will search the Maven Central.
为了添加库,我们必须先下载它。通常情况下,任何外部库的共同来源是Maven仓库。因此,IntelliJ允许我们直接从任何预先配置的Maven仓库下载。当然,如果没有配置仓库, 它将搜索Maven Central。。
IntelliJ will now download the commons-lang3.jar into a specified folder. Along with that, it also adds it to the project classpath.
IntelliJ现在将下载commons-lang3.jar到一个指定的文件夹中。与此同时,它还会将其添加到项目的classpath中。
Of course, remember that adding a library this way is IntelliJ-specific and not as portable as more robust options. It’s convenient, though, for simple projects.
当然,请记住,以这种方式添加一个库是IntelliJ特有的,不像更强大的选项那样可以移植。不过,对于简单的项目来说,这很方便。
In the next section, we’ll use this library and execute a simple Java program.
在下一节,我们将使用这个库并执行一个简单的Java程序。
4. Running or Debugging an Application
4.运行或调试一个应用程序
4.1. Run/Debug Configurations
4.1.运行/调试配置
Before we run our Java program, let’s add some code to the class we added earlier. We’ll simply use the added library and call StringUtils.reverse() to reverse any text given as a program argument:
在我们运行我们的Java程序之前,让我们为我们先前添加的类添加一些代码。我们将简单地使用添加的库并调用StringUtils.reverse() 来反转任何作为程序参数的文本。
System.out.println(StringUtils.reverse(args[0]));Now, there are 2 approaches for running this main method in IntelliJ. Firstly, we can simply run Ctrl + Shift +F10 or Control + Shift + R/D from the main class. IntelliJ will then create a temporary Run configuration.
现在,在IntelliJ中运行这个主方法有两种方法。首先,我们可以简单地从主类中运行Ctrl + Shift + F10 或Control + Shift + R/D。IntelliJ随后将创建一个临时的运行配置。
However, since we have to pass a String to our StringReversal application as a program argument (the args[0] part), a temporary run configuration won’t work.
然而,由于我们必须将一个字符串传递给我们的StringReversal应用程序作为程序参数(args[0] 部分),临时运行配置将无法工作。
So, we can create a permanent Run/Debug Configuration.
因此,我们可以创建一个永久的运行/调试配置。
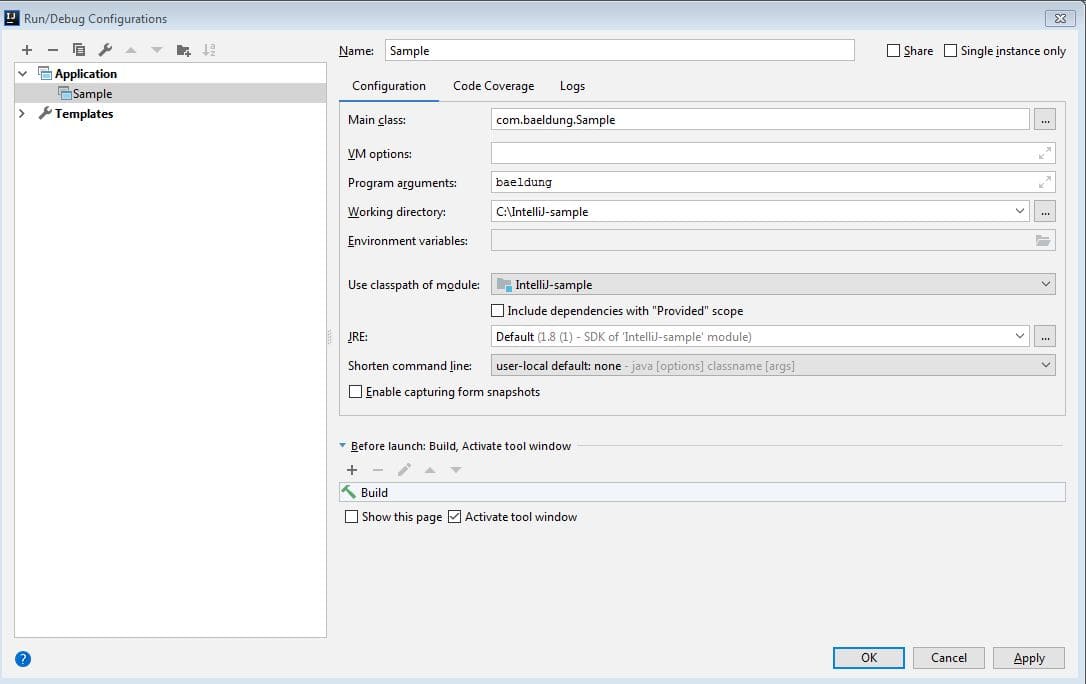
We’ll do that using the “Edit Configurations” window from the Run Navigation bar (Run->Edit Configurations):
我们将使用运行导航栏中的”编辑配置“窗口(Run->编辑配置)来实现。
Here, we specify the name of our class to run in Main Class. It needs to have a main method for this to work.
在这里,我们在Main Class中指定我们要运行的类的名字。它需要有一个主方法,这样才能发挥作用。
We’ll also pass a String – “baeldung“, in this case – as a Program Argument to our application.
我们还将传递一个字符串–“baeldung“,在这种情况下–作为程序参数传递给我们的应用程序。
And, while we won’t demo this here, we can also configure JVM options and environment variables, too, for our application.
而且,虽然我们不会在这里演示,但我们也可以为我们的应用程序配置JVM选项和环境变量。
Contrary to temporary run configurations, IntelliJ saves this configuration and allows us to execute it any time with a click of a button.
与临时运行配置相反,IntelliJ保存了该配置,并允许我们在任何时候通过点击按钮来执行它。
4.2. Debugging a Java Application
4.2.调试一个Java应用程序
IntelliJ has great support for debugging many languages. Let’s debug our String Reversal utility as an example.
IntelliJ对许多语言的调试有很好的支持。让我们以调试我们的String Reversalutility为例。
As with most IDEs, we can add a breakpoint on any line of our class from the editor by clicking on the side panel:
与大多数IDE一样,我们可以在编辑器中通过点击侧面的面板在我们的类的任何一行上添加一个断点。
Now, we can debug the class by clicking on the debug icon from the Run/Debug configuration.
现在,我们可以通过点击运行/调试配置中的调试图标来调试这个类。
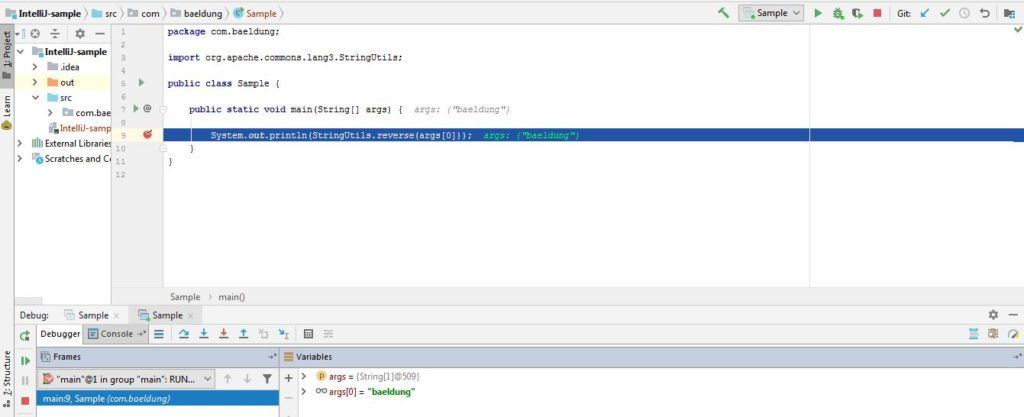
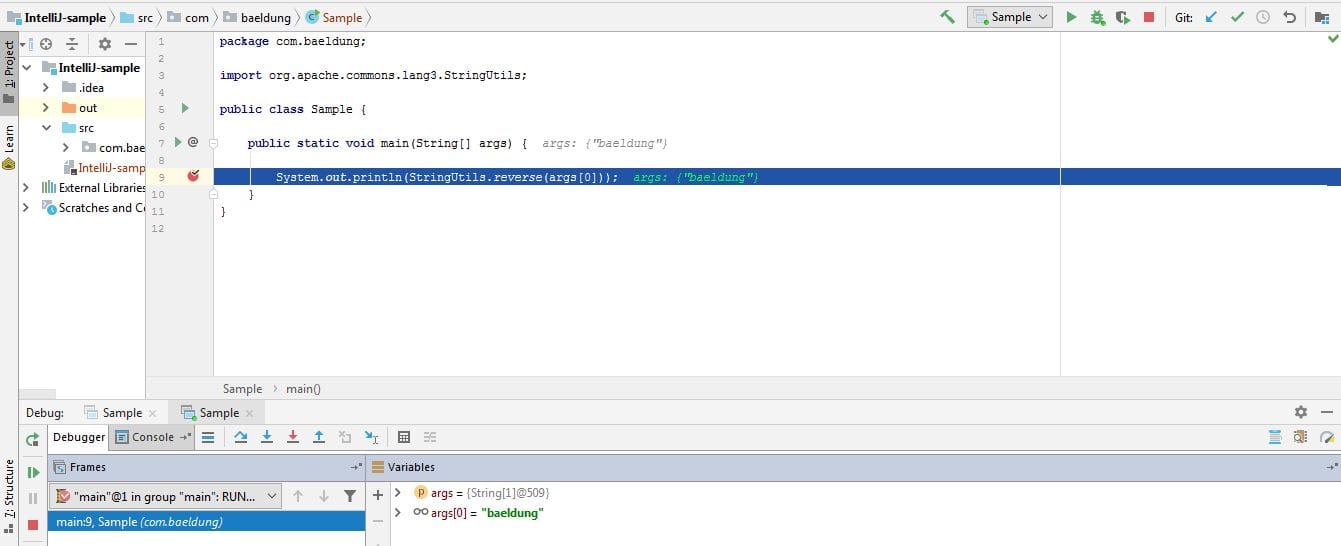
In this case, the program is suspended at line 9 as shown above, allowing us to inspect the thread stack, inspect variables or even evaluate expressions (Alt+F8 or Option/Alt + F8).
在这种情况下,程序在第9行暂停,如上图所示,允许我们检查线程堆栈,检查变量,甚至评估表达式(Alt+F8或Option/Alt+F8)。
At this point, we can either Step Into (F7) the StringUtils.reverse() method, Step Over (F8) the line or Resume Program (F9), meaning run until either the next breakpoint or until the end of the application.
在这一点上,我们可以选择Step Into (F7) StringUtils.reverse() method, Step Over (F8) the line 或者Resume Program (F9),意思是运行到下一个中断点或者直到应用程序的结束。
Usually, most IDEs allow the users to mark a line in a Java class as a breakpoint like we just used. In addition, IntelliJ allows us to configure more than just Line breakpoints. We can also do:
通常情况下,大多数IDE允许用户在Java类中标记一行作为断点,就像我们刚才使用的那样。此外,IntelliJ允许我们配置的不仅仅是行中断点。我们还可以做到。
- Temporary Breakpoint – A line breakpoint which is executed only once
- Exception Breakpoint – A breakpoint on any exception class in Java. The debugger will pause when that exception is about to be thrown
- Method Breakpoint – One that executes when entering or exiting a method
- Field Breakpoint – And one that executes when a field is modified
A breakpoint can have conditional logic, too.
一个断点也可以有条件逻辑。
We can view and configure all the breakpoints in a project in the Breakpoints dialog Run->View Breakpoints (Ctrl+Shift+F8 or Cmd+Shift+F8).
我们可以在Breakpoints对话框Run->View Breakpoints(Ctrl+Shift+F8或Cmd+Shift+F8)中查看和配置一个项目中的所有断点。
4.3. Building Artifacts
4.3.建筑艺术品
Now that we’ve tested, debugged and fixed all the issues, we are ready to ship our application. Therefore, we need to create deployable binaries for our application.
现在,我们已经测试、调试并修复了所有的问题,我们已经准备好运送我们的应用程序。因此,我们需要为我们的应用程序创建可部署的二进制文件。
We can create deployable .jar binaries in IntelliJ automatically.
我们可以在IntelliJ中自动创建可部署的.jar二进制文件。
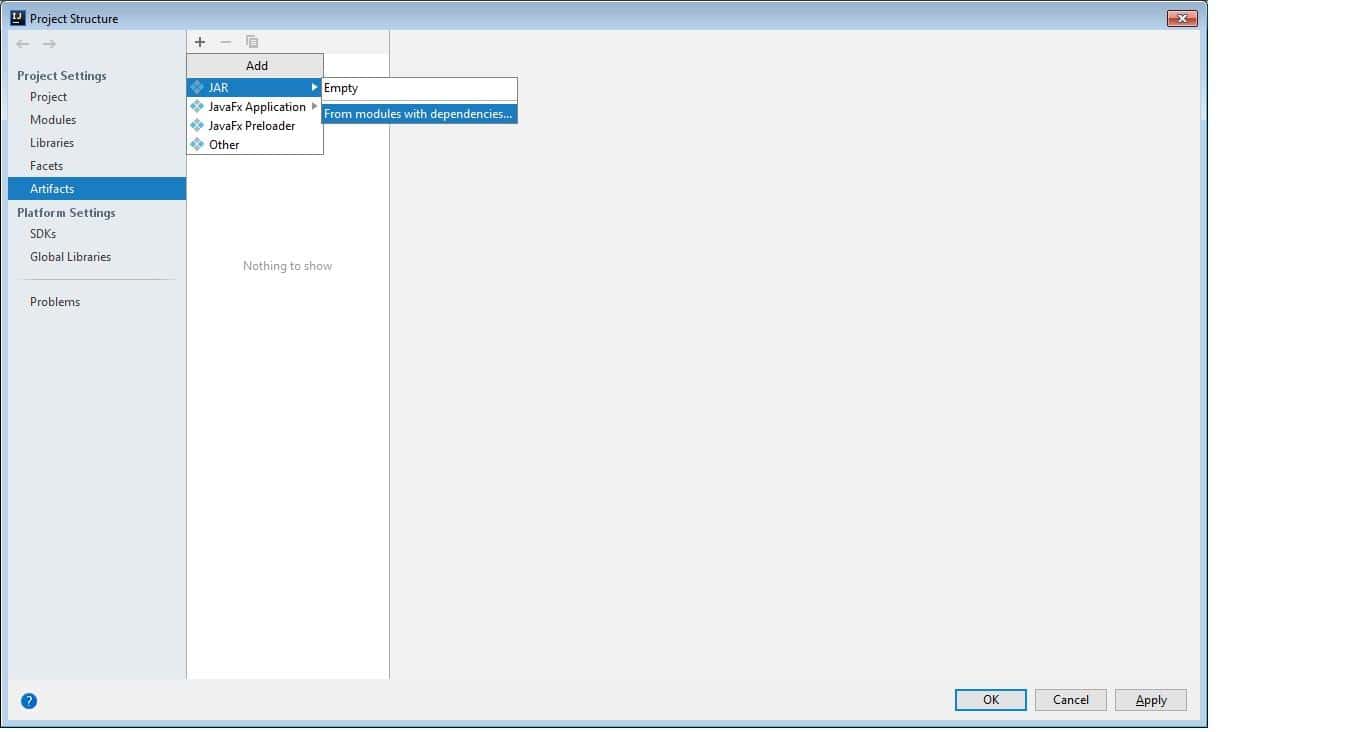
First, in the Project Structure (Ctrl+Alt+Shift+S or Cmd+;), we need to declare a new artifact.
首先,在项目结构(Ctrl+Alt+Shift+S或Cmd+;),我们需要声明一个新的工件。
We select “Artifacts” and then click the plus button.
我们选择“人工制品”,然后点击加号按钮。
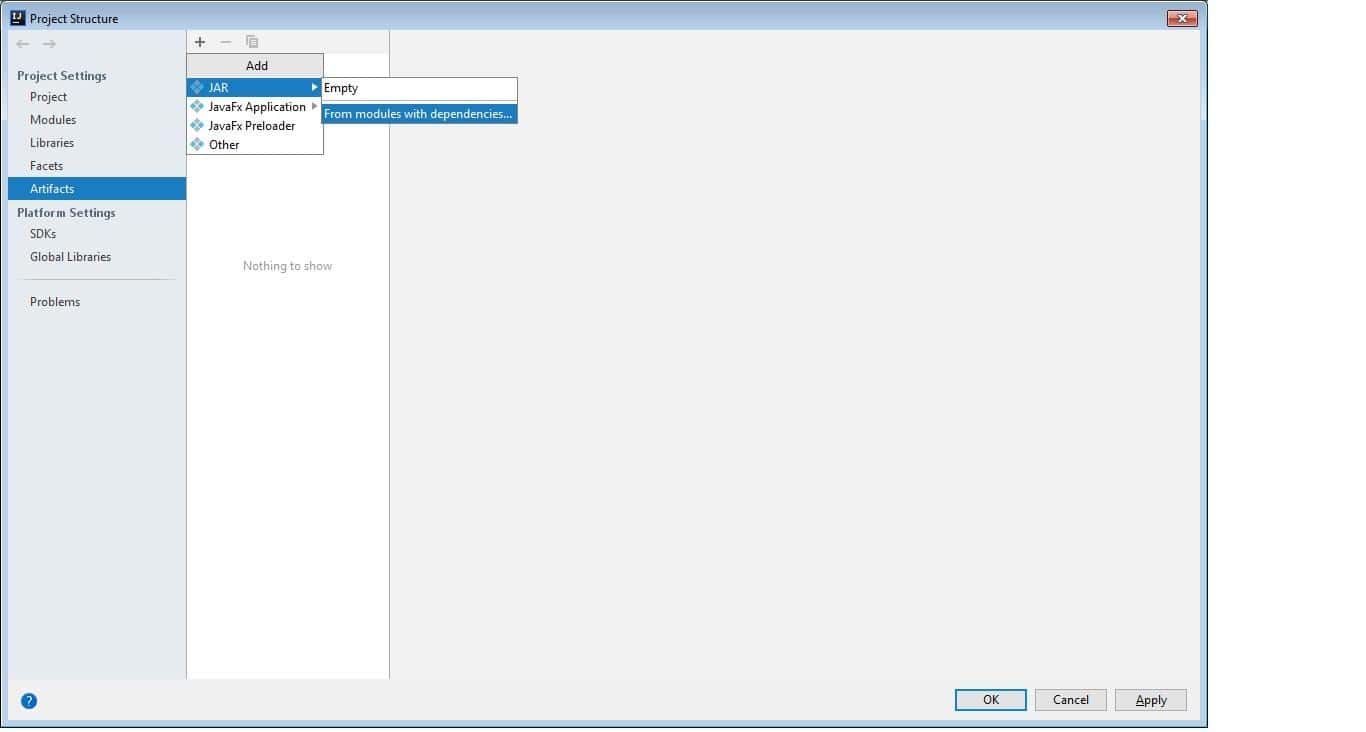
Next, we select a JAR artifact and also add dependencies in the JAR:
接下来,我们选择一个JAR工件,同时在JAR中添加依赖关系。
Next, we’ll go back to our Run/Debug Configuration dialog.
接下来,我们将回到我们的运行/调试配置对话框。
There, we need to add a Build Artifact task in the Before Launch window. As a result, a new executable jar is created for our application every time we execute our Run/Debug configuration.
在那里,我们需要在Before Launch窗口中添加一个Build Artifact任务。因此,每次我们执行运行/调试配置时,都会为我们的应用程序创建一个新的可执行程序jar。
Again, building artifacts is not IDE-agnostic. This mechanism is specific to IntelliJ. A build management tool could be a better approach, similar to what we discussed for dependency management.
同样,构建工件与IDE无关。这种机制是IntelliJ特有的。构建管理工具可能是一个更好的方法,类似于我们讨论的依赖性管理的方法。
5. Common Shortcuts in IntelliJ
5.IntelliJ中的常用快捷键
The shortcuts are really useful in boosting developers productivity. The following is a quick cheat sheet for the most common ones.
这些快捷方式在提高开发人员的工作效率方面确实很有用。下面是一份最常见的快捷方式表。
5.1. Navigation
5.1.导航
- Search Class – Ctrl + N / Cmd + O
- Search All files – Double Shift
- Recent Files – Ctrl + E / Cmd + E
- Switch between files – Ctrl + Tab / Cmd + Tab
- Type Hierarchy – Ctrl + H / Control + H
- Call Hierarchy – Ctrl + Alt + H / Control + Alt+ H
- File structure popup – Ctrl + F12 / Cmd + F12 (lists all methods and fields)
- Go to declaration – Ctrl + B / Cmd + b
- Go to implementations – Ctrl + Alt + B / Cmd + Alt+ B
- Show Project Structure – Ctrl + Alt + Shift + S / Cmd + ;
5.2. Editor
5.2. 编辑
- Code Completion – Ctrl + Space / Control + Space
- Method parameter info – Ctrl + P / Cmd + P
- Method/Class documentation info – Ctrl + Q / Control + J
- Reformat Code – Ctrl + Alt + L / Cmd + Alt + L
- Optimize imports – Ctrl + Alt + O / Control + Alt + O
- Duplicate line – Ctrl + D / Cmd + D
- Delete line – Ctrl + Y / Cmd + Delete
- Code selection – Ctrl + W / Alt + Up
- Show quick actions – Alt + Enter / Alt + Return
- System.out.println – sout + Ctrl + Enter / sout + Control + Space
- public static void main – psvm + Ctrl + Enter / psvm + Control + Space
- System.out.println for a method’s return value – methodName().sout [Enter]
- Assign method’s return value to local variable – methodName().var [Enter]
5.3. Refactoring
5.3.重构
- Rename class/method – Shift + F6
- Extract Method – Ctrl + Alt + M / Cmd + Alt + M
- Extract variable – Ctrl + Alt + V / Cmd + Alt + V
- Extract field – Ctrl + Alt + F / Cmd + Alt + F
- Extract constant – Ctrl + Alt + C / Cmd + Alt + C
- Extract parameter – Ctrl + Alt + P / Cmd + Alt + P
6. Conclusion
6.结语
In this article, we looked at some basic configurations in IntelliJ.
在这篇文章中,我们研究了IntelliJ的一些基本配置。
As an example, we created a Java project, added libraries, debugged it, and created an artifact, all in IntelliJ.
作为一个例子,我们创建了一个Java项目,添加了库,调试了它,并创建了一个工件,所有这些都在IntelliJ中完成。
Lastly, we looked at shortcuts for some common actions.
最后,我们看了一些常用动作的快捷方式。

