1. Overview
1.概述
In this article, we’ll create an application with WebSocket and test it using Postman.
在本文中,我们将使用WebSocket创建一个应用程序,并使用Postman进行测试。
2. Java WebSockets
2.Java WebSockets
WebSocket is a bi-directional, full-duplex, persistent connection between a web browser and a server. Once a WebSocket connection is established, the connection stays open until the client or server decides to close this connection.
WebSocket是网络浏览器和服务器之间的一种双向、全双工、持久的连接。一旦建立了WebSocket连接,该连接将一直保持开放状态,直到客户或服务器决定关闭该连接。
The WebSocket protocol is one of the ways to make our application handle real-time messages. The most common alternatives are long polling and server-sent events. Each of these solutions has its advantages and drawbacks.
WebSocket协议是使我们的应用程序处理实时消息的方法之一。最常见的替代方案是长时间轮询和服务器发送的事件。这些解决方案都有其优点和缺点。
One way of using WebSockets in Spring is using the STOMP subprotocol. However, in this article, we’ll be using raw WebSockets because, as of today, STOMP support is not available in Postman.
在Spring中使用WebSockets的一种方法是使用STOMP子协议。然而,在这篇文章中,我们将使用原始的WebSockets,因为到今天为止,STOMP支持在Postman中还没有出现。
3. Postman Setup
3.邮递员设置
Postman is an API platform for building and using APIs. When using Postman, we don’t need to write an HTTP client infrastructure code just for the sake of testing. Instead, we create test suites called collections and let Postman interact with our API.
Postman是一个用于构建和使用API的API平台。在使用Postman时,我们不需要仅仅为了测试而编写HTTP客户端基础设施代码。相反,我们创建称为集合的测试套件,让Postman与我们的API进行交互。
4. Application Using WebSocket
4.使用WebSocket的应用
We’ll build a simple application. The workflow of our application will be:
我们将建立一个简单的应用程序。我们的应用程序的工作流程将是。
- The server sends a one-time message to the client
- It sends periodic messages to the client
- Upon receiving messages from a client, it logs them and sends them back to the client
- The client sends aperiodic messages to the server
- The client receives messages from a server and logs them
The workflow diagram is as follows:
工作流程图如下。
5. Spring WebSocket
5.Spring的WebSocket
Our server consists of two parts. Spring WebSocket events handler and Spring WebSocket configuration. We’ll discuss them separately below:
我们的服务器由两部分组成。Spring WebSocket事件处理器和Spring WebSocket配置。下面我们将分别讨论它们。
5.1. Spring WebSocket Config
5.1.Spring WebSocket配置
We can enable WebSocket support in the Spring server by adding the @EnableWebSocket annotation.
我们可以通过添加@EnableWebSocket注解在Spring服务器中启用WebSocket支持。
In the same configuration, we’ll also register the implemented WebSocket handler for the WebSocket endpoint:
在同一配置中,我们还将为WebSocket端点注册已实现的WebSocket处理器:。
@Configuration
@EnableWebSocket
public class ServerWebSocketConfig implements WebSocketConfigurer {

    @Override
    public void registerWebSocketHandlers(WebSocketHandlerRegistry registry) {
        registry.addHandler(webSocketHandler(), "/websocket");
    }

    @Bean
    public WebSocketHandler webSocketHandler() {
        return new ServerWebSocketHandler();
    }
}
5.2. Spring WebSocket Handler
5.2 Spring WebSocket处理程序
The WebSocket handler class extends TextWebSocketHandler. This handler uses the handleTextMessage callback method to receive messages from a client. The sendMessage method sends messages back to the client:
WebSocket处理程序类扩展了TextWebSocketHandler。该处理程序使用handleTextMessage回调方法来接收来自客户端的消息。sendMessage方法将消息发回给客户端。
@Override
public void handleTextMessage(WebSocketSession session, TextMessage message) throws Exception {
    String request = message.getPayload();
    logger.info("Server received: {}", request);

    String response = String.format("response from server to '%s'", HtmlUtils.htmlEscape(request));
    logger.info("Server sends: {}", response);
    session.sendMessage(new TextMessage(response));
}
The @Scheduled method broadcasts periodic messages to active clients with the same sendMessage method:
@Scheduled方法通过相同的sendMessage方法向活动客户广播定期消息。
@Scheduled(fixedRate = 10000)
void sendPeriodicMessages() throws IOException {
    for (WebSocketSession session : sessions) {
        if (session.isOpen()) {
            String broadcast = "server periodic message " + LocalTime.now();
            logger.info("Server sends: {}", broadcast);
            session.sendMessage(new TextMessage(broadcast));
        }
    }
}
Our endpoint for testing will be:
我们测试的终点将是。
ws://localhost:8080/websocket6. Testing with Postman
6.用Postman测试
Now that our endpoint is ready, we can test it with Postman. To test WebSocket, we must have v8.5.0 or higher.
现在我们的端点已经准备好了,我们可以用Postman来测试它。要测试WebSocket,我们必须拥有V8.5.0或更高版本。
Before starting the process with Postman, we’ll run our server. Now let’s proceed.
在开始使用Postman的过程之前,我们将运行我们的服务器。现在让我们继续.。
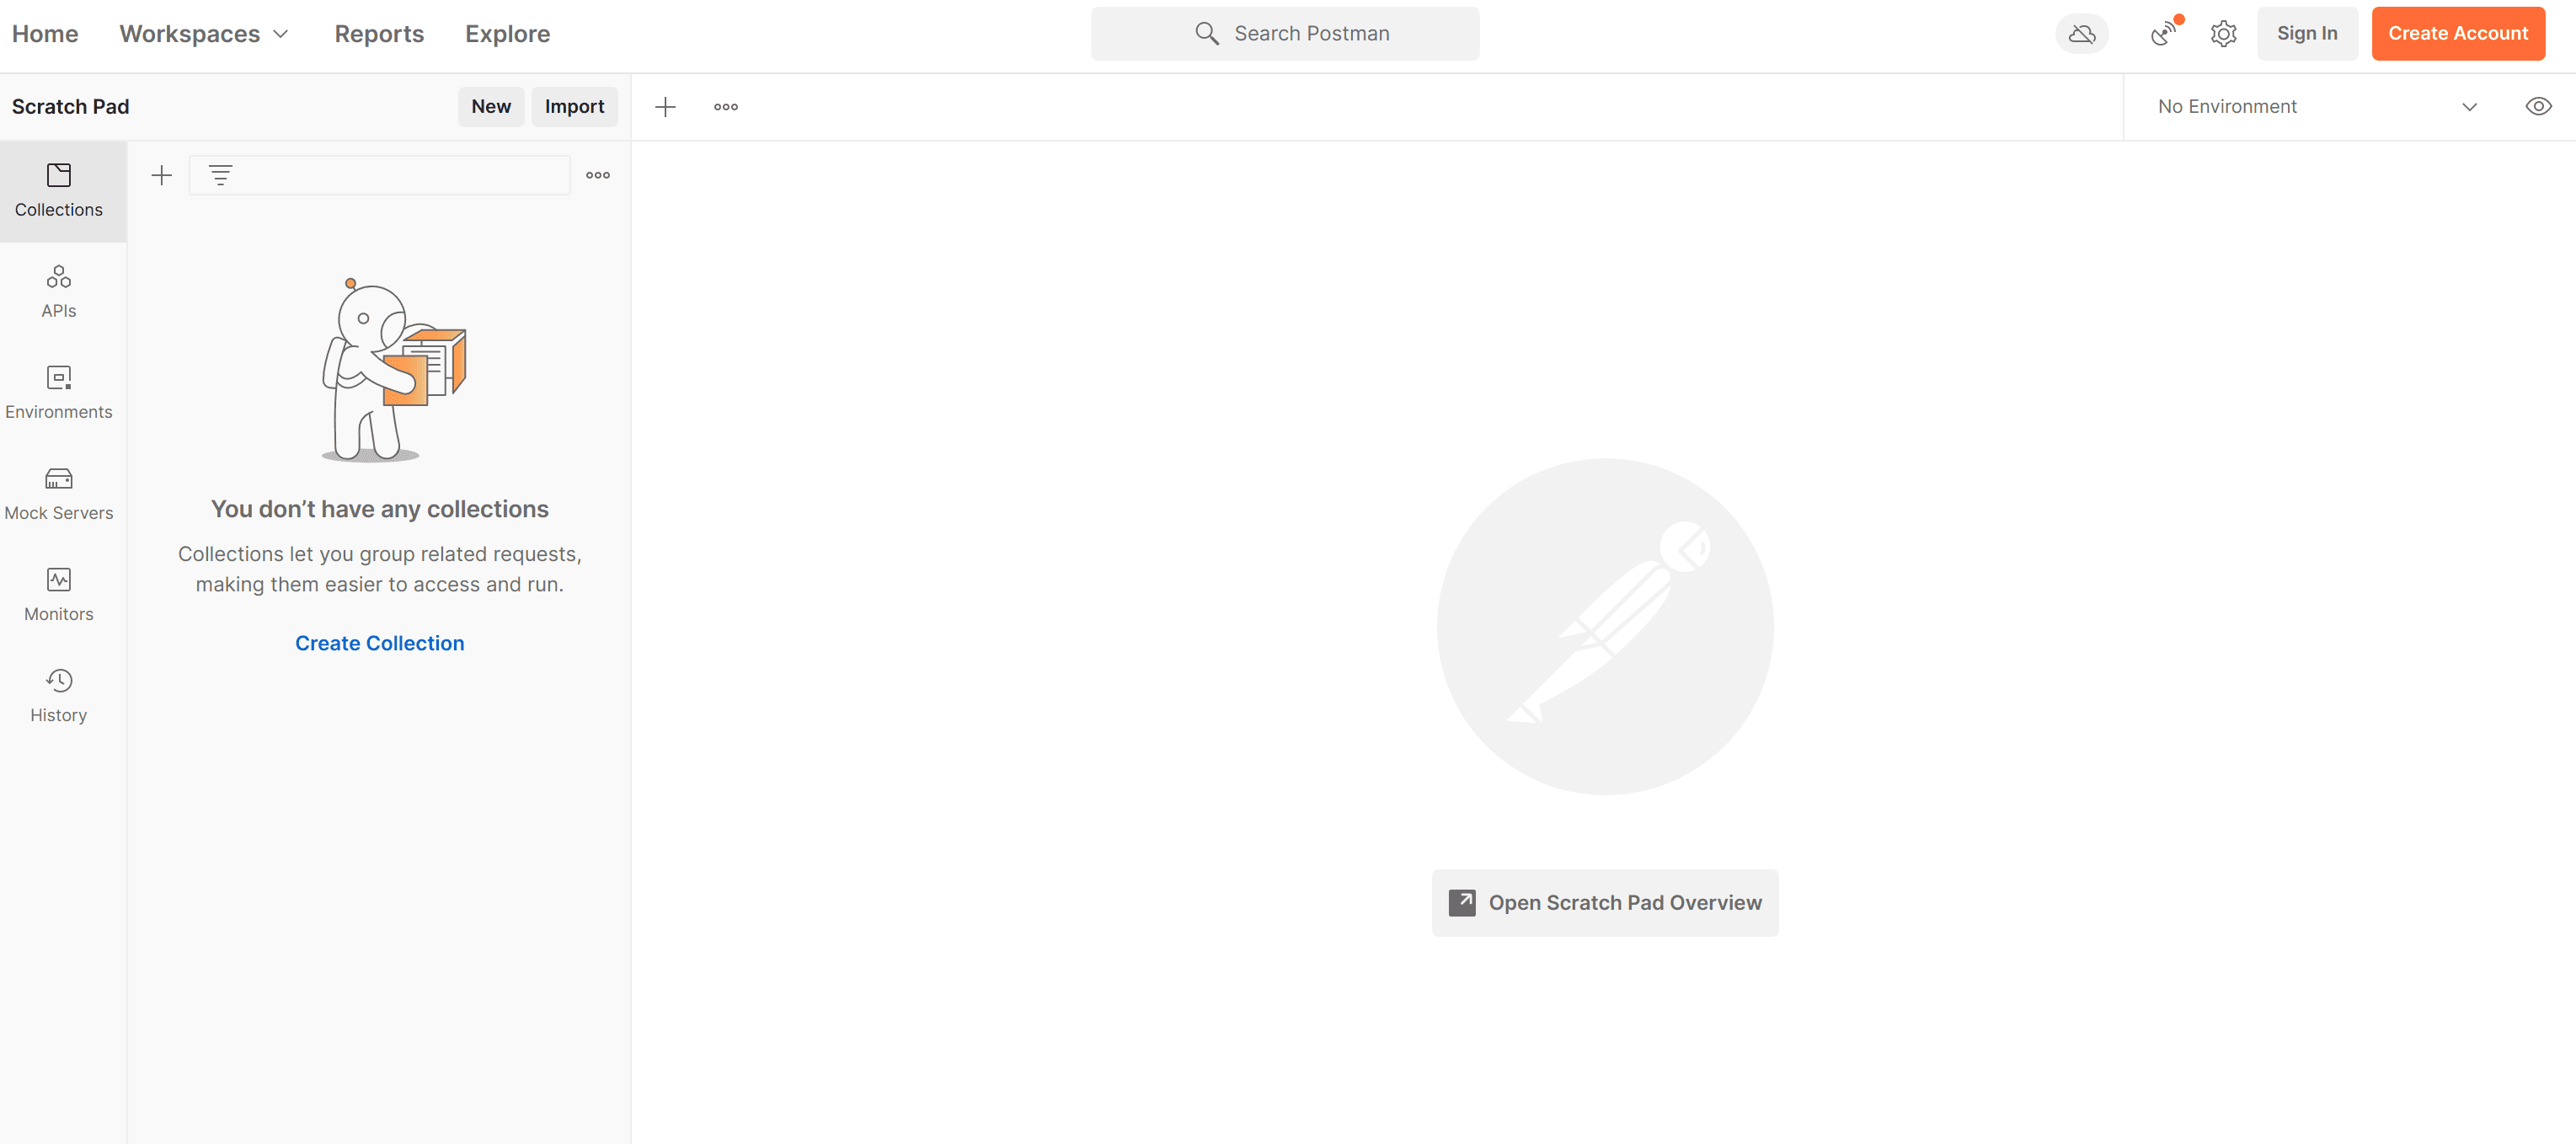
Firstly, start the Postman application. Once it started we can proceed.
首先,启动Postman应用程序。一旦它启动,我们就可以继续。
After it has loaded from the UI choose new:
在它从用户界面加载后,选择新的。
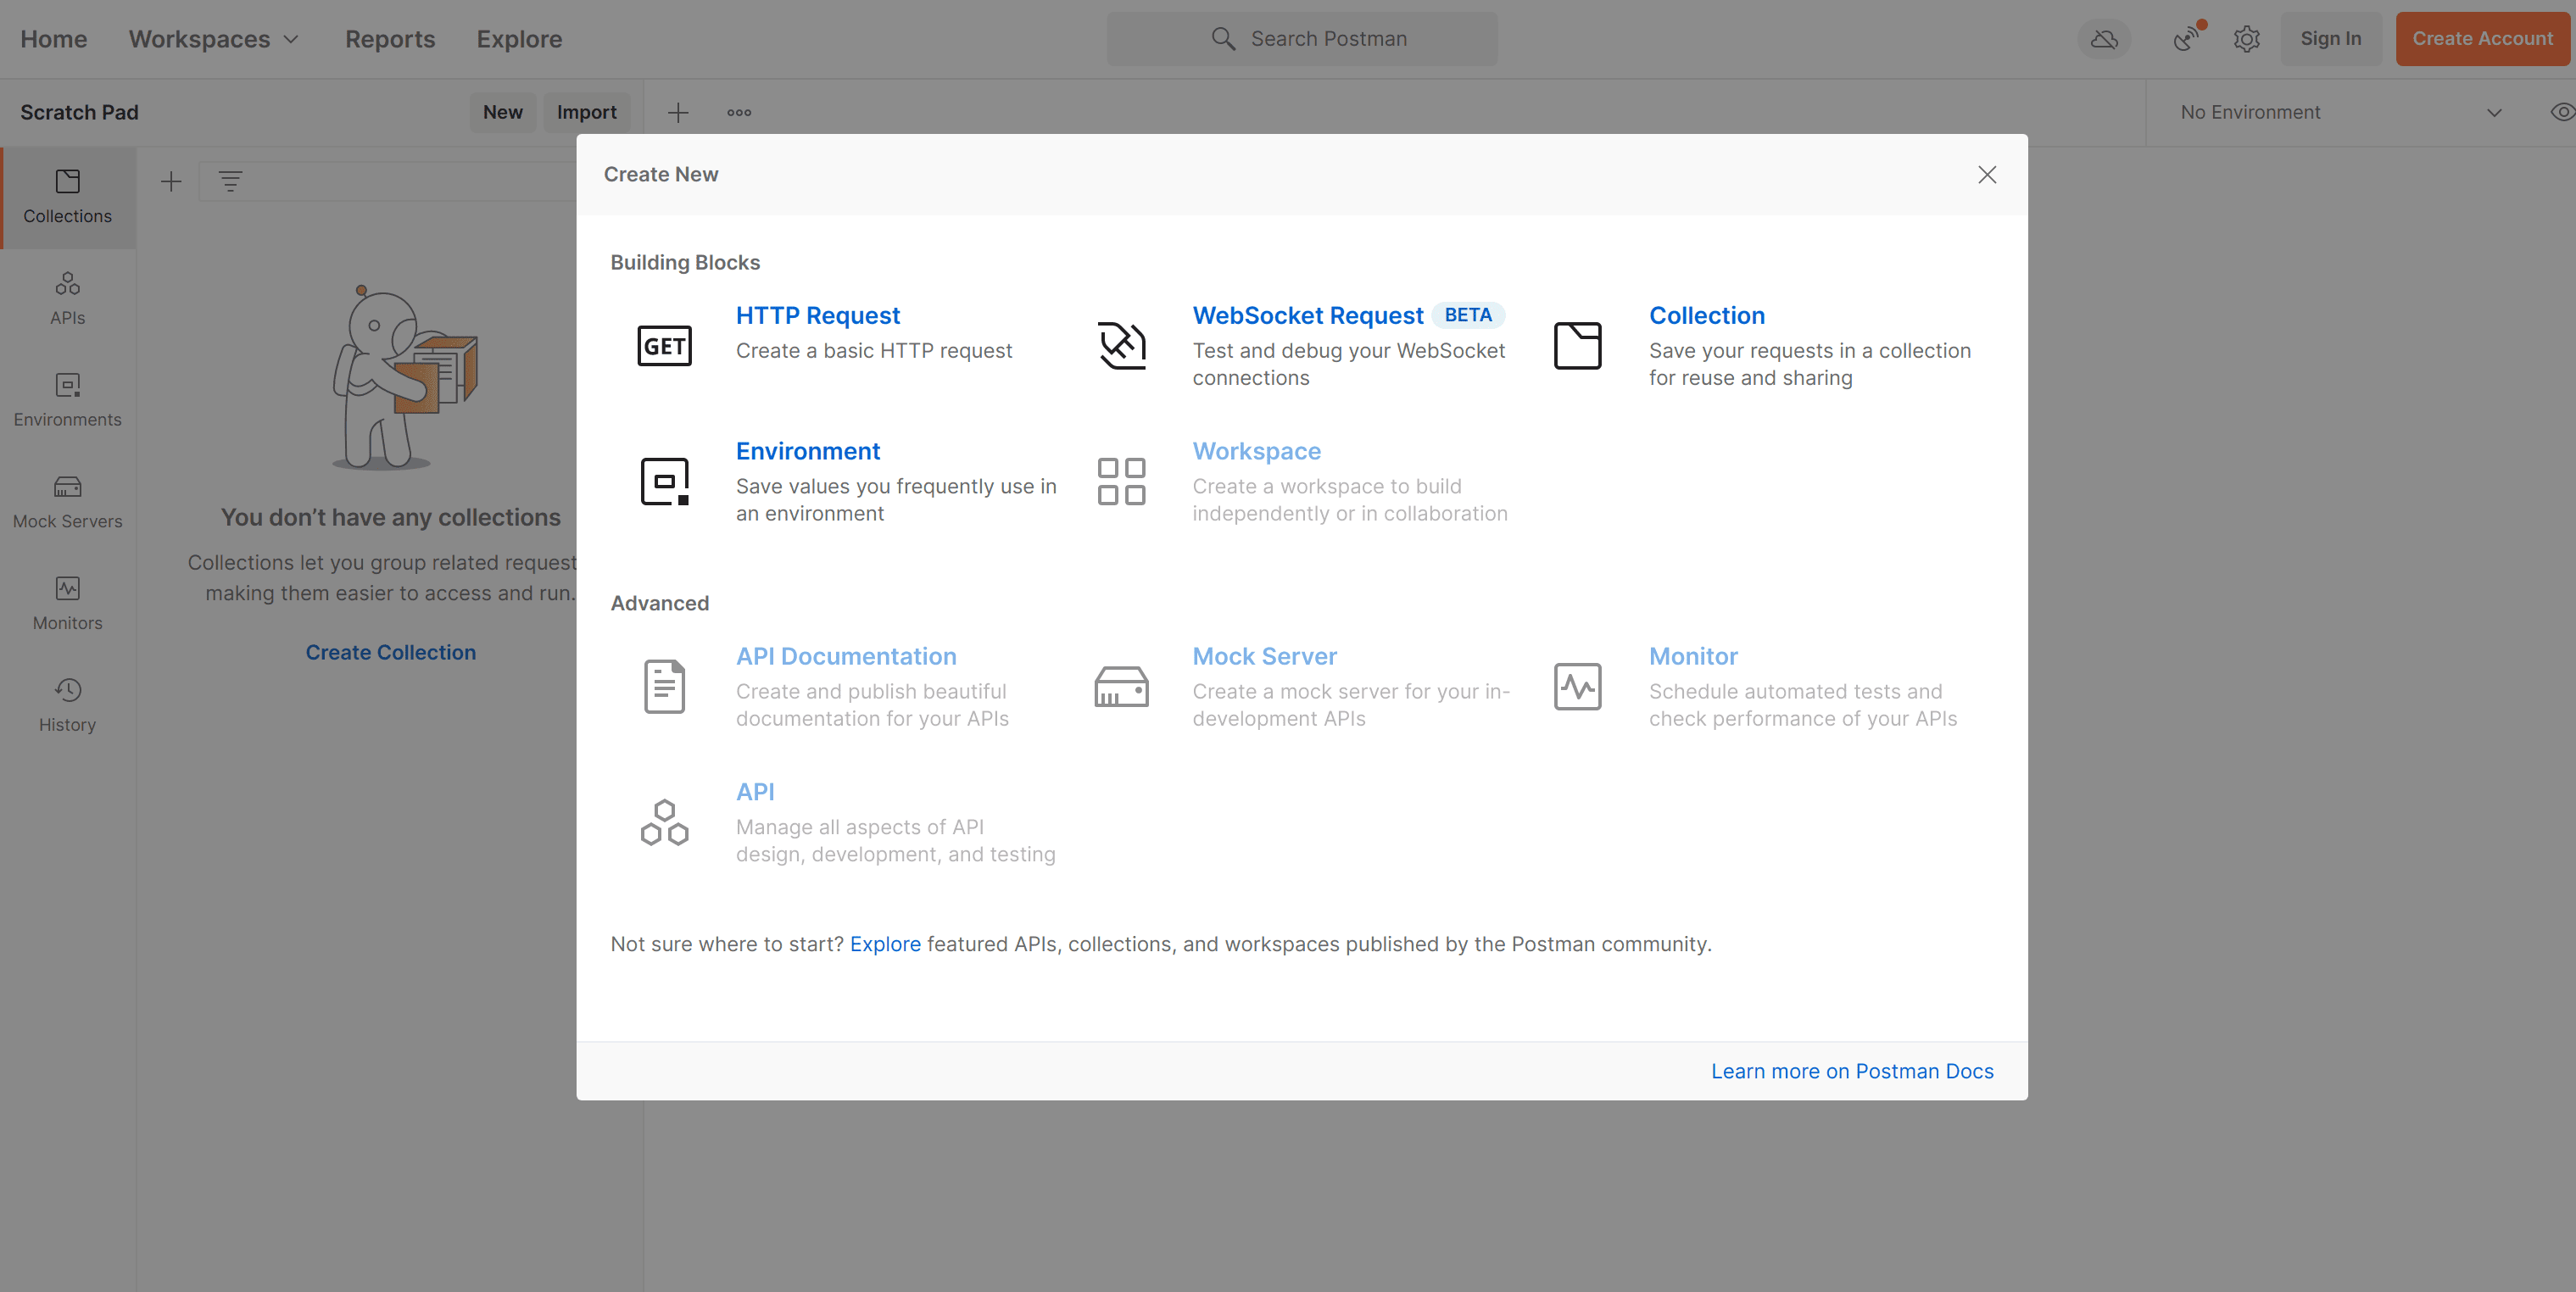
A new pop-up will be opened. From there choose WebSocket Request:
一个新的弹出窗口将被打开。从那里 选择WebSocket请求:。
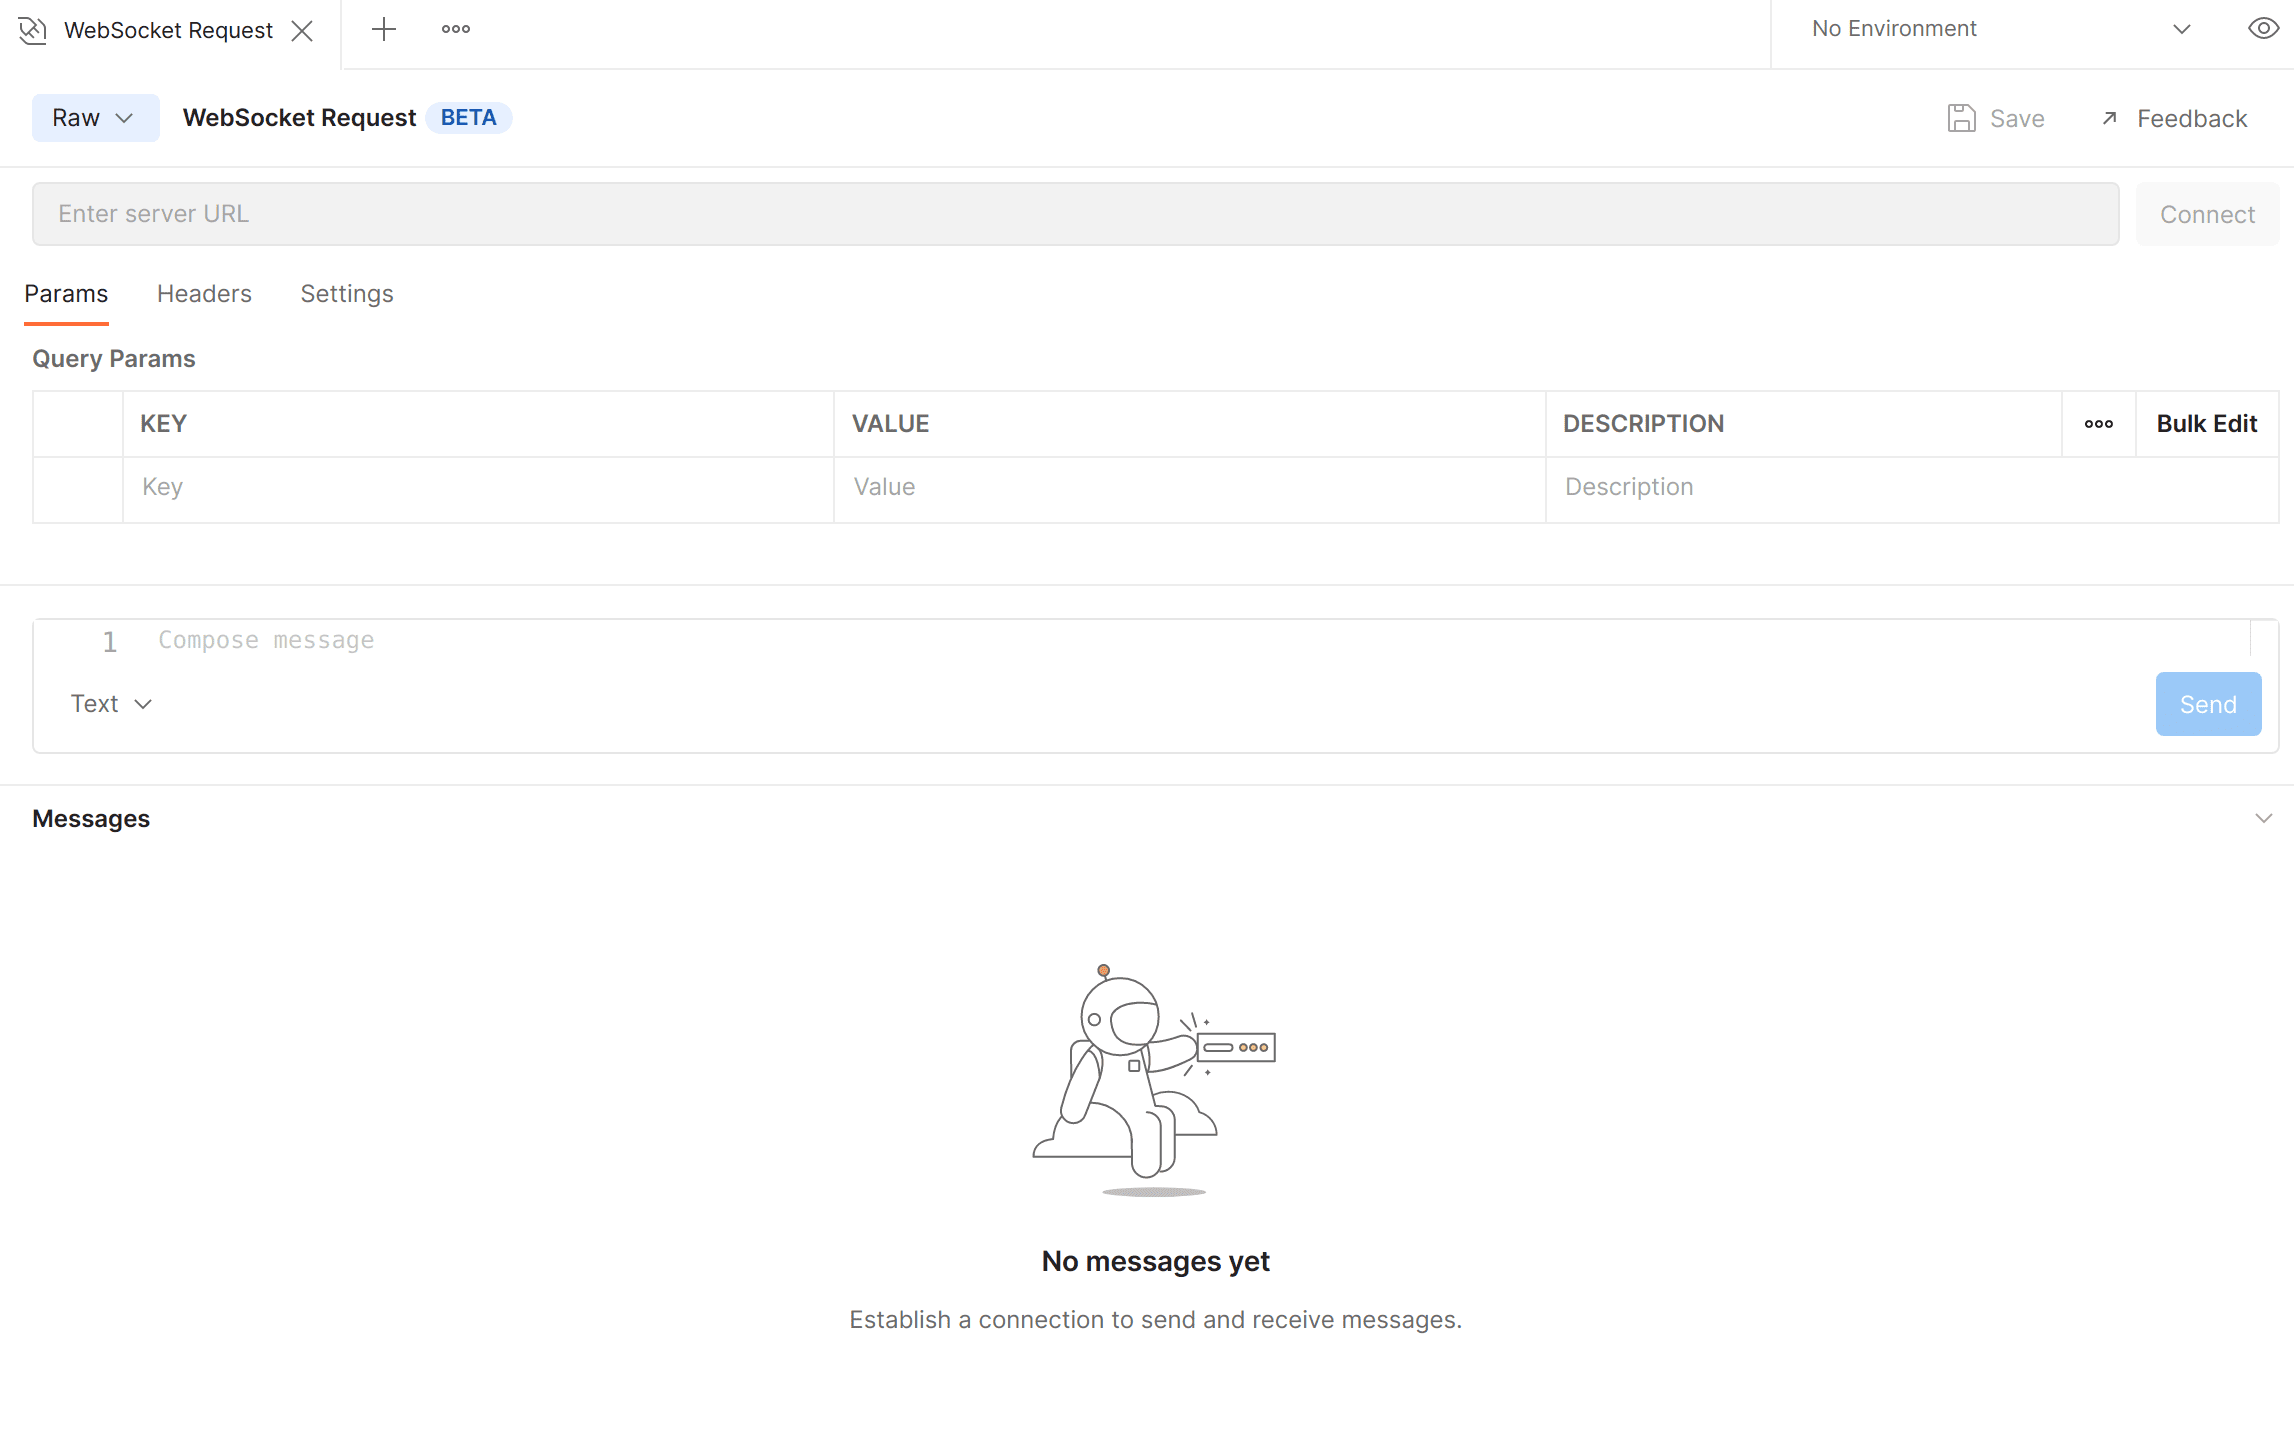
We’ll be testing a raw WebSocket request. The screen should look like this:
我们将测试一个原始WebSocket请求。屏幕应该是这样的。
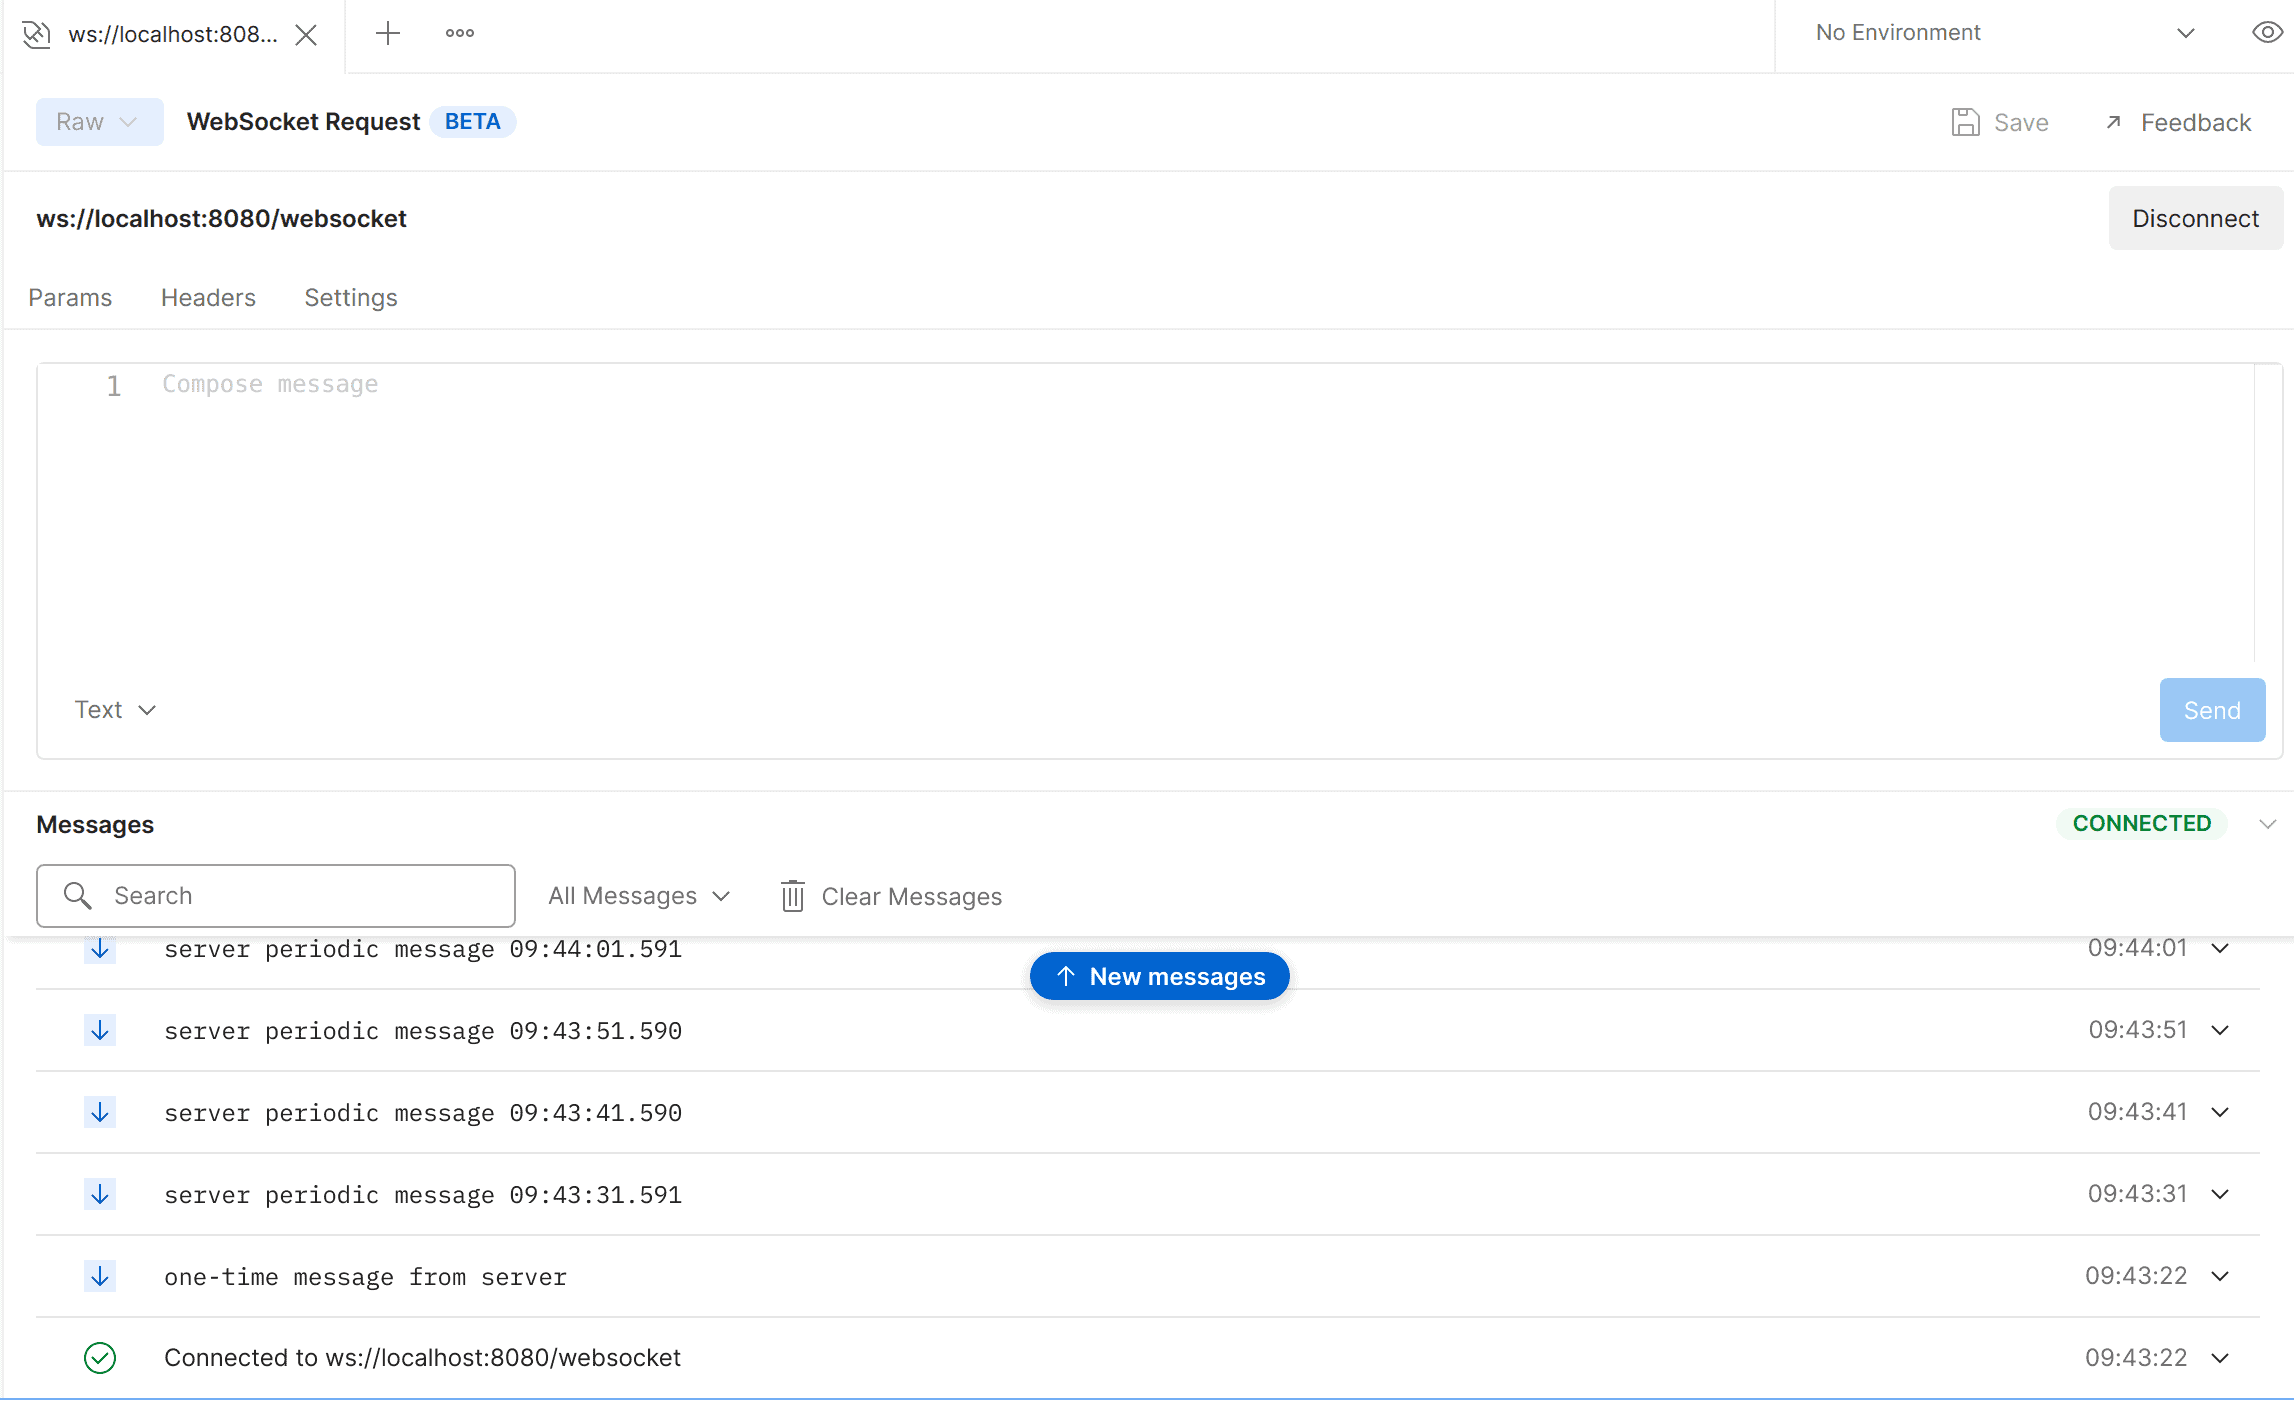
Now let’s add our URL. Press the connect button and test the connection:
现在让我们添加我们的URL。按下连接按钮并测试连接。
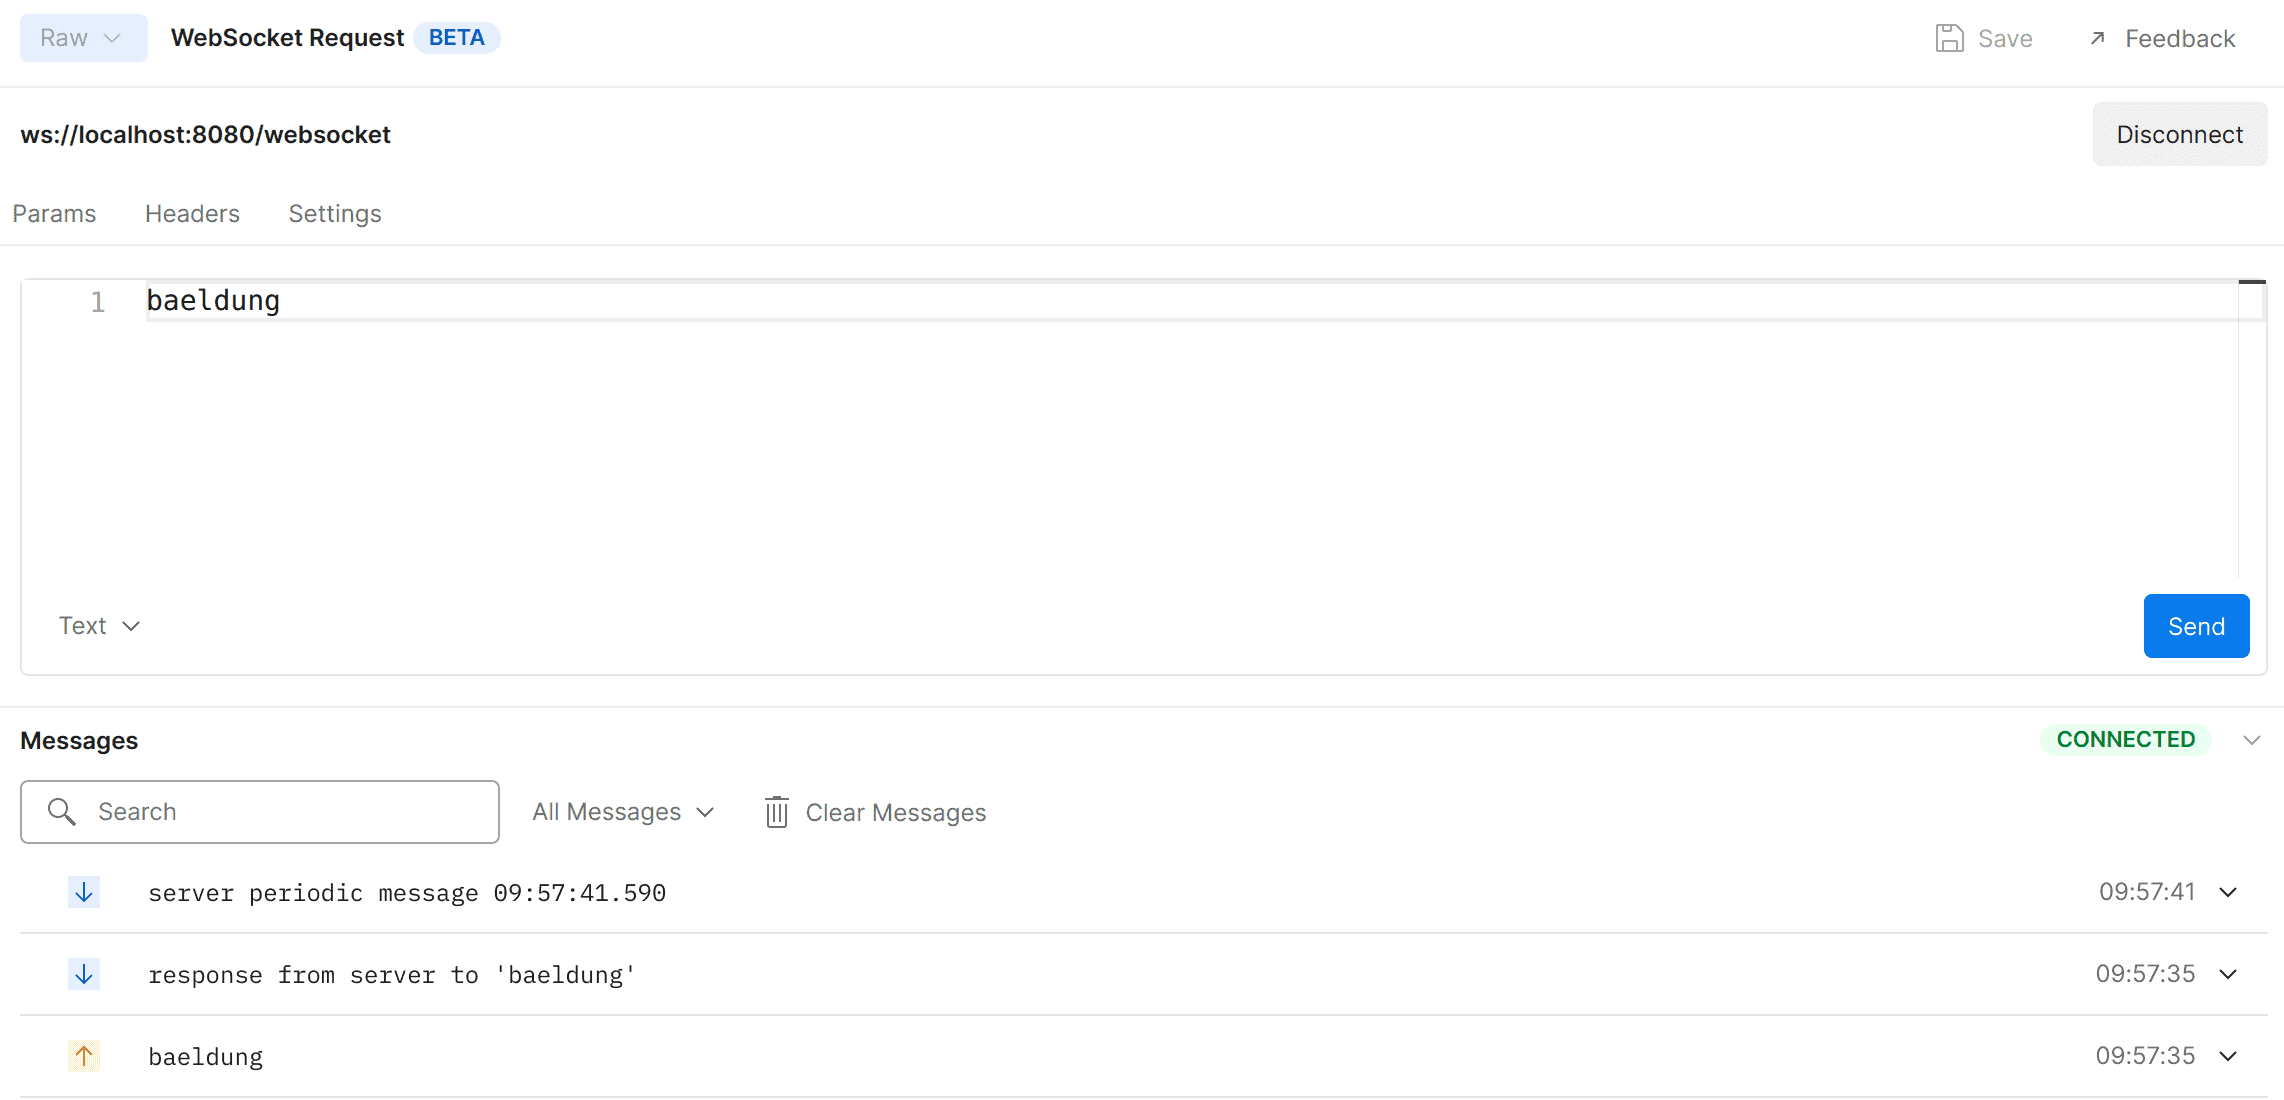
So, the connection is working fine. As we can see from the console we are getting responses from the server. Let’s try sending messages now and the server will respond back:
因此,连接工作正常。我们可以从控制台看到,我们正在从服务器上得到响应。现在让我们试着发送消息,服务器将作出回应。
After our test is done, we can disconnect simply by clicking the Disconnect button.
在我们的测试完成后,我们可以简单地点击断开连接按钮来断开连接。
7. Conclusion
7.结语
In this article, we’ve created a simple application to test a connection with WebSocket and tested it using Postman.
在本文中,我们创建了一个简单的应用程序来测试与WebSocket的连接,并使用Postman对其进行了测试。
Finally, the related code is available over on GitHub.
最后,相关的代码可以在GitHub上找到over。
