1. Introduction
1.绪论
Integration testing is crucial when validating that an application is working properly. Also, we should correctly test authentication as it’s a sensitive part. Testcontainers allow us to launch Docker containers during the testing phase to run our tests against actual technical stacks.
在验证一个应用程序是否正常工作时,集成测试是至关重要的。此外,我们应该正确测试认证,因为它是一个敏感的部分。测试容器允许我们在测试阶段启动Docker容器,针对实际的技术堆栈运行我们的测试。
In this article, we’ll see how to set up integration tests against an actual Keycloak instance using Testcontainers.
在这篇文章中,我们将看到如何使用Testcontainers针对实际的Keycloak实例设置集成测试。
2. Setting up Spring Security with Keycloak
2.用Keycloak设置Spring安全
We’ll need to set up Spring Security, Keycloak configuration, and, finally, Testcontainers.
我们需要设置Spring Security、Keycloak配置,以及最后的Testcontainers。
2.1. Setting up Spring Boot and Spring Security
2.1.设置Spring Boot和Spring Security
Let’s start by setting up security, thanks to Spring Security. We’ll need the spring-boot-starter-security dependency. So, let’s add it to our pom:
让我们从设置安全性开始,这要感谢Spring Security。我们需要spring-boot-starter-security依赖项。因此,让我们把它添加到我们的Pom中。
<dependency>
    <groupId>org.springframework.boot</groupId>
    <artifactId>spring-boot-starter-security</artifactId>
</dependency>
We’ll use the spring-boot parent pom. Hence we don’t need to specify the version of the libraries specified in its dependencies management.
我们将使用spring-boot的父pom。因此,我们不需要指定其依赖关系管理中指定的库的版本。
Next, let’s create a simple controller to return a User:
接下来,让我们创建一个简单的控制器来返回一个用户。
@RestController
@RequestMapping("/users")
public class UserController {

    @GetMapping("me")
    public UserDto getMe() {
        return new UserDto(1L, "janedoe", "Doe", "Jane", "jane.doe@baeldung.com");
    }
}
At this point, we have a secure controller that responds to requests on “/users/me”. When launching the application, Spring Security generates a password for the user ‘user’, visible in the application logs.
在这一点上,我们有一个安全的控制器,响应”/users/me”上的请求。在启动应用程序时,Spring Security为用户 “user “生成了一个密码,在应用程序日志中可见。
2.2. Configuring Keycloak
2.2.配置Keycloak
The easiest way to launch a local Keycloak is to use Docker. Hence, let’s run a Keycloak container with an admin account already configured:
启动本地Keycloak的最简单方法是使用Docker。因此,让我们运行一个已经配置了管理账户的Keycloak容器。
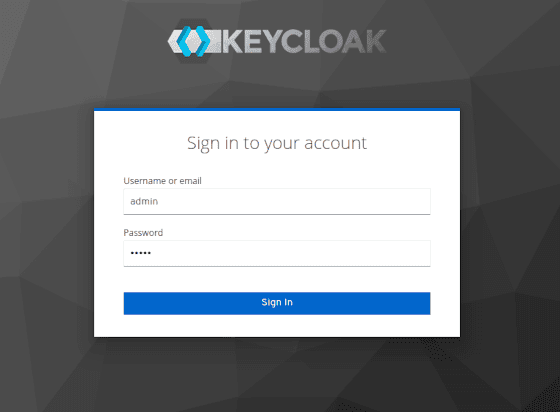
docker run -p 8081:8080 -e KEYCLOAK_ADMIN=admin -e KEYCLOAK_ADMIN_PASSWORD=admin quay.io/keycloak/keycloak:17.0.1 start-devLet’s open a browser to the URL http://localhost:8081 to access the Keycloak console:
让我们打开浏览器到URL http://localhost:8081,访问Keycloak控制台。
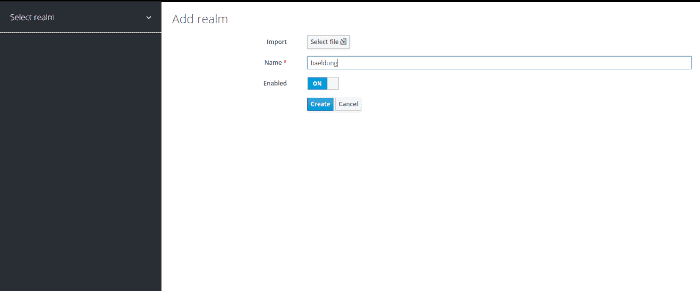
Next, let’s create our realm. We’ll call it baeldung:
接下来,让我们创建我们的境界。我们将把它称为baeldung。
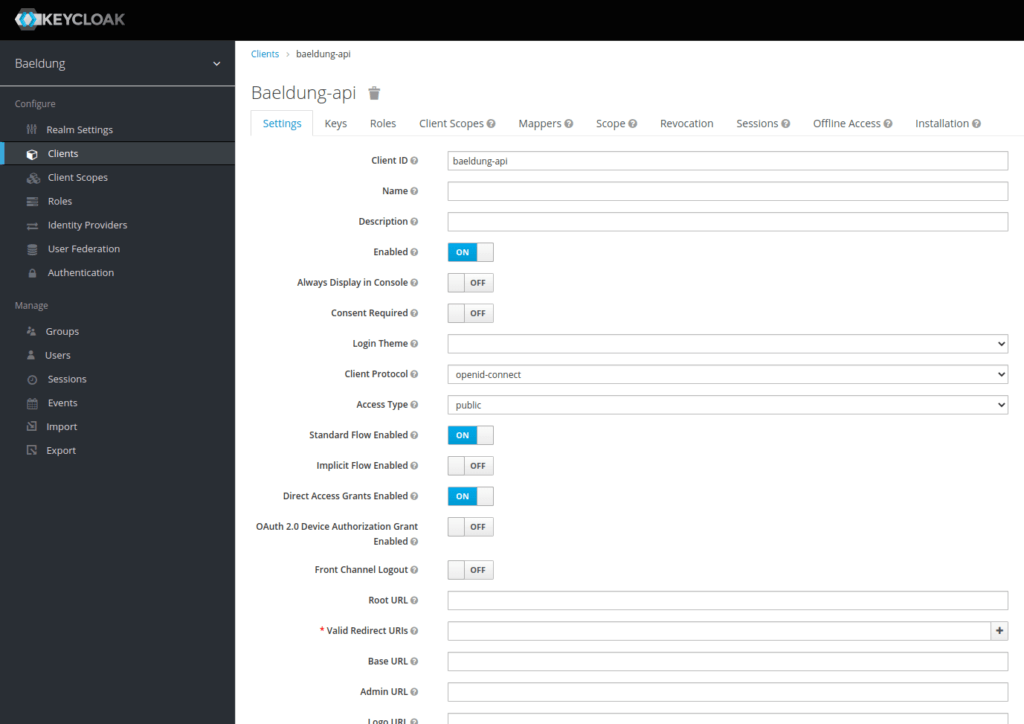
We need to add a client, which we’ll name baeldung-api:
我们需要添加一个客户端,我们将其命名为baeldung-api。
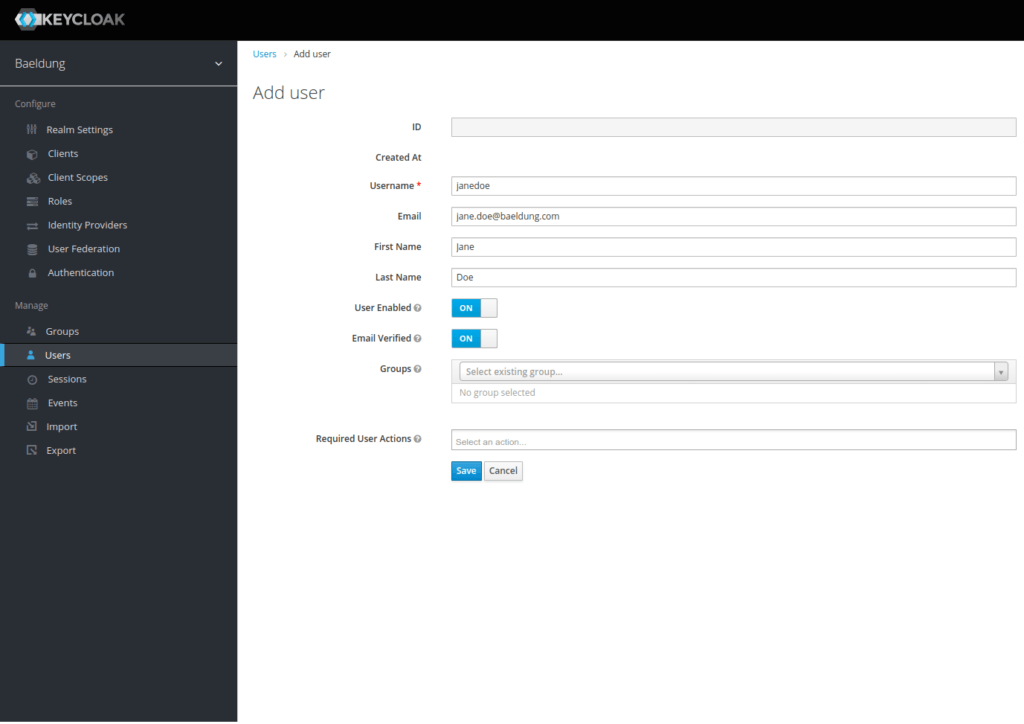
Finally, let’s add a Jane Doe user using the Users menu:
最后,让我们使用用户菜单添加一个无名氏用户。
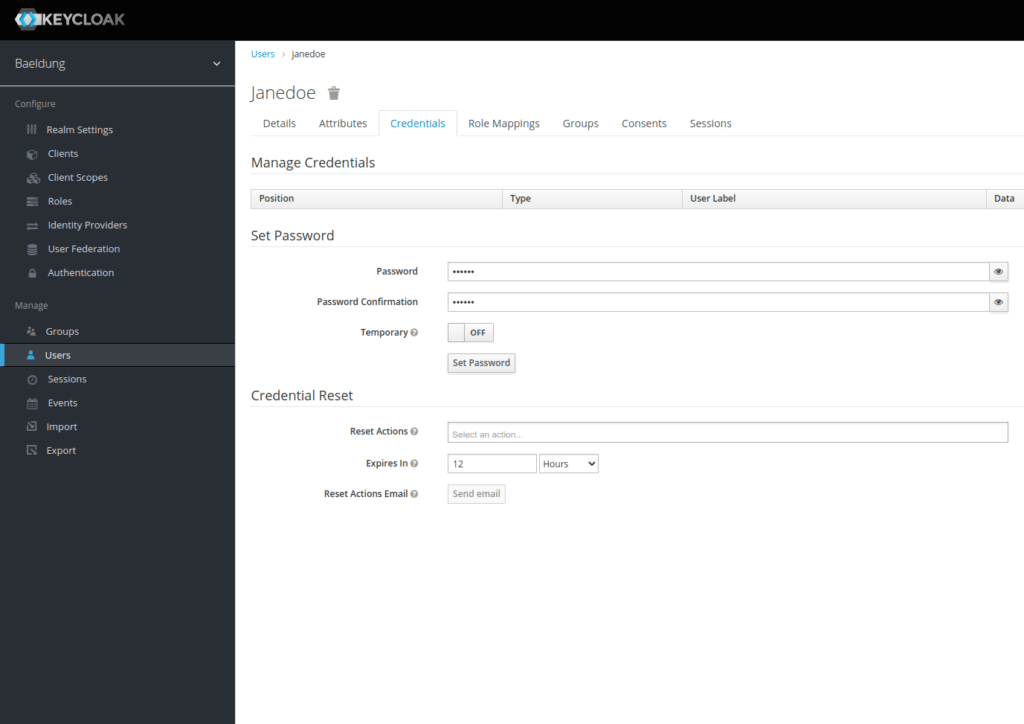
Now that we’ve created our user, we must assign it a password. Let’s choose s3cr3t and uncheck the temporary button:
现在我们已经创建了我们的用户,我们必须给它分配一个密码。让我们选择s3cr3t并取消对临时按钮的勾选。
We’ve now set up our Keycloak realm with a baeldung-api client and a Jane Doe user.
我们现在已经用一个baeldung-api客户端和一个Jane Doe用户设置了我们的Keycloak领域。
We’ll next configure Spring to use Keycloak as the identity provider.
接下来我们将配置Spring,使其使用Keycloak作为身份提供者。
2.3. Putting Both Together
2.3.将两者结合起来
First, we’ll delegate the identification control to a Keycloak server. For this, we’ll use the spring-boot-starter-oauth2-resource-server library. It will allow us to validate a JWT token with the Keycloak server. Hence, let’s add it to our pom:
首先,我们将把识别控制委托给一个Keycloak服务器。为此,我们将使用spring-boot-starter-oauth2-resource-server>库。它将允许我们用Keycloak服务器验证JWT令牌。因此,让我们把它添加到我们的pom中。
<dependency>
    <groupId>org.springframework.boot</groupId>
    <artifactId>spring-boot-starter-oauth2-resource-server</artifactId>
</dependency>
Let’s continue by configuring Spring Security to add the OAuth 2 resource server support:
让我们继续配置Spring Security以添加OAuth 2资源服务器支持。
@Configuration
@ConditionalOnProperty(name = "keycloak.enabled", havingValue = "true", matchIfMissing = true)
public class WebSecurityConfiguration {

    @Bean
    protected SessionAuthenticationStrategy sessionAuthenticationStrategy() {
        return new NullAuthenticatedSessionStrategy();
    }

    @Bean
    public SecurityFilterChain filterChain(HttpSecurity http) throws Exception {

        return http.csrf()
            .disable()
            .cors()
            .and()
            .authorizeHttpRequests(auth -> auth.anyRequest()
                .authenticated())
            .oauth2ResourceServer(OAuth2ResourceServerConfigurer::jwt)
            .build();
    }
}
We’re setting up a new filter chain that will apply to all incoming requests. It will validate the bound JWT token against our Keycloak server.
我们正在设置一个新的过滤器链,将适用于所有传入的请求。它将根据我们的Keycloak服务器验证绑定的JWT令牌。
As we’re building a stateless application with bearer-only authentication, we’ll use the NullAuthenticatedSessionStrategy as a session strategy. Moreover, @ConditionalOnProperty allows us to disable the Keycloak configuration by setting the keycloak.enabled property to false.
由于我们正在构建一个无状态的应用程序,并且只需进行验证,我们将使用NullAuthenticatedSessionStrategy作为一个会话策略。此外,@ConditionalOnProperty允许我们通过将keycloak.enabled属性设置为false来停用Keycloak配置。
Finally, let’s add the configuration needed to connect to our Keycloak in our application.properties file:
最后,让我们在application.properties文件中添加连接到Keycloak所需的配置。
keycloak.enabled=true
spring.security.oauth2.resourceserver.jwt.issuer-uri=http://localhost:8180/auth/realms/baeldung-api
Our application is now secure and queries Keycloak on each request to validate the authentication.
我们的应用程序现在是安全的,并在每个请求中查询Keycloak以验证认证。
3. Setting up Testcontainers for Keycloak
3.为Keycloak设置Testcontainers
3.1. Exporting the Realm Configuration
3.1.导出境界配置
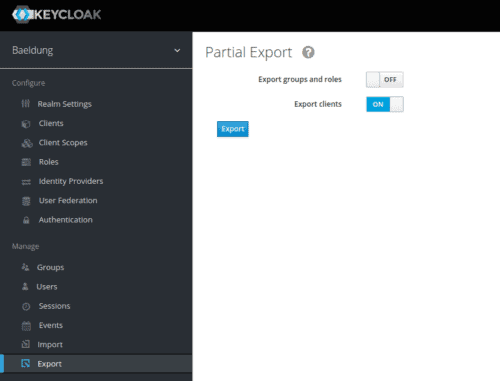
The Keycloak container starts without any configuration in place. Thus, we must import it when the container starts as a JSON file. Let’s export this file from our currently running instance:
Keycloak容器在没有任何配置的情况下启动。因此,我们必须在容器启动时将其作为一个JSON文件导入。让我们从我们当前运行的实例中导出这个文件。
Unfortunately, Keycloak does not export users through the administration interface. We could log into the container and use the kc.sh export command. For our example, it’s easier to manually edit the resulting realm-export.json file and add our Jane Doe to it. Let’s add this configuration just before the final curly brace:
不幸的是,Keycloak并没有通过管理界面导出用户。我们可以登录容器并使用kc.sh export命令。对于我们的例子,手动编辑产生的realm-export.json文件并添加我们的Jane Doe到其中更容易。让我们在最后的大括号之前添加这个配置。
"users": [
  {
    "username": "janedoe",
    "email": "jane.doe@baeldung.com",
    "firstName": "Jane",
    "lastName": "Doe",
    "enabled": true,
    "credentials": [
      {
        "type": "password",
        "value": "s3cr3t"
      }
    ],
    "clientRoles": {
      "account": [
        "view-profile",
        "manage-account"
      ]
    }
  }
]
Let’s include our realm-export.json file to our project in an src/test/resources/keycloak folder. We’ll use it during the launch of our Keycloak container.
让我们把我们的realm-export.json文件纳入我们的项目,放在src/test/resources/keycloak文件夹中。我们将在启动我们的Keycloak容器时使用它。
3.2. Setting up Testcontainers
3.2.设置Testcontainers
Let’s add the testcontainers dependency as well as testcontainers-keycloak, which allows us to launch a Keycloak container:
让我们添加testcontainers依赖,以及testcontainers-keycloak,它允许我们启动一个Keycloak容器。
<dependency>
    <groupId>com.github.dasniko</groupId>
    <artifactId>testcontainers-keycloak</artifactId>
    <version>2.1.2</version>
    <scope>test</scope>
</dependency>
<dependency>
    <groupId>org.testcontainers</groupId>
    <artifactId>testcontainers</artifactId>
    <version>1.16.3</version>
</dependency>
Next, let’s create a class from which all our tests will derive. We use it to configure the Keycloak container, launched by Testcontainers:
接下来,让我们创建一个类,我们所有的测试都将从该类中派生出来。我们用它来配置Keycloak容器,由Testcontainers启动。
@SpringBootTest(webEnvironment = WebEnvironment.RANDOM_PORT)
public abstract class KeycloakTestContainers {

    static {
        keycloak = new KeycloakContainer().withRealmImportFile("keycloak/realm-export.json");
        keycloak.start();
    }
}
Declaring and starting our container statically will ensure it will be instantiated and started once for all of our tests. We’re specifying the realm’s configuration to import at startup using the withRealmImportFile method from the KeycloakContainer object.
静态地声明和启动我们的容器将确保它在我们所有的测试中被实例化和启动一次。我们使用withRealmImportFile方法从KeycloakContainer对象中指定境界的配置以在启动时导入。
3.3. Spring Boot Testing Configuration
3.3.Spring Boot测试配置
The Keycloak container uses a random port. So we need to override the spring.security.oauth2.resourceserver.jwt.issuer-uri configuration defined in our application.properties once started. For this, we’ll use the convenient @DynamicPropertySource annotation:
Keycloak容器使用一个随机的端口。所以我们需要在启动后覆盖我们的spring.security.oauth2.resourceserver.jwt.issuer-uri中定义的配置。为此,我们将使用方便的@DynamicPropertySource注解。
@DynamicPropertySource
static void registerResourceServerIssuerProperty(DynamicPropertyRegistry registry) {
    registry.add("spring.security.oauth2.resourceserver.jwt.issuer-uri", () -> keycloak.getAuthServerUrl() + "/realms/baeldung");
}
4. Creating Integration Tests
4.创建集成测试
Now that we have our main test class responsible for launching our Keycloak container and configuring Spring properties, let’s create an integration test calling our User controller.
现在我们有了负责启动Keycloak容器和配置Spring属性的主测试类,让我们创建一个集成测试,调用我们的User控制器。
4.1. Getting an Access Token
4.1.获得访问令牌
First, let’s add to our abstract class IntegrationTest a method for requesting a token with Jane Doe’s credentials:
首先,让我们在我们的抽象类IntegrationTest中添加一个方法,用于请求带有Jane Doe凭证的令牌。
URI authorizationURI = new URIBuilder(keycloak.getAuthServerUrl() + "/realms/baeldung/protocol/openid-connect/token").build();
WebClient webclient = WebClient.builder().build();
MultiValueMap<String, String> formData = new LinkedMultiValueMap<>();
formData.put("grant_type", Collections.singletonList("password"));
formData.put("client_id", Collections.singletonList("baeldung-api"));
formData.put("username", Collections.singletonList("jane.doe@baeldung.com"));
formData.put("password", Collections.singletonList("s3cr3t"));

String result = webclient.post()
  .uri(authorizationURI)
  .contentType(MediaType.APPLICATION_FORM_URLENCODED)
  .body(BodyInserters.fromFormData(formData))
  .retrieve()
  .bodyToMono(String.class)
  .block();
Here, we’re using Webflux’s WebClient to post a form containing the different parameters required to get an access token.
在这里,我们使用Webflux的WebClient来发布一个包含获取访问令牌所需不同参数的表单。
Finally, we’ll parse the Keycloak server response to extract the token from it. Specifically, we generate a classic authentication string containing the Bearer keyword, followed by the content of the token, ready to be used in a header:
最后,我们将解析Keycloak服务器响应,从中提取令牌。具体来说,我们生成一个包含Bearer关键字的经典认证字符串,后面是令牌的内容,准备在头中使用。
JacksonJsonParser jsonParser = new JacksonJsonParser();
return "Bearer " + jsonParser.parseMap(result)
  .get("access_token")
  .toString();
4.2. Creating an Integration Test
4.2.创建一个集成测试
Let’s quickly set up integration tests against our configured Keycloak container. We’ll be using RestAssured and Hamcrest for our test. Let’s add the rest-assured dependency:
让我们针对我们配置的Keycloak容器快速设置集成测试。我们将使用RestAssured和Hamcrest进行测试。让我们添加rest-assured依赖性。
<dependency>
    <groupId>io.rest-assured</groupId>
    <artifactId>rest-assured</artifactId>
    <scope>test</scope>
</dependency>
We can now create our test using our abstract IntegrationTest class:
现在我们可以使用抽象的IntegrationTest类创建我们的测试。
@Test
void givenAuthenticatedUser_whenGetMe_shouldReturnMyInfo() {

    given().header("Authorization", getJaneDoeBearer())
      .when()
      .get("/users/me")
      .then()
      .body("username", equalTo("janedoe"))
      .body("lastname", equalTo("Doe"))
      .body("firstname", equalTo("Jane"))
      .body("email", equalTo("jane.doe@baeldung.com"));
}
As a result, our access token, fetched from Keycloak, is added to the request’s Authorization header.
因此,我们从Keycloak获取的访问令牌被添加到请求的授权头中。
5. Conclusion
5.总结
In this article, we set up integration tests against an actual Keycloak managed by Testcontainers. We imported a realm configuration to have a preconfigured environment each time we launch the test phase.
在这篇文章中,我们针对Testcontainers管理的实际Keycloak设置了集成测试。我们导入了一个境界配置,以便每次启动测试阶段时有一个预配置的环境。
As usual, all the code samples used in this article can be found over on GitHub.
像往常一样,本文中使用的所有代码样本都可以在GitHub上找到over。
