1. Overview
1.概述
We can use Keycloak as a third-party authorization server to manage users of our web or mobile applications.
我们可以使用Keycloak作为第三方授权服务器来管理我们网络或移动应用程序的用户。
While it’s possible for an administrator to add users, Keycloak also has the ability to allow users to register themselves. Additionally, along with default attributes such as first name, last name, and email, we can also add extra user attributes specific to our application’s need.
虽然管理员有可能添加用户,但Keycloak也有能力允许用户自己注册。此外,除了默认的属性,如名字、姓氏和电子邮件,我们还可以根据我们的应用程序的需要添加额外的用户属性。
In this tutorial, we’ll see how we can enable self-registration on Keycloak and add custom fields on the user registration page.
在本教程中,我们将看到如何在Keycloak上启用自我注册,并在用户注册页面添加自定义字段。
We’re building on top of customizing the login page, so it’ll be helpful to go through it first for the initial setup.
我们在定制登录页面的基础上进行构建,所以首先通过它进行初始设置会有帮助。
2. Standalone Server
2.独立服务器
First, we’ll see user self-registration for a standalone Keycloak server.
首先,我们将看到用户对独立Keycloak服务器的自我注册。
2.1. Enabling User Registration
2.1.启用用户注册
Initially, we need to enable Keycloak to allow user registration. For that, we’ll first need to start the server by running this command from our Keycloak distribution’s bin folder:
首先,我们需要启用Keycloak以允许用户注册。为此,我们首先需要从Keycloak的bin文件夹中运行这个命令来启动服务器。
./standalone.sh -Djboss.socket.binding.port-offset=100Then we need to go to the admin console and key-in the initial1/zaq1!QAZ credentials.
然后我们需要进入管理员控制台,并键入initial1/zaq1!QAZ凭证。
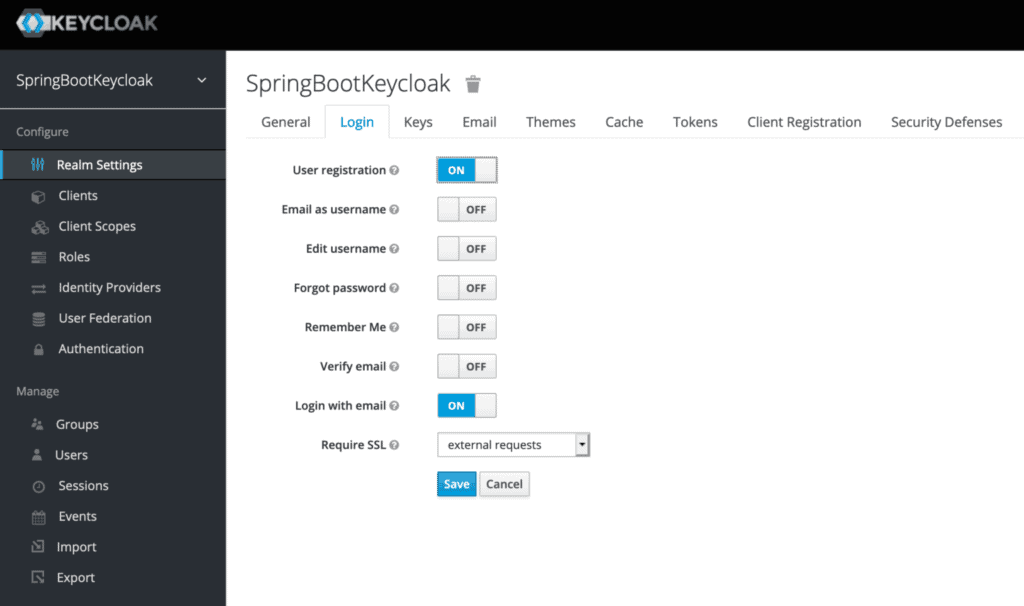
Next, in the Login tab on the Realm Settings page, we’ll toggle the User registration button:
接下来,在实时设置页面的登录标签中,我们将切换用户注册按钮。
That’s all! We just need to click Save and self-registration gets enabled.
这就是全部!我们只需要点击Save就可以启用自助注册。
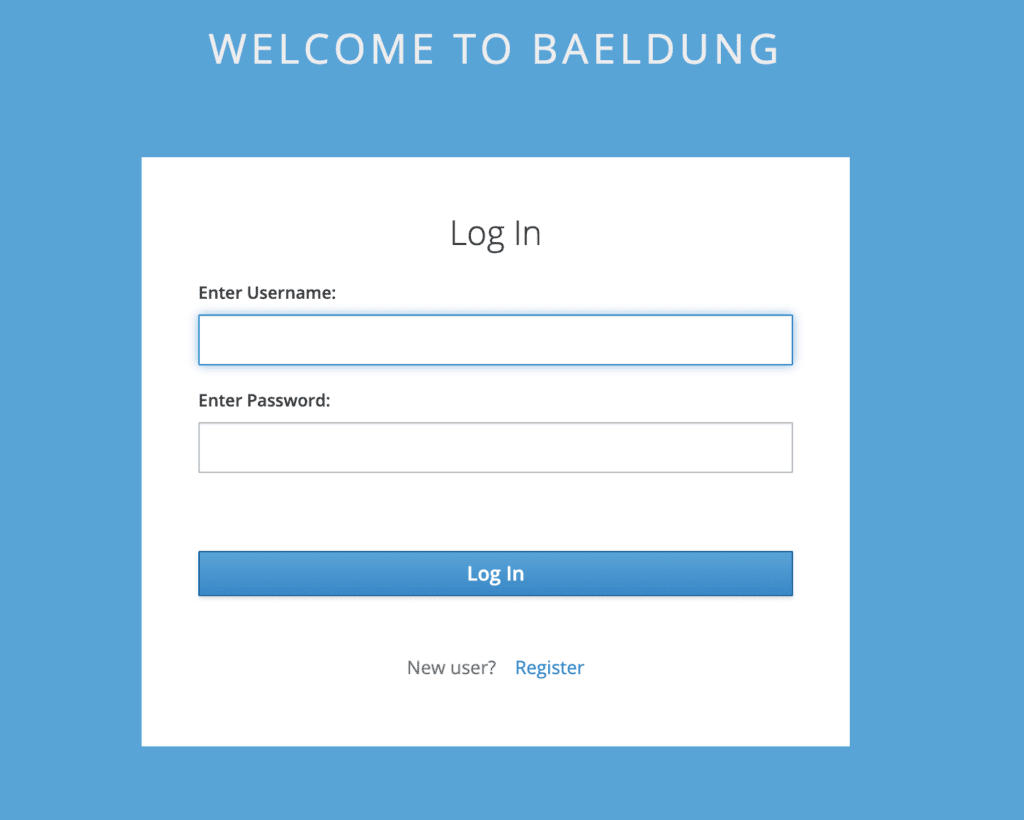
So now we’ll get a link named Register on the login page:
所以现在我们将在登录页面上获得一个名为Register的链接。
Again, recall that the page looks different than Keycloak’s default login page because we’re extending the customizations we did earlier.
再次提醒,该页面看起来与Keycloak的默认登录页面不同,因为我们正在扩展我们之前做的定制。
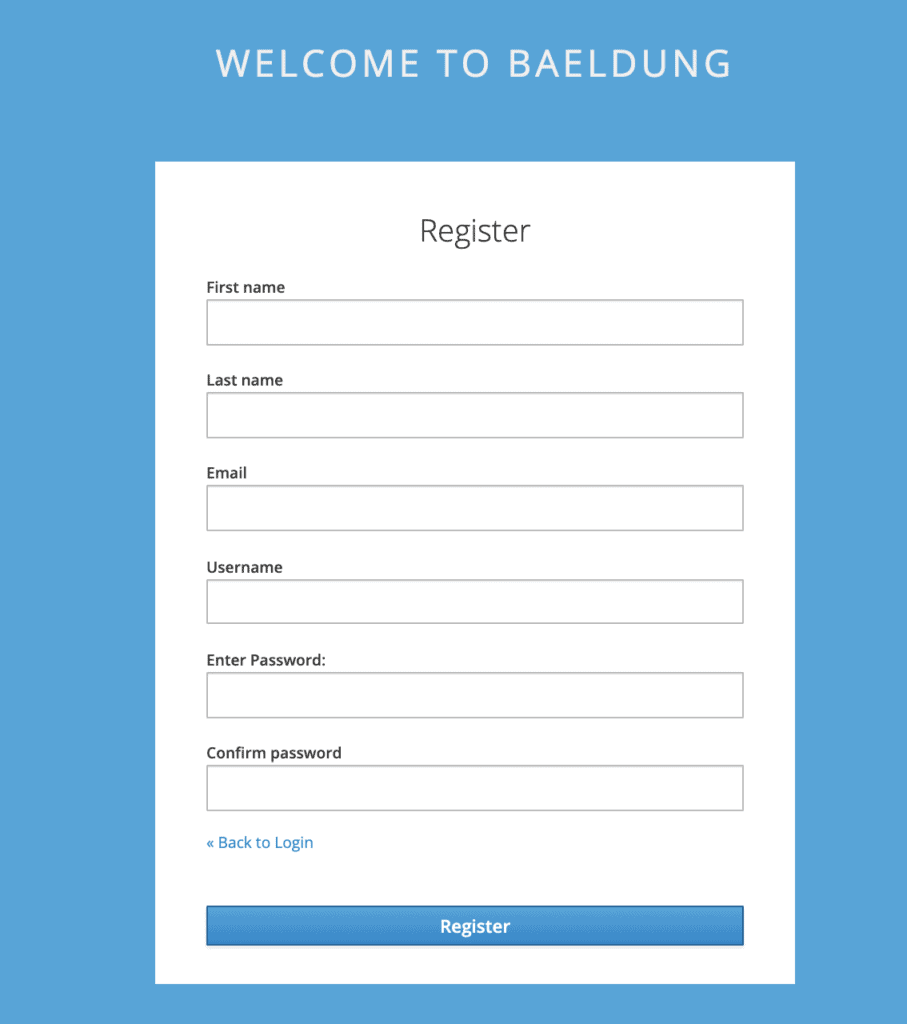
The register link takes us to the Register page:
注册链接将我们带到注册页面。
As we can see, the default page includes the basic attributes of a Keycloak user.
我们可以看到,默认页面包括一个Keycloak用户的基本属性。
In the next section, we’ll see how we can add extra attributes to our choice.
在下一节,我们将看到如何为我们的选择添加额外的属性。
2.2. Adding Custom User Attributes
2.2.添加自定义用户属性
Continuing with our custom theme, let’s copy the existing template base/login/register.ftl to our custom/login folder.
继续我们的自定义主题,让我们把现有的模板base/login/register.ftl复制到我们的custom/login文件夹。
We’ll now try adding a new field dob for Date of birth. For that, we’ll need to modify the above register.ftl and add this:
我们现在尝试添加一个新的字段dob来表示Date of birth。为此,我们需要修改上面的register.ftl,并添加这个。
<div class="form-group">
    <div class="${properties.kcLabelWrapperClass!}">
        <label for="user.attributes.dob" class="${properties.kcLabelClass!}">
          Date of birth</label>
    </div>

    <div class="${properties.kcInputWrapperClass!}">
        <input type="date" class="${properties.kcInputClass!}"
          id="user.attributes.dob" name="user.attributes.dob"
          value="${(register.formData['user.attributes.dob']!'')}"/>
    </div>
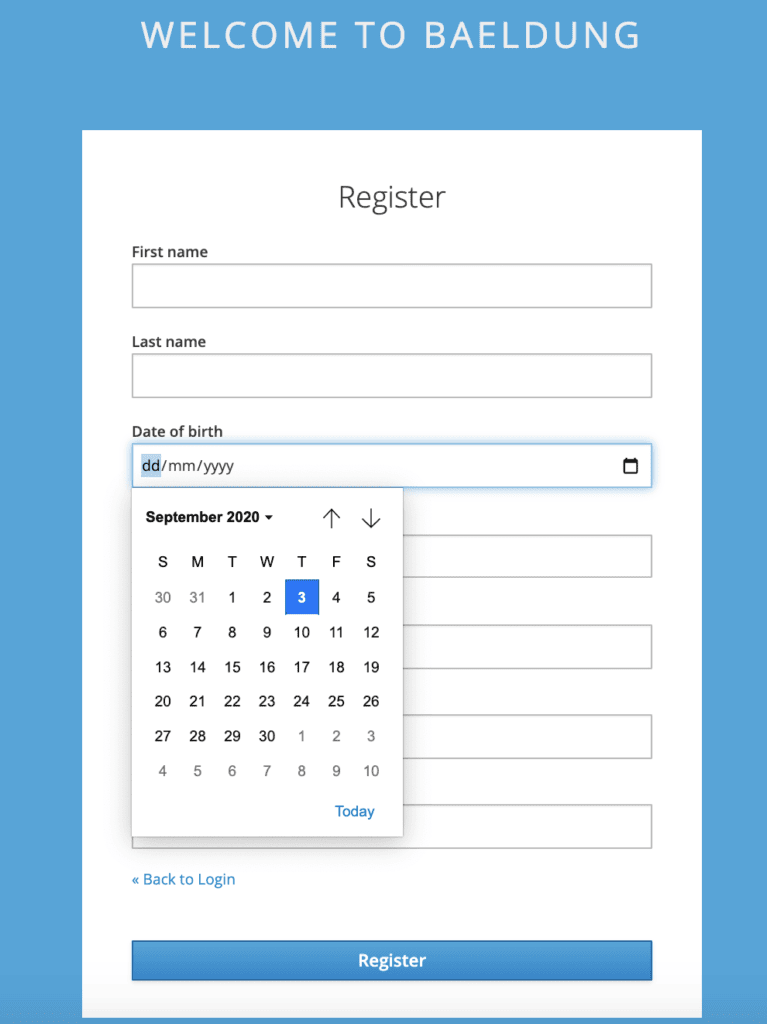
</div>
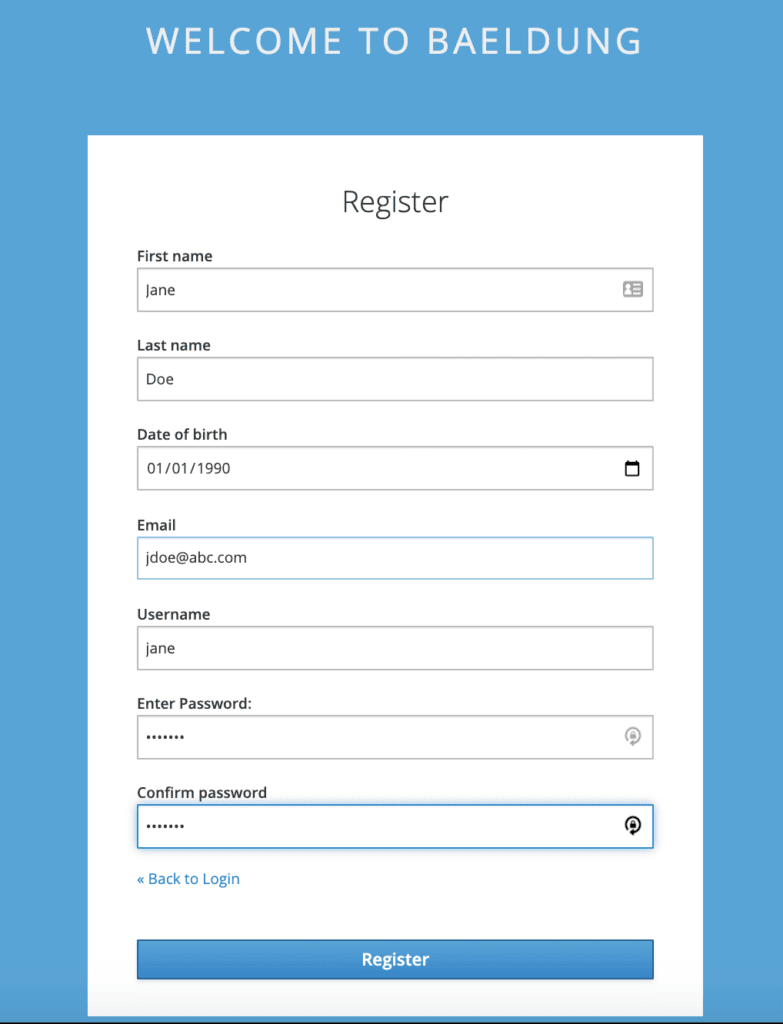
Now when we register a new user on this page, we can enter its Date of birth as well:
现在当我们在这个页面上注册一个新用户时,我们也可以输入其出生日期。
To verify, let’s open up the Users page on the admin console and lookup Jane:
为了验证,让我们打开管理控制台的Users页面,查找Jane。
Next, let’s go to Jane‘s Attributes and check out the DOB:
接下来,让我们进入Jane的Attributes,查看DOB。
As is evident, the same date of birth is displayed here as we entered on the self-registration form.
很明显,这里显示的出生日期与我们在自我登记表上填写的相同。
3. Embedded Server
3.嵌入式服务器
Now let’s see how we can add custom attributes for self-registration for a Keycloak server embedded in a Spring Boot application.
现在让我们看看如何为Spring Boot应用程序中的Keycloak服务器embedded添加自定义属性进行自我注册。
Same as the first step for the standalone server, we need to enable user registration in the beginning.
与独立服务器的第一步一样,我们需要在开始时启用用户注册。
We can do this by setting registrationAllowed to true in our realm definition file, baeldung-realm.json:
我们可以通过在境界定义文件baeldung-realm.json中设置registrationAllowed来实现。
"registrationAllowed" : true,After that, we need to add Date of birth to register.ftl, exactly the same way as done previously.
之后,我们需要在register.ftl中添加Date of birth,与之前做的方法完全相同。
Next, let’s copy this file to our src/main/resources/themes/custom/login directory.
接下来,让我们把这个文件复制到我们的src/main/resources/themes/custom/login目录。
Now on starting the server, our login page carries the register link. Here’s the self-registration page with our custom field Date of birth:
现在在启动服务器时,我们的登录页面带有注册链接。下面是带有我们的自定义字段出生日期的自我注册页面。
It’s important to bear in mind that the user added via the self-registration page for the embedded server is transient.
重要的是要记住,通过嵌入式服务器的自我注册页面添加的用户是暂时性的。
Since we did not add this user to the pre-configuration file, it won’t be available on a server restart. However, this comes in handy during the development phase, when we’re only checking design and functionality.
由于我们没有把这个用户添加到预配置文件中,所以在服务器重启时它将不可用。然而,在开发阶段,当我们只检查设计和功能时,这就很方便了。
To test, before restarting the server, we can verify that the user is added with DOB as a custom attribute from the admin console. We can also try to log in using the new user’s credentials.
为了测试,在重启服务器之前,我们可以从管理员控制台中验证该用户是否被添加了DOB作为自定义属性。我们也可以尝试使用新用户的凭证来登录。
4. Conclusion
4.总结
In this tutorial, we learned how to enable user self-registration in Keycloak. We also saw how to add custom attributes while registering as a new user.
在本教程中,我们学习了如何在Keycloak启用用户自我注册。我们还看到如何在注册为新用户时添加自定义属性。
We looked at examples on how to do this for both a standalone as well as an embedded instance.
我们看了如何为独立的和嵌入的实例做到这一点的例子。
As always, the source code is available over on GitHub. For the standalone server, it’s on the tutorials GitHub, and for the embedded instance, on the OAuth GitHub.
一如既往,源代码可在GitHub上获得。对于独立服务器,它位于教程GitHub上,而对于嵌入式实例,它位于OAuth GitHub上。
