1. Overview
1.概述
In this tutorial, we’re going to look at how to add a license header to our IntelliJ IDEA project files. The license header typically describes a project file’s permitted usage and ownership.
在本教程中,我们将看看如何在我们的IntelliJ IDEA项目文件中添加一个许可头。许可证头通常描述一个项目文件的允许用途和所有权。
We assume that you have a basic knowledge of IntelliJ, therefore, we’ll dive straight to the point.
我们假设你有IntelliJ的基本知识,因此,我们将直接进入主题。
2. Configuring the License Header
2.配置许可证标头
Let’s open any of our existing projects to configure the license header. We first need to access the Preference window by click on the IntelliJ IDEA menu item or pressing the Command + Comma keys.
让我们打开我们现有的任何一个项目来配置许可证头。我们首先需要访问Preference窗口,点击IntelliJ IDEA的菜单项或按Command + Comma键。
The new pop-up window will display a list of menus on the left, from which we can click on Editor > Copyright > Copyright Profiles. For quicker access, we can just type Copyright in the Preference window’s search bar.
新的弹出窗口将在左边显示一个菜单列表,我们可以点击Editor > Copyright > Copyright Profiles。为了更快进入,我们可以在偏好窗口的搜索栏中输入Copyright。
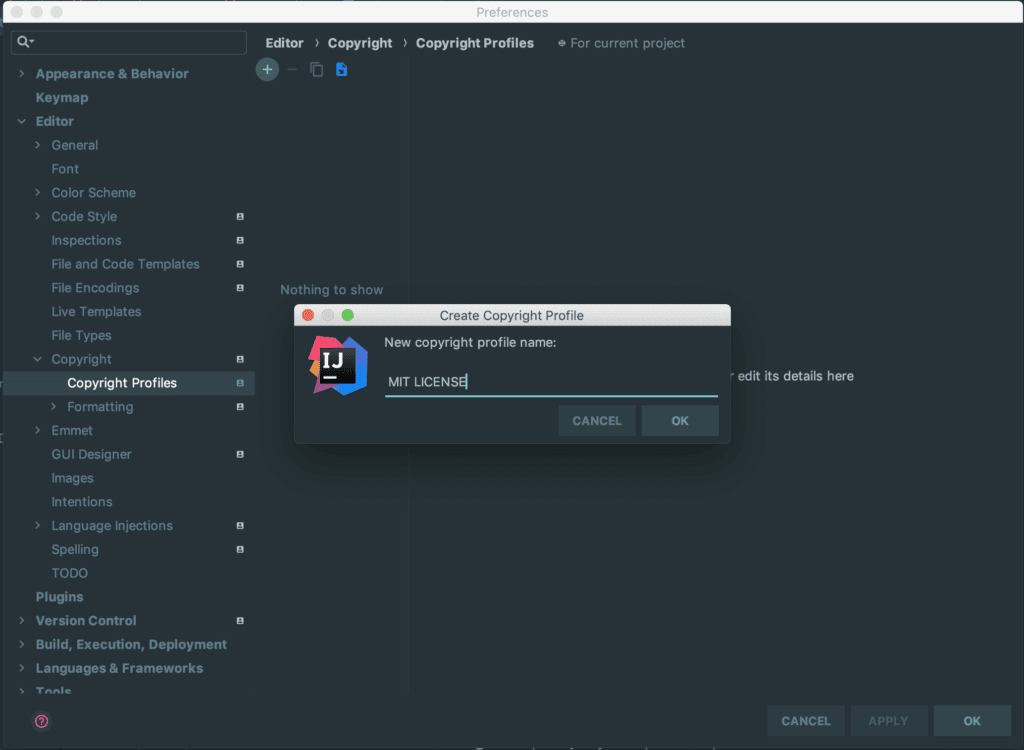
On the right pane of the window, let’s click the “+” button at the top to create a new Copyright Profile.
在窗口的右侧窗格,让我们点击顶部的 “+”按钮,创建一个新的版权档案。
We start by giving it a name — MIT License, for example — and then click “OK”:
我们首先给它一个名字–MIT许可证,例如–,然后点击 “确定”。
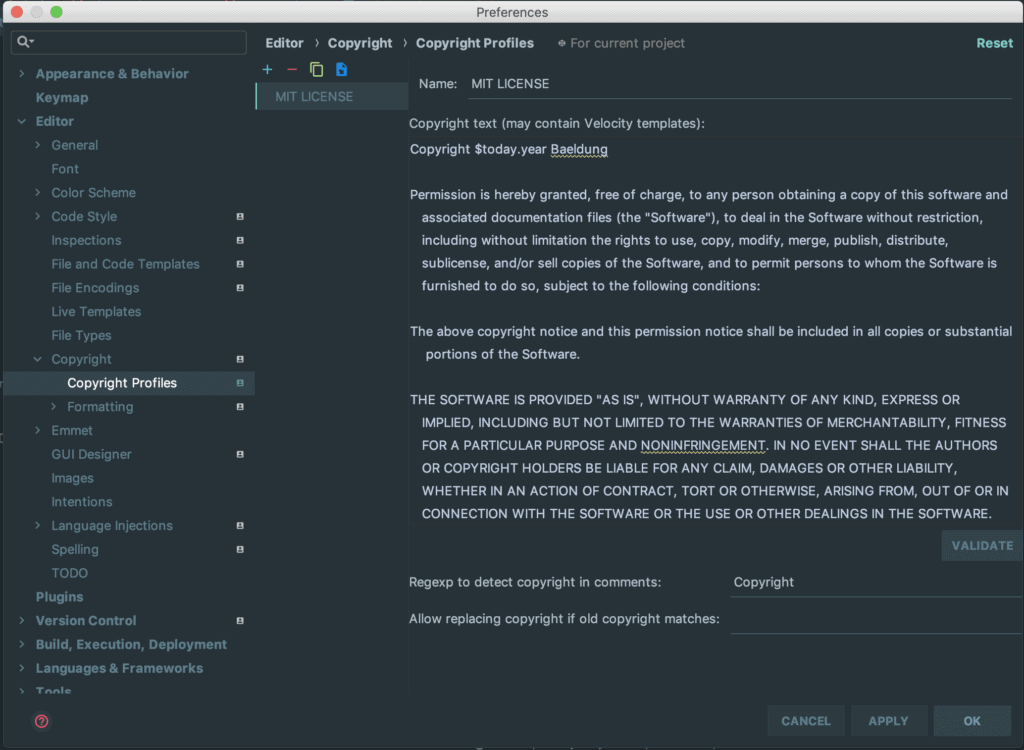
After this, we’ll add the license text to the text area.
在这之后,我们将把许可证文本添加到文本区。
We used a sample text that eventually should be replaced with our own:
我们使用了一个样本文本,最终应该用我们自己的文本来代替。
We replaced the <YEAR> with a placeholder – $today.year. It’ll be translated automatically by IntelliJ to the current year every time we use the profile.
我们用一个占位符替换了<YEAR> – $today.year.每次使用配置文件时,IntelliJ都会自动将其翻译为当前年份。
IntelliJ defines additional variables that we can use in our copyright profile. For details please review the help page.
IntelliJ定义了额外的变量,我们可以在我们的版权配置文件中使用这些变量。详情请查看帮助页面。
Finally, let’s click the “VALIDATE” button, just right below the license text, to validate our text and make sure everything is in order, and then click “APPLY” to save the profile.
最后,让我们点击 “VALIDATE “按钮,就在许可证文本下方,以验证我们的文本,并确保一切正常,然后点击 “APPLY “以保存配置文件。
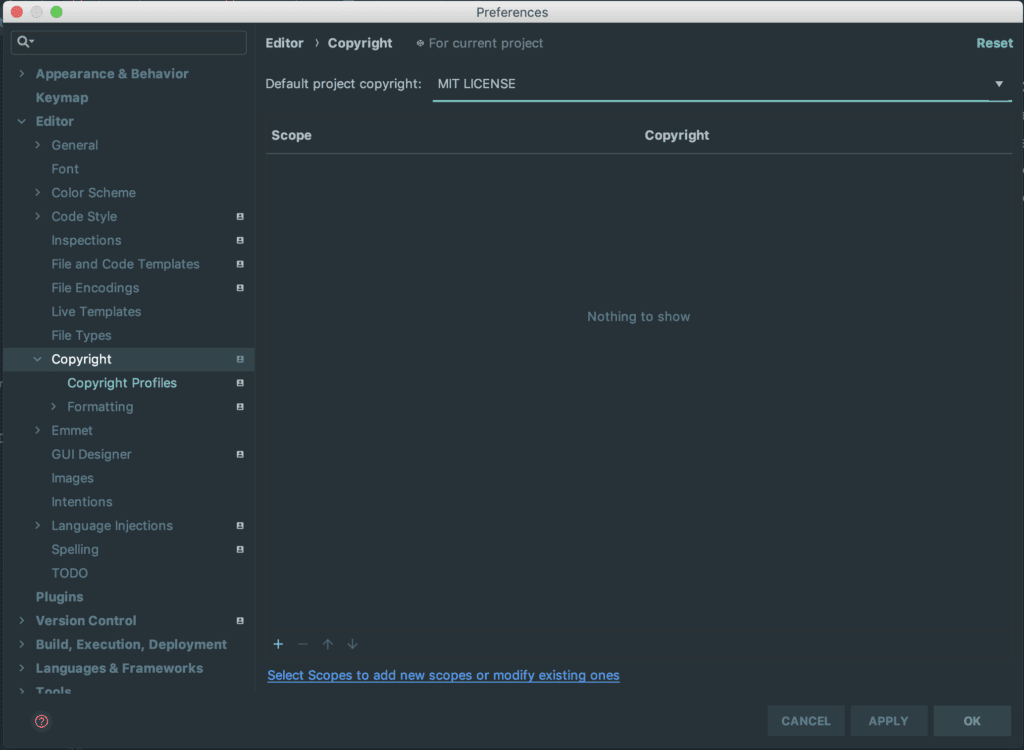
The next thing is to set the profile as a default one. We can achieve that by clicking on Editor > Copyright and selecting the MIT License as the default project copyright:
下一件事是将配置文件设置为默认的。我们可以通过点击Editor > Copyright并选择MIT License作为项目默认版权来实现。
3. Using the Created Copyright Profile in Project Files
3.在项目文件中使用创建的版权配置文件
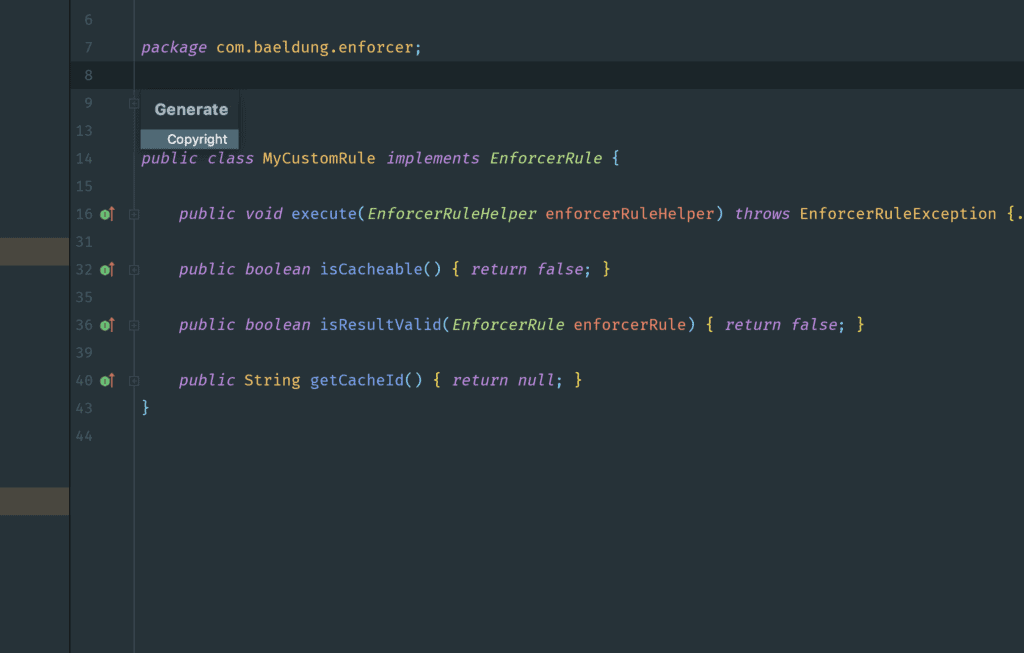
Now, it’s time to use the copyright profile in our project files. We can achieve this by pressing the Control + Return keys and selecting the copyright menu:
现在,是时候在我们的项目文件中使用版权配置文件了。我们可以通过按Control + Return键并选择版权菜单来实现这一目标。
This will apply the Copyright text we previously set as a default to the topmost part of our project file.
这将把我们之前设定的版权文本作为默认值应用到我们项目文件的最上方。
If perhaps we’re not satisfied with the format of the resulting text, we can go to Preferences > Editor > Copyright > Copyright Profiles to edit it and click “APPLY”. After that, we’ll have to clear the existing text and press Control + Return keys to apply the updated text.
如果我们对产生的文本格式不满意,我们可以到Preferences > Editor > Copyright > Copyright Profiles进行编辑,然后点击 “APPLY”。之后,我们要清除现有的文本,并按Control + Return键来应用更新的文本。
Subsequently, any new project file we create will automatically have the license header, eliminating the need to add it manually.
随后,我们创建的任何新项目文件都会自动有许可头,而不需要手动添加。
4. Conclusion
4.结论
In this quick article, we learned how to configure IntelliJ IDEA to add license headers automatically to all of our project files – which can come quite handy on larger codebases.
在这篇快速文章中,我们学习了如何配置IntelliJ IDEA,使其自动向我们所有的项目文件添加许可头文件–这在较大的代码库中是相当方便的。


