1. Introduction
1.绪论
In this tutorial, we’ll discuss decompiling Java classes. When source code is not available, decompiling Java classes helps to debug and understand source code behavior.
在本教程中,我们将讨论对Java类进行反编译。当源代码不可用时,反编译Java类有助于调试和理解源代码的行为。
Let’s take a look at the different options available.
让我们来看看有哪些不同的选择。
2. Decompiling in IDE
2.在IDE中反编译
Since most development is done in an integrated development environment (IDE), it makes sense that decompilation should also take place in an IDE.
由于大多数开发是在集成开发环境(IDE)中完成的,因此反编译也应该在IDE中进行,这是合理的。
For more info on the IDEs we will work with, check out our articles on how to debug in Eclipse and configuration for IntelliJ IDEA.
有关我们将使用的IDE的更多信息,请查看我们的文章:如何在Eclipse中进行调试和IntelliJ IDEA的配置。
2.1. Eclipse
日蚀
Firstly, in Eclipse we need a plugin such as the Enhanced Class Decompiler (ECD). This plugin uses five different decompilers. We can install it from the Eclipse Marketplace and then we need to restart Eclipse.
首先,在Eclipse中,我们需要一个插件,如Enhanced Class Decompiler(ECD)。这个插件使用五个不同的反编译器。 我们可以从Eclipse Marketplace中安装它,然后我们需要重新启动Eclipse。
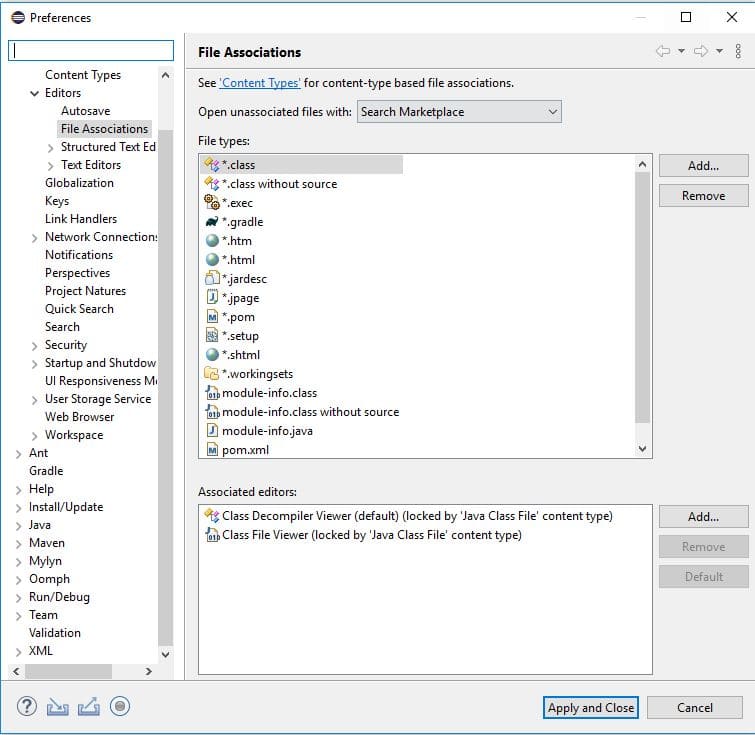
Next, ECD requires a small amount of setup to associate class files with the Class Decompiler Viewer:
接下来,ECD需要进行少量的设置,以便将类文件与类反编译器浏览器联系起来。
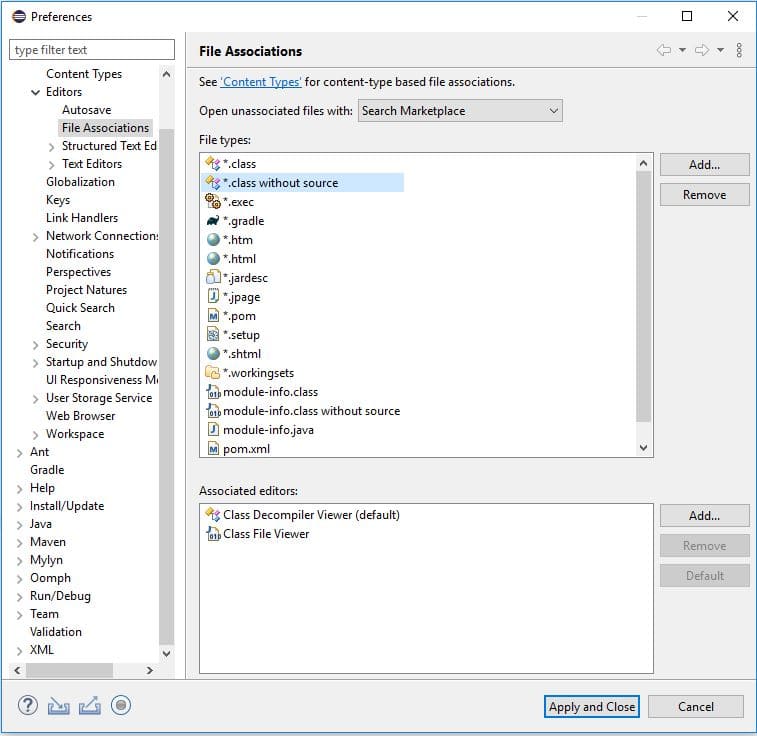
Also, we need to associate “.class without source” files:
另外,我们需要关联”.class无源 “文件。
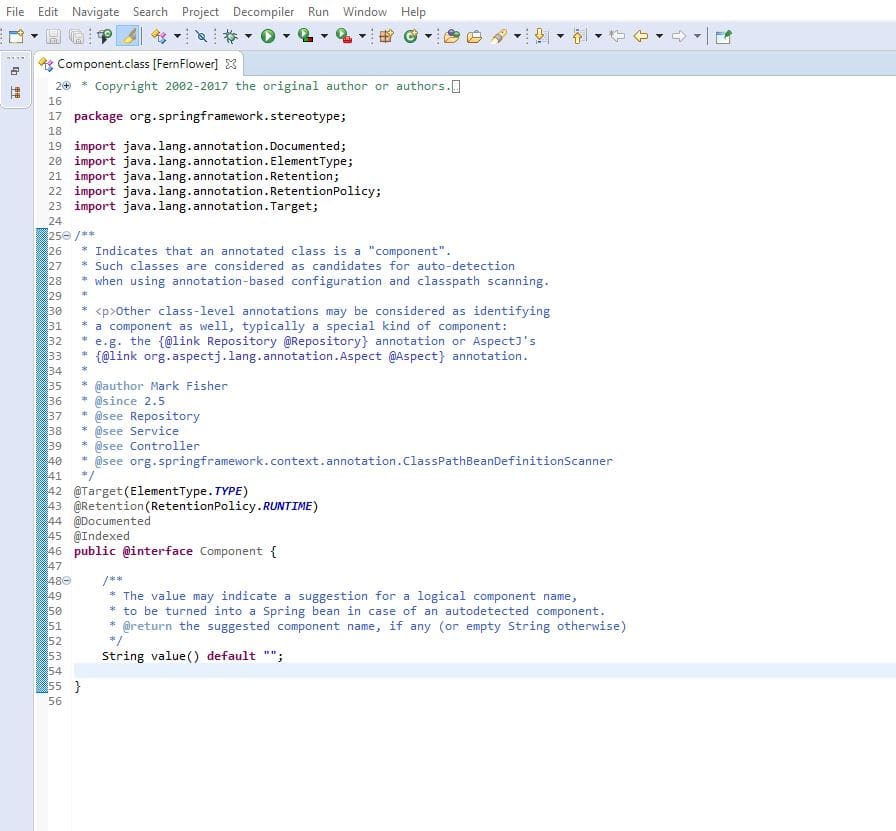
Finally, we can use the decompiler by pressing Ctrl+Left-Click on a class name. We see the decompiler used on the file tab in brackets.
最后,我们可以通过按Ctrl+Left-Click在class名称上使用反编译器。我们在文件标签上看到括号中使用的反编译器。
In this example, we’re using FernFlower:
在这个例子中,我们使用FernFlower。
2.2. IntelliJ IDEA
2.2 IntelliJ IDEA
In contrast to Eclipse, IntelliJ IDEA provides the FernFlower decompiler as a default.
与Eclipse相比,IntelliJ IDEA提供FernFlower反编译器作为默认的。
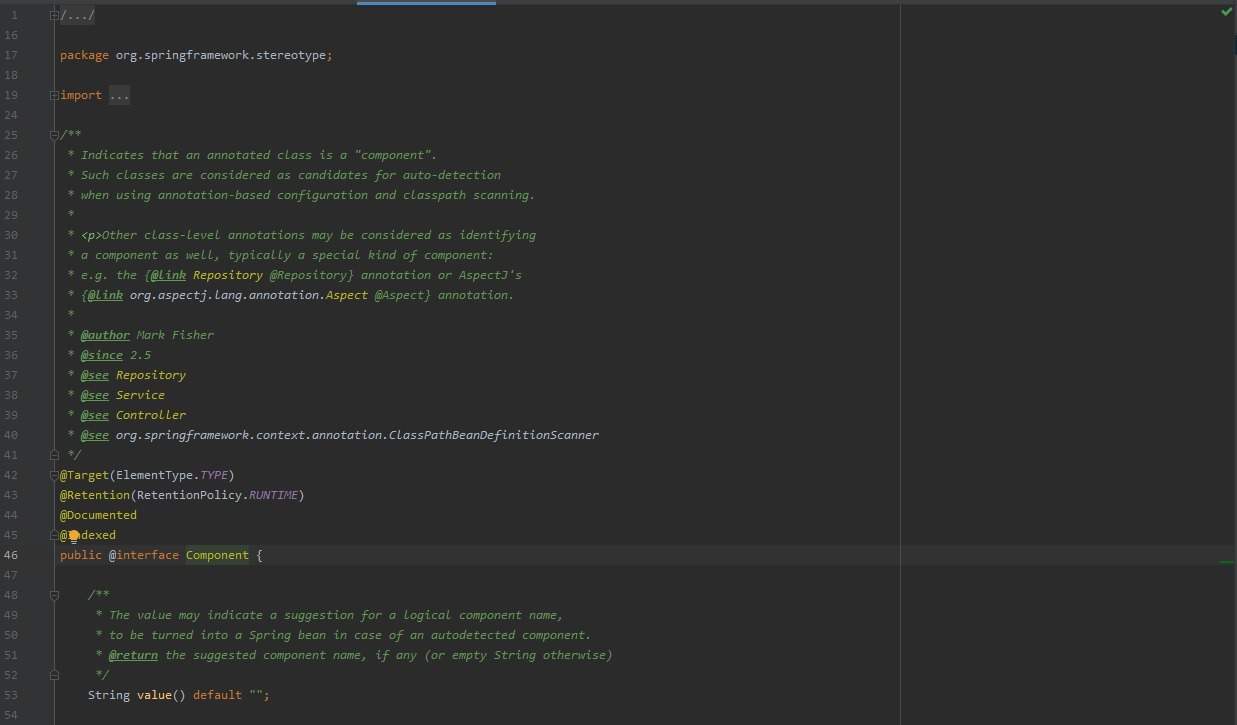
To use it, we simply Ctrl+Left-Click on a class name and view the code:
要使用它,我们只需Ctrl+Left-Click在一个类的名称上并查看代码。
Also, we can download the source. Downloading the source will provide the actual code and comments.
此外,我们还可以下载源代码。下载源代码将提供实际的代码和注释。
For instance, the Component annotation class from the above screenshot includes Javadoc on the use of Component. We can notice the difference:
例如,上面截图中的Component注解类包括了关于使用Component的Javadoc。我们可以注意到其中的差别。
While decompilation is very helpful, it doesn’t always give a complete picture. The full source code gives us a complete picture.
虽然反编译很有帮助,但它并不总是能提供一个完整的画面。完整的源代码会给我们一个完整的画面。
3. Command Line Decompiling
3.命令行反编译
Before IDE plugins, the command-line was used for decompiling classes. Command-line decompilers can also be useful for debugging Java bytecode on a remote server that is not accessible with an IDE or GUI.
在IDE插件之前,命令行被用来对类进行反编译。命令行反编译器对于调试远程服务器上不能用IDE或GUI访问的Java字节码也很有用。
For example, we can decompile with JDCommandLine using a simple jar command:
例如,我们可以用JDCmandLine进行反编译,使用一个简单的jar命令。
java -jar JDCommandLine.jar ${TARGET_JAR_NAME}.jar ./classesDon’t leave off the ./classes parameter. It defines the output directory.
不要漏掉./classes参数。它定义了输出目录。
After successful decompilation, we can access the source files contained in the output directory. They’re now ready to view through a text editor like Vim.
反编译成功后,我们可以访问输出目录中的源文件。现在可以通过像Vim这样的文本编辑器查看它们。
4. Conclusion
4.总结
We looked at decompilation in Eclipse and IntelliJ IDEA IDEs as well as a command-line option when they aren’t available.
我们研究了Eclipse和IntelliJ IDEA IDEs中的反编译,以及当它们不可用时的命令行选项。
We also looked at the difference between linking source code and decompilation.
我们还研究了链接源代码和反编译之间的区别。


